Latest version: SIBS Plugin v2.16.1 (14/11/2025)
Compatible with:
- PHP: 7.4 – 8.2.28
- WordPress: 5.9 – 6.8.X
- WooCommerce: 7.4.1 – 10.3.X
This page provides a comprehensive guide on how to install, configure, and use SIBS Payments plugin for WooCommerce. The plugin seamlessly integrates with your WooCommerce store, allowing you to securely process payments using your customers’ preferred payment methods.
Benefits
This type of integration offers several key benefits for businesses looking to streamline their payment processing and improve the overall customer experience:
Before you start
Before installing the plugin, ensure that you have received the following credentials via email during onboarding:
- Terminal Code
- Bearer Token
- Client ID.
You will also need SIBS Webhook Secret. Check how to obtain it in Step 2: Introduce your credentials, point 3.
Installation guide
Step 1: Install the plugin
Step 2: Introduce your credentials
Step 3: Customize your payment methods
Step 1: Install the plugin
- Download the latest version of the SIBS plugin at the top of this page.
- Log into your WordPress administration area (typically at https://yourwebsite/wp-admin/).
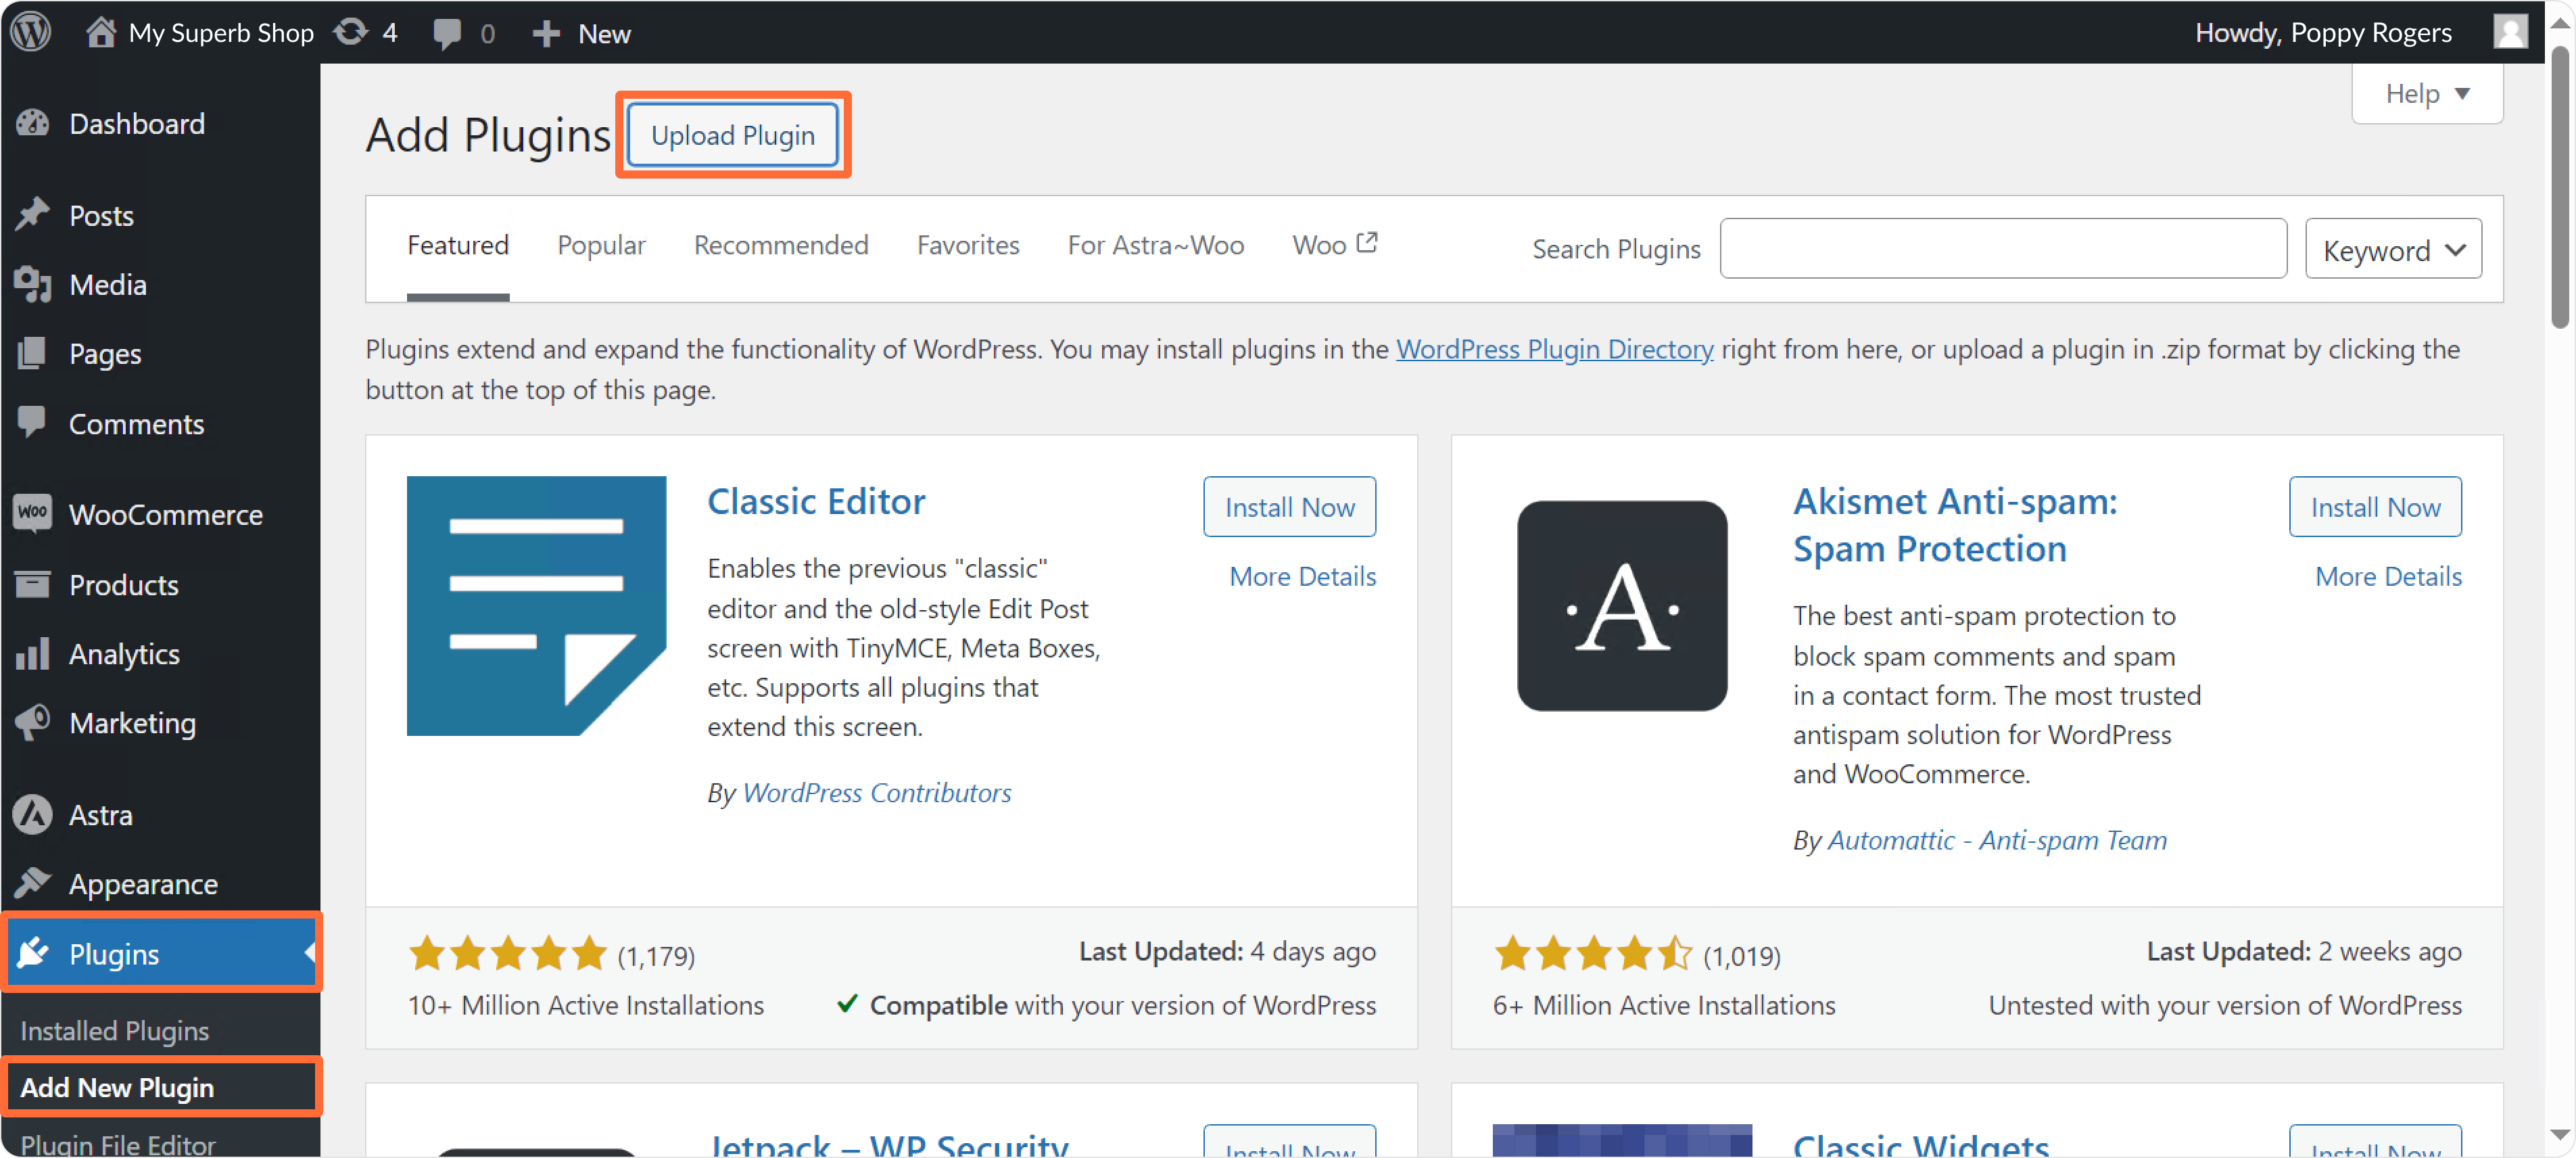
- In the left-side menu, go to Plugins > Add New Plugin. Click Upload Plugin:
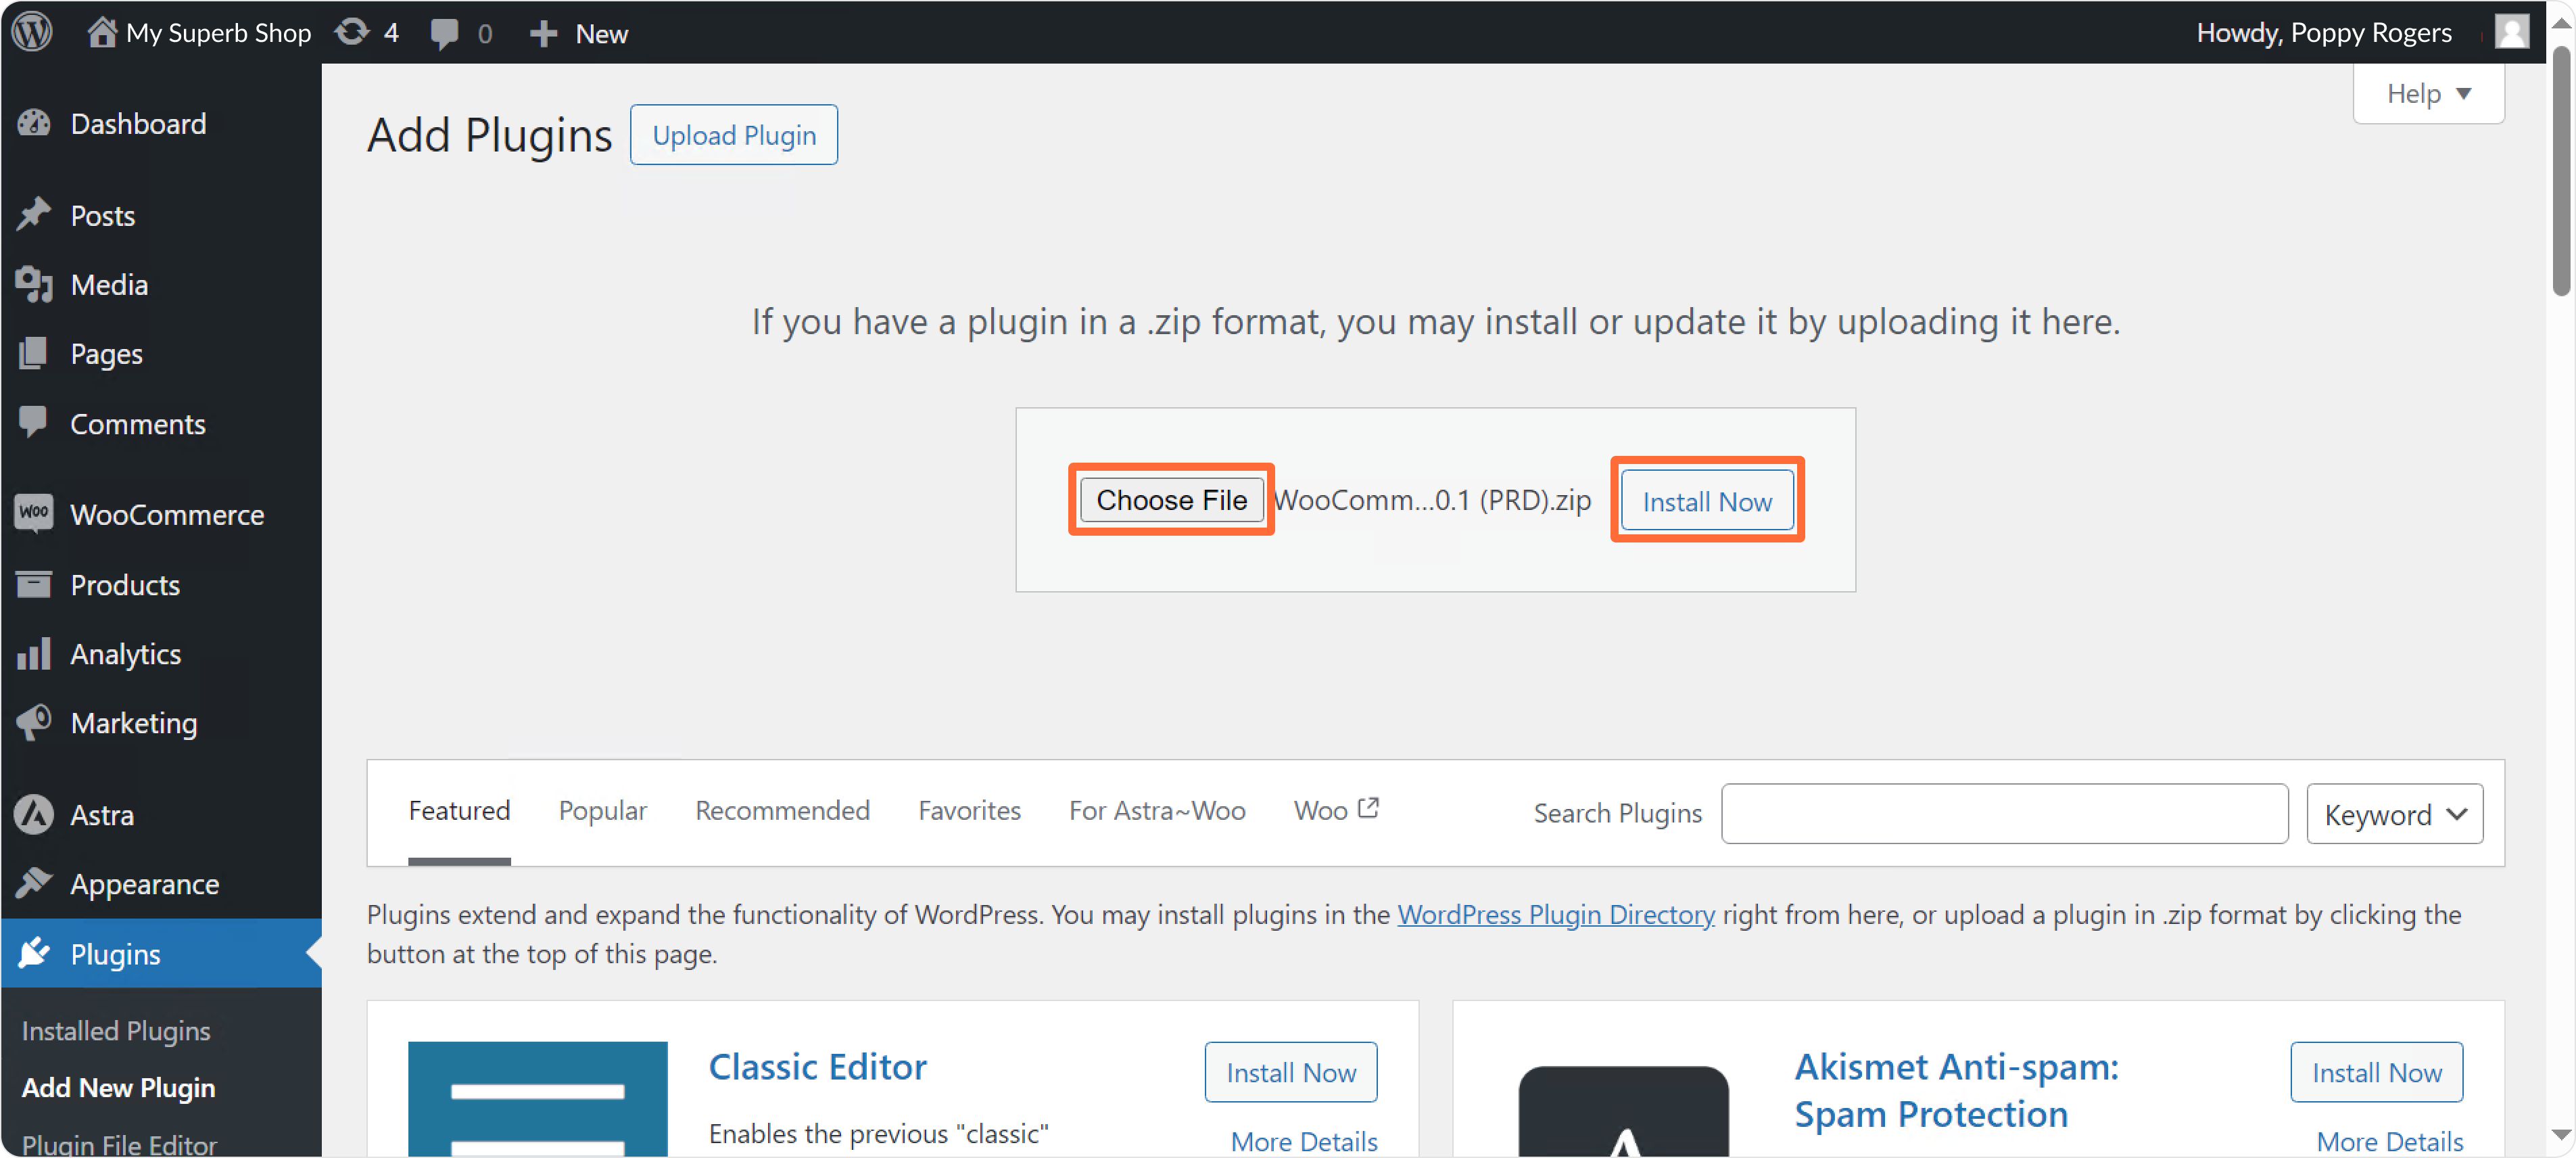
- Click Choose File and select the SIBS plugin you have downloaded. Then click Install Now:
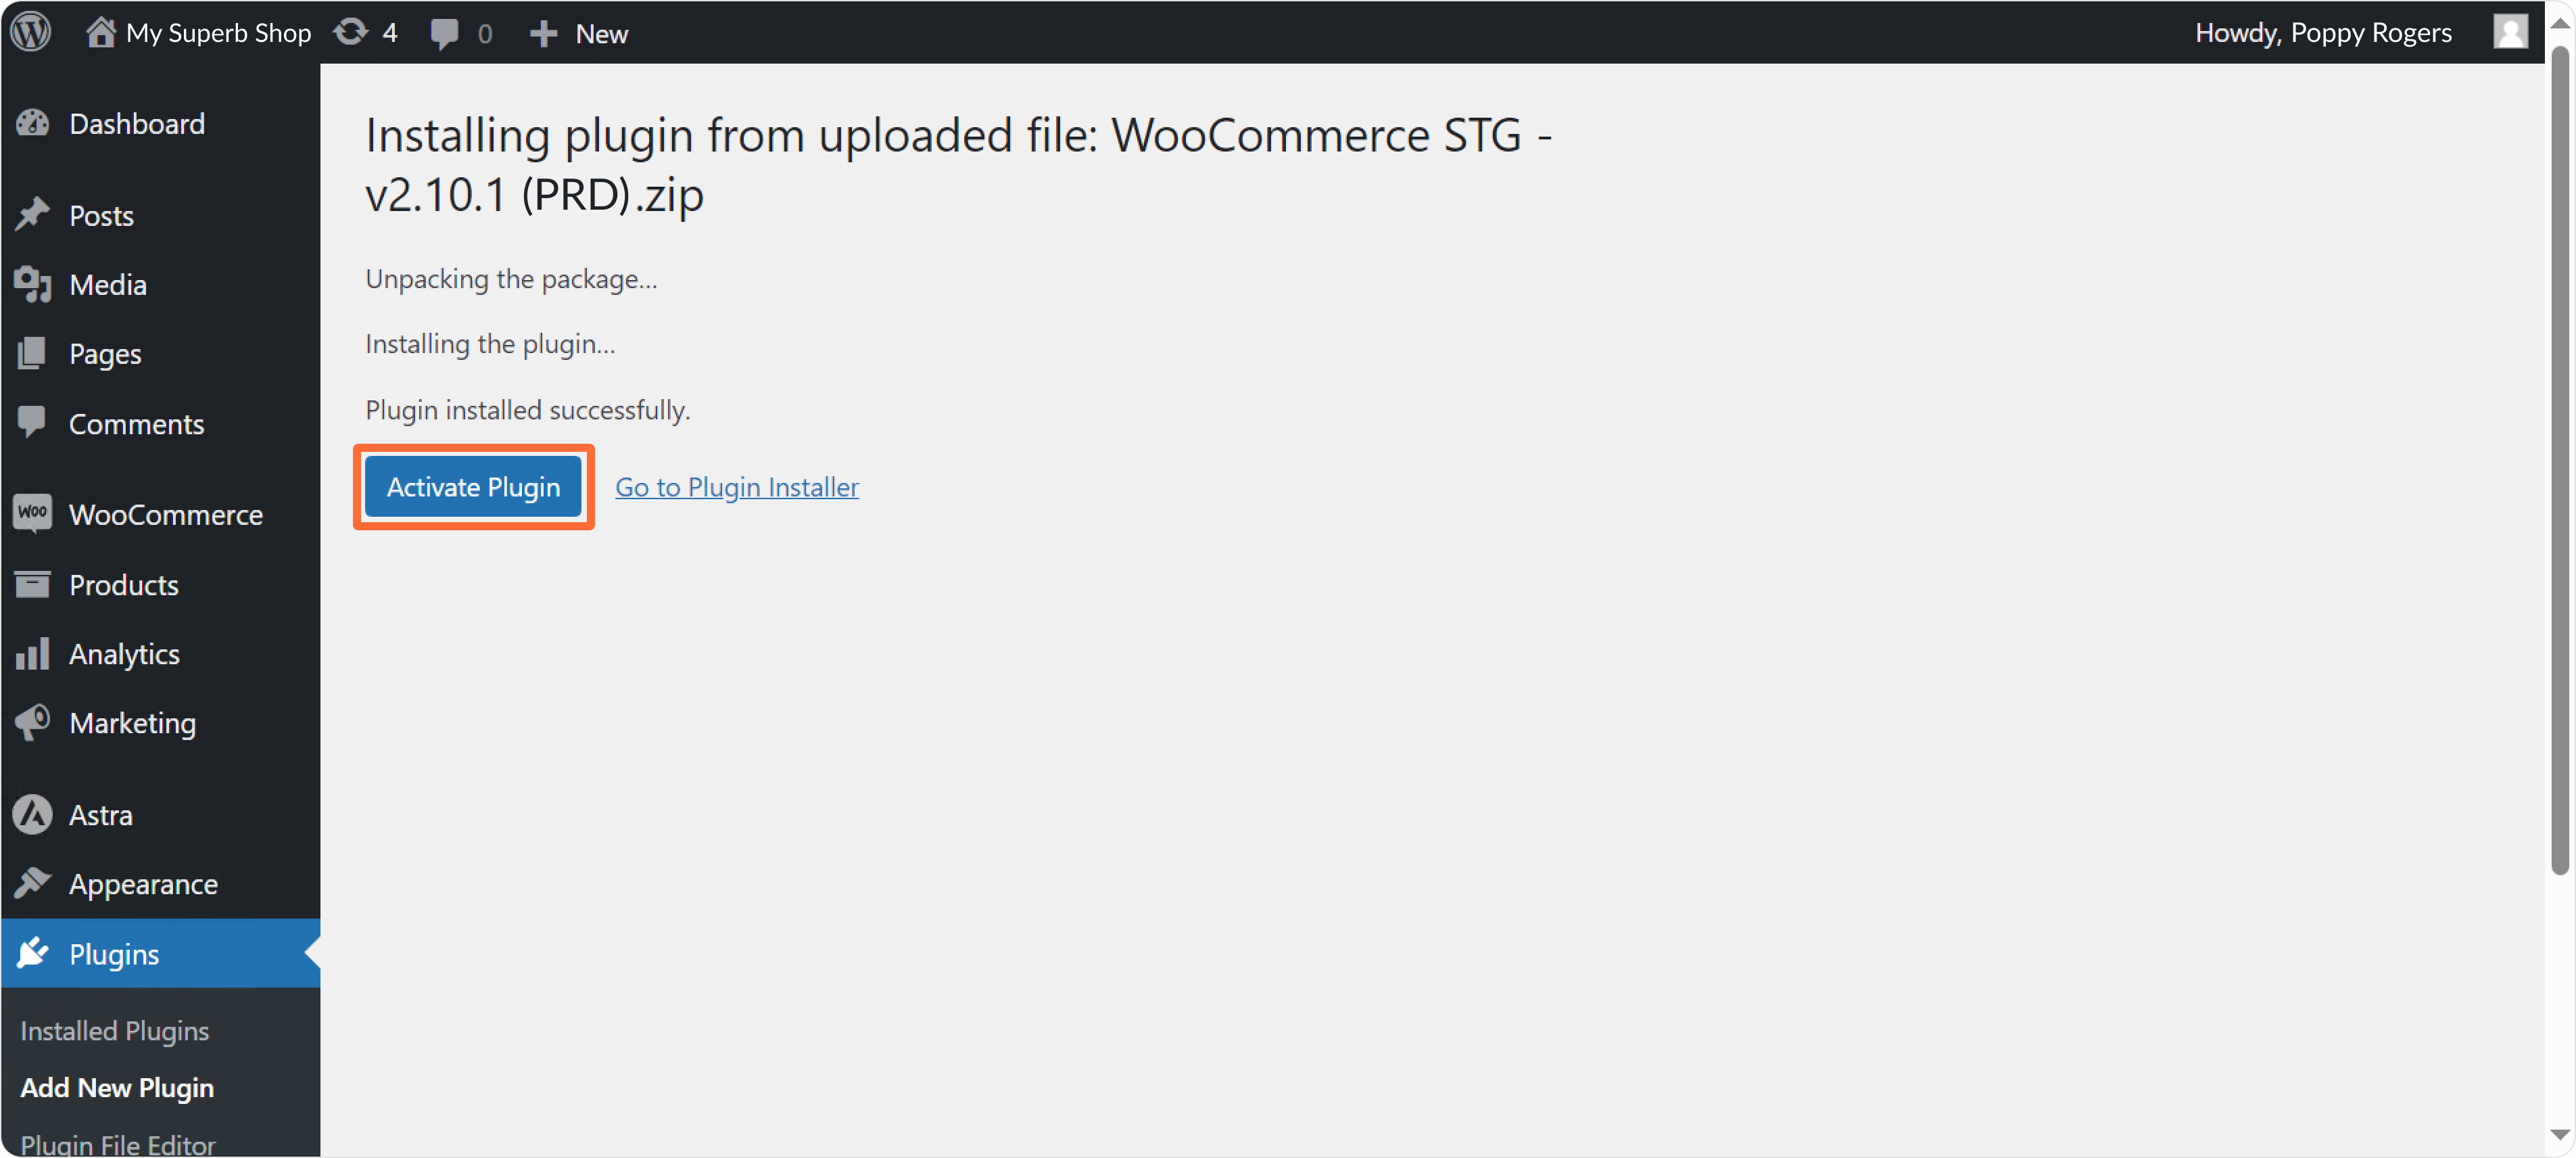
- Activate the plugin right after installation, by clicking Activate Plugin button:
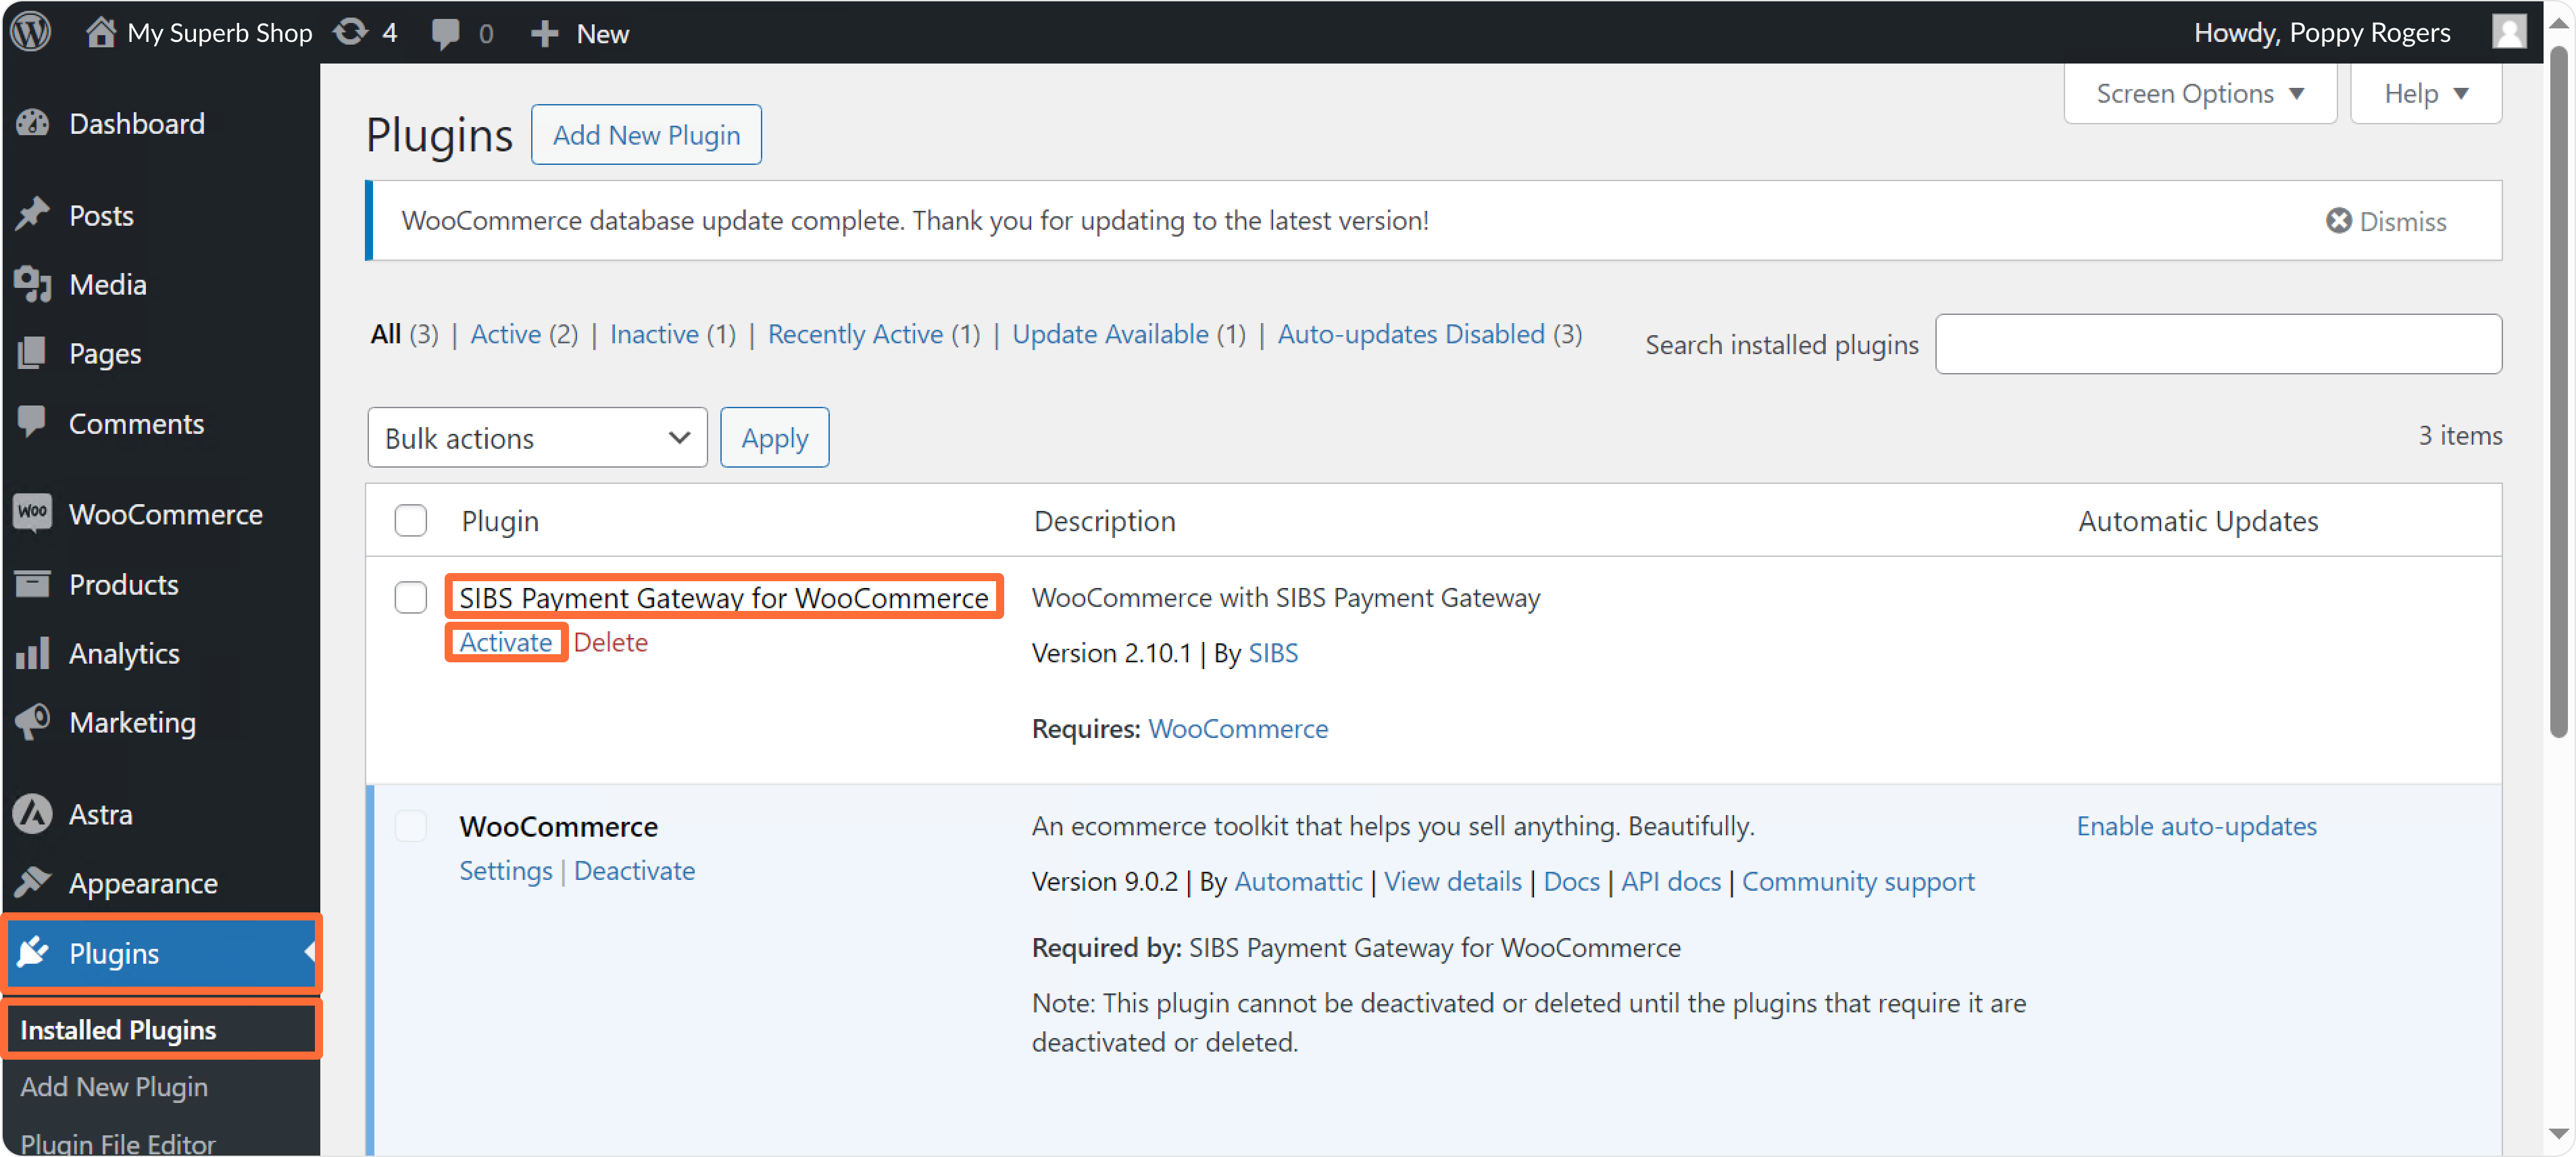
or go to Plugins > Installed Plugins in the left-side menu, find the plugin SIBS Payment Gateway for WooCommerce and click Activate:
Step 2: Introduce your credentials
- Go to Plugins > Installed Plugins in the left-side menu. Find the plugin SIBS Payment Gateway for WooCommerce and click General Settings:
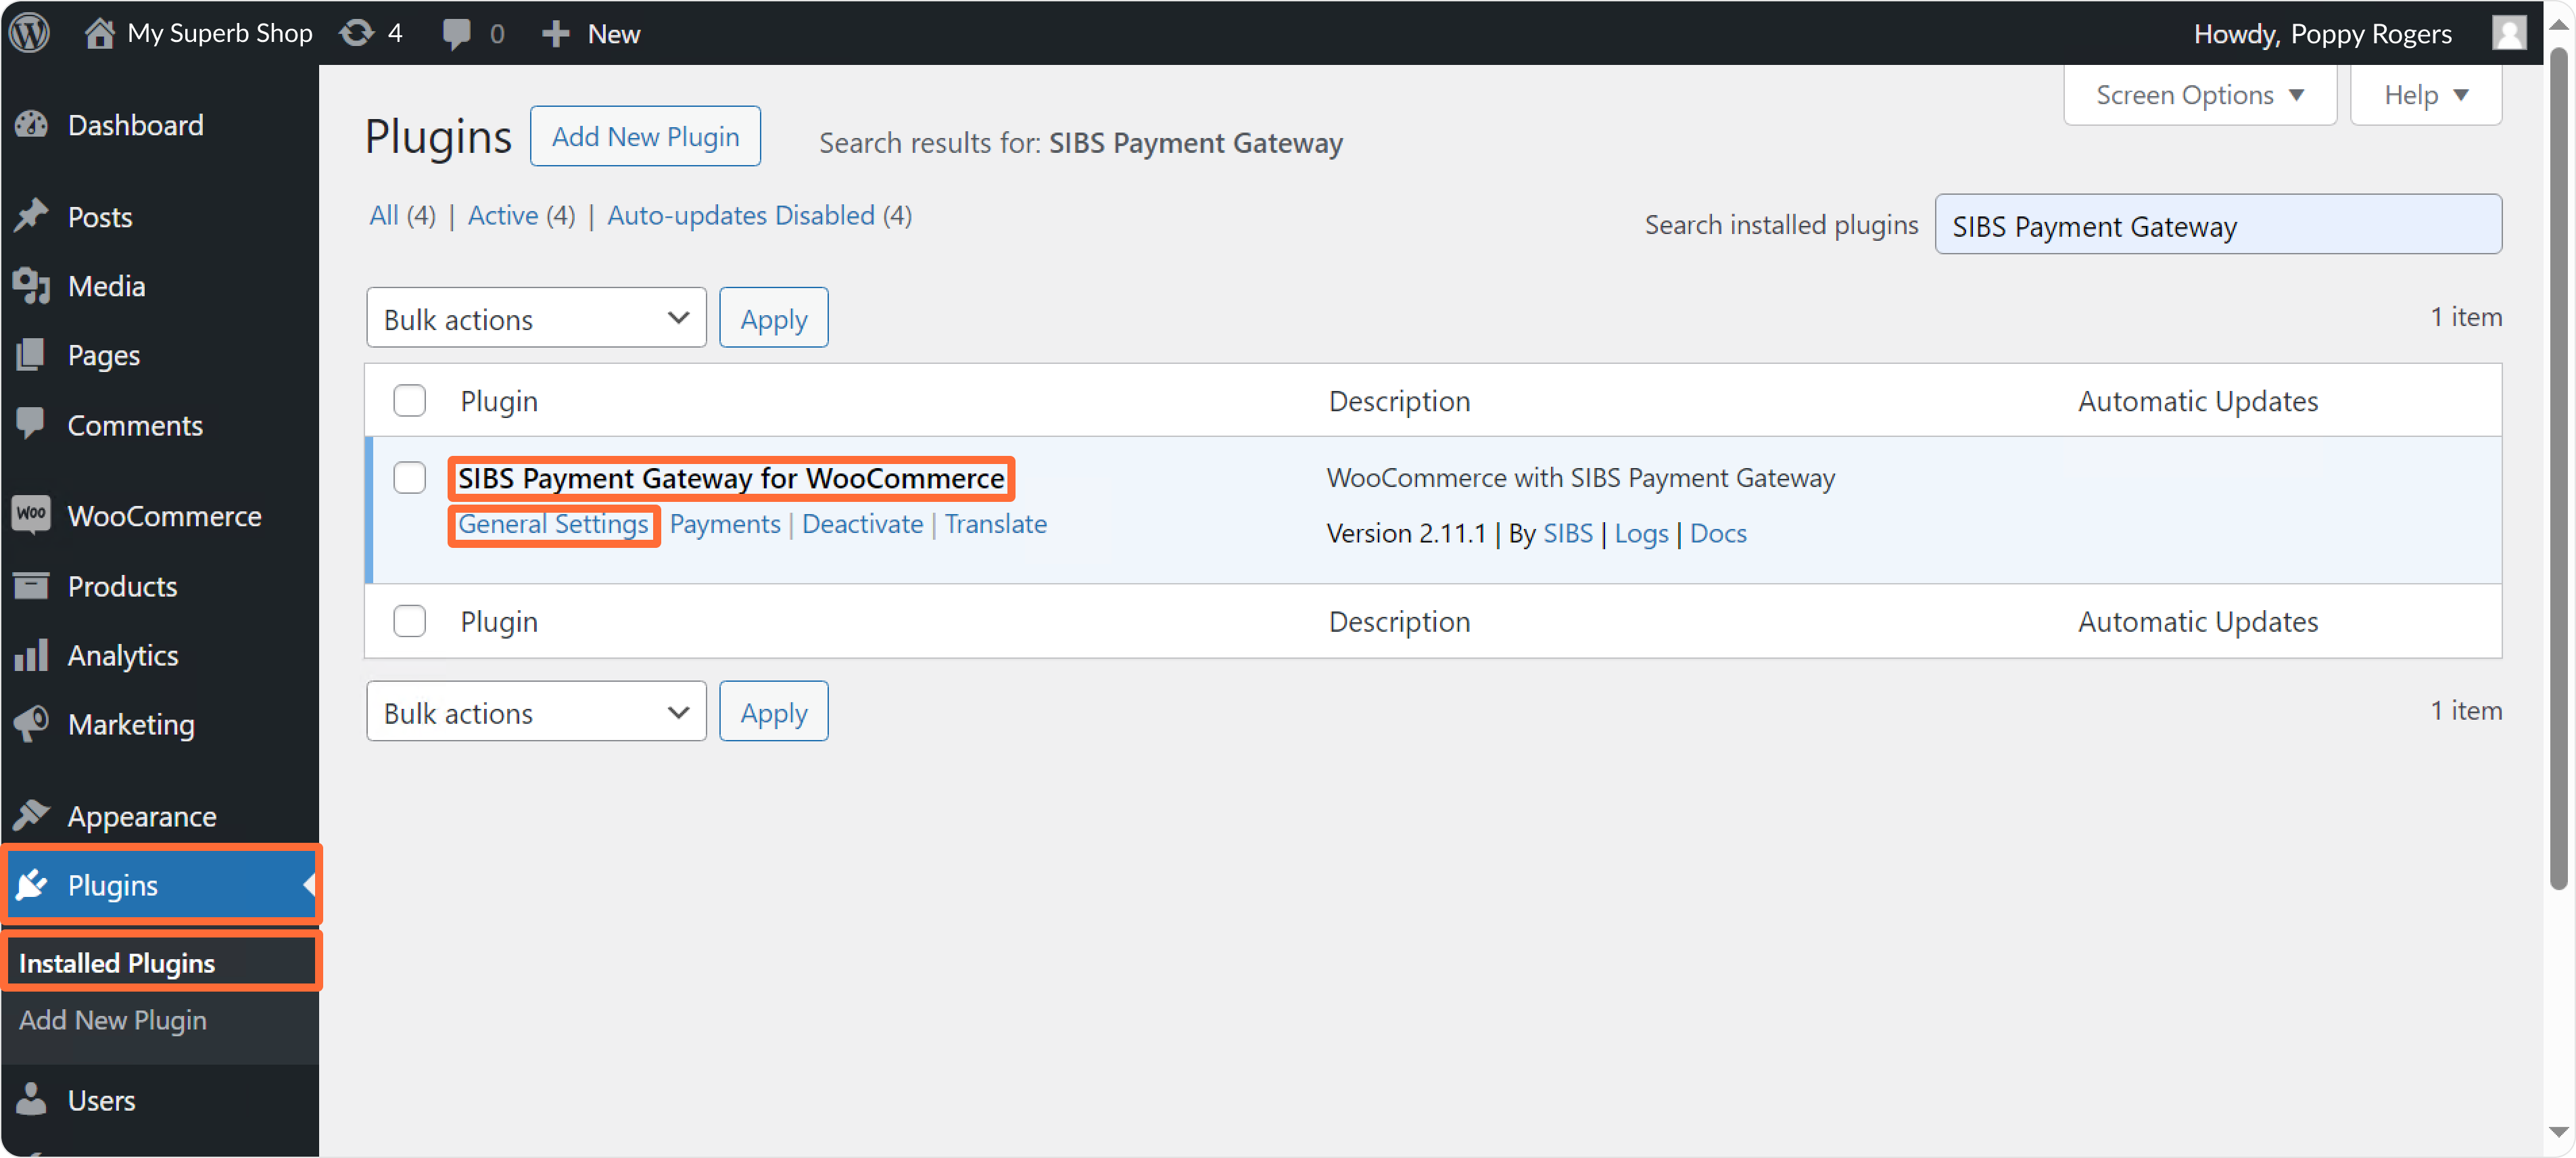
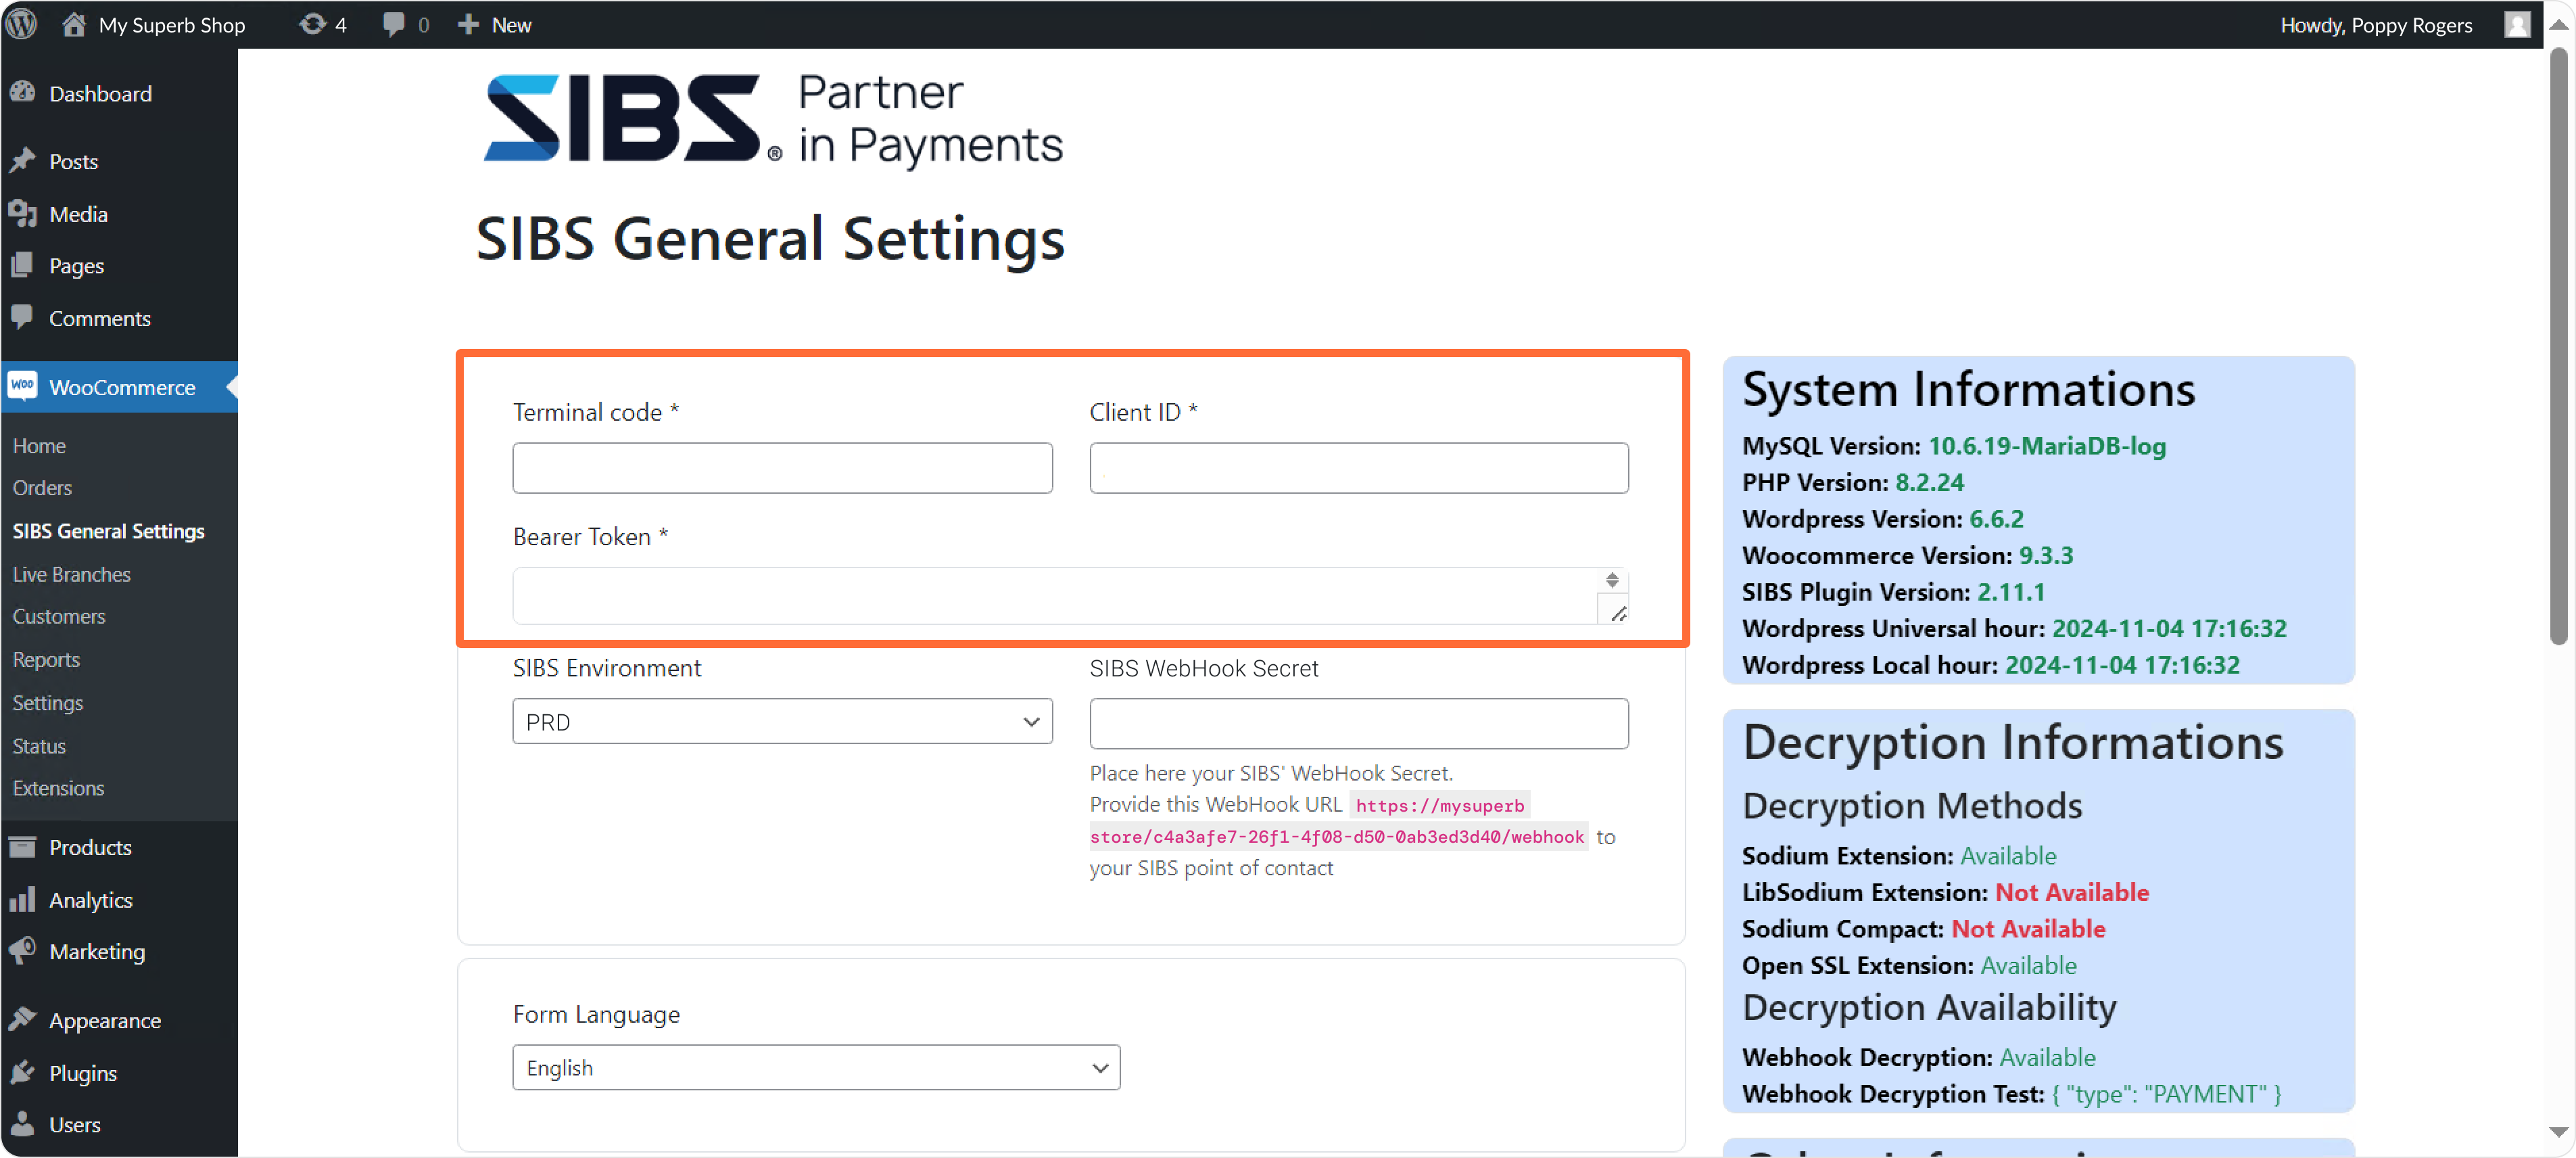
- Fill in the fields Terminal Code, Client ID, and Bearer Token with the credentials you received via email during onboarding:
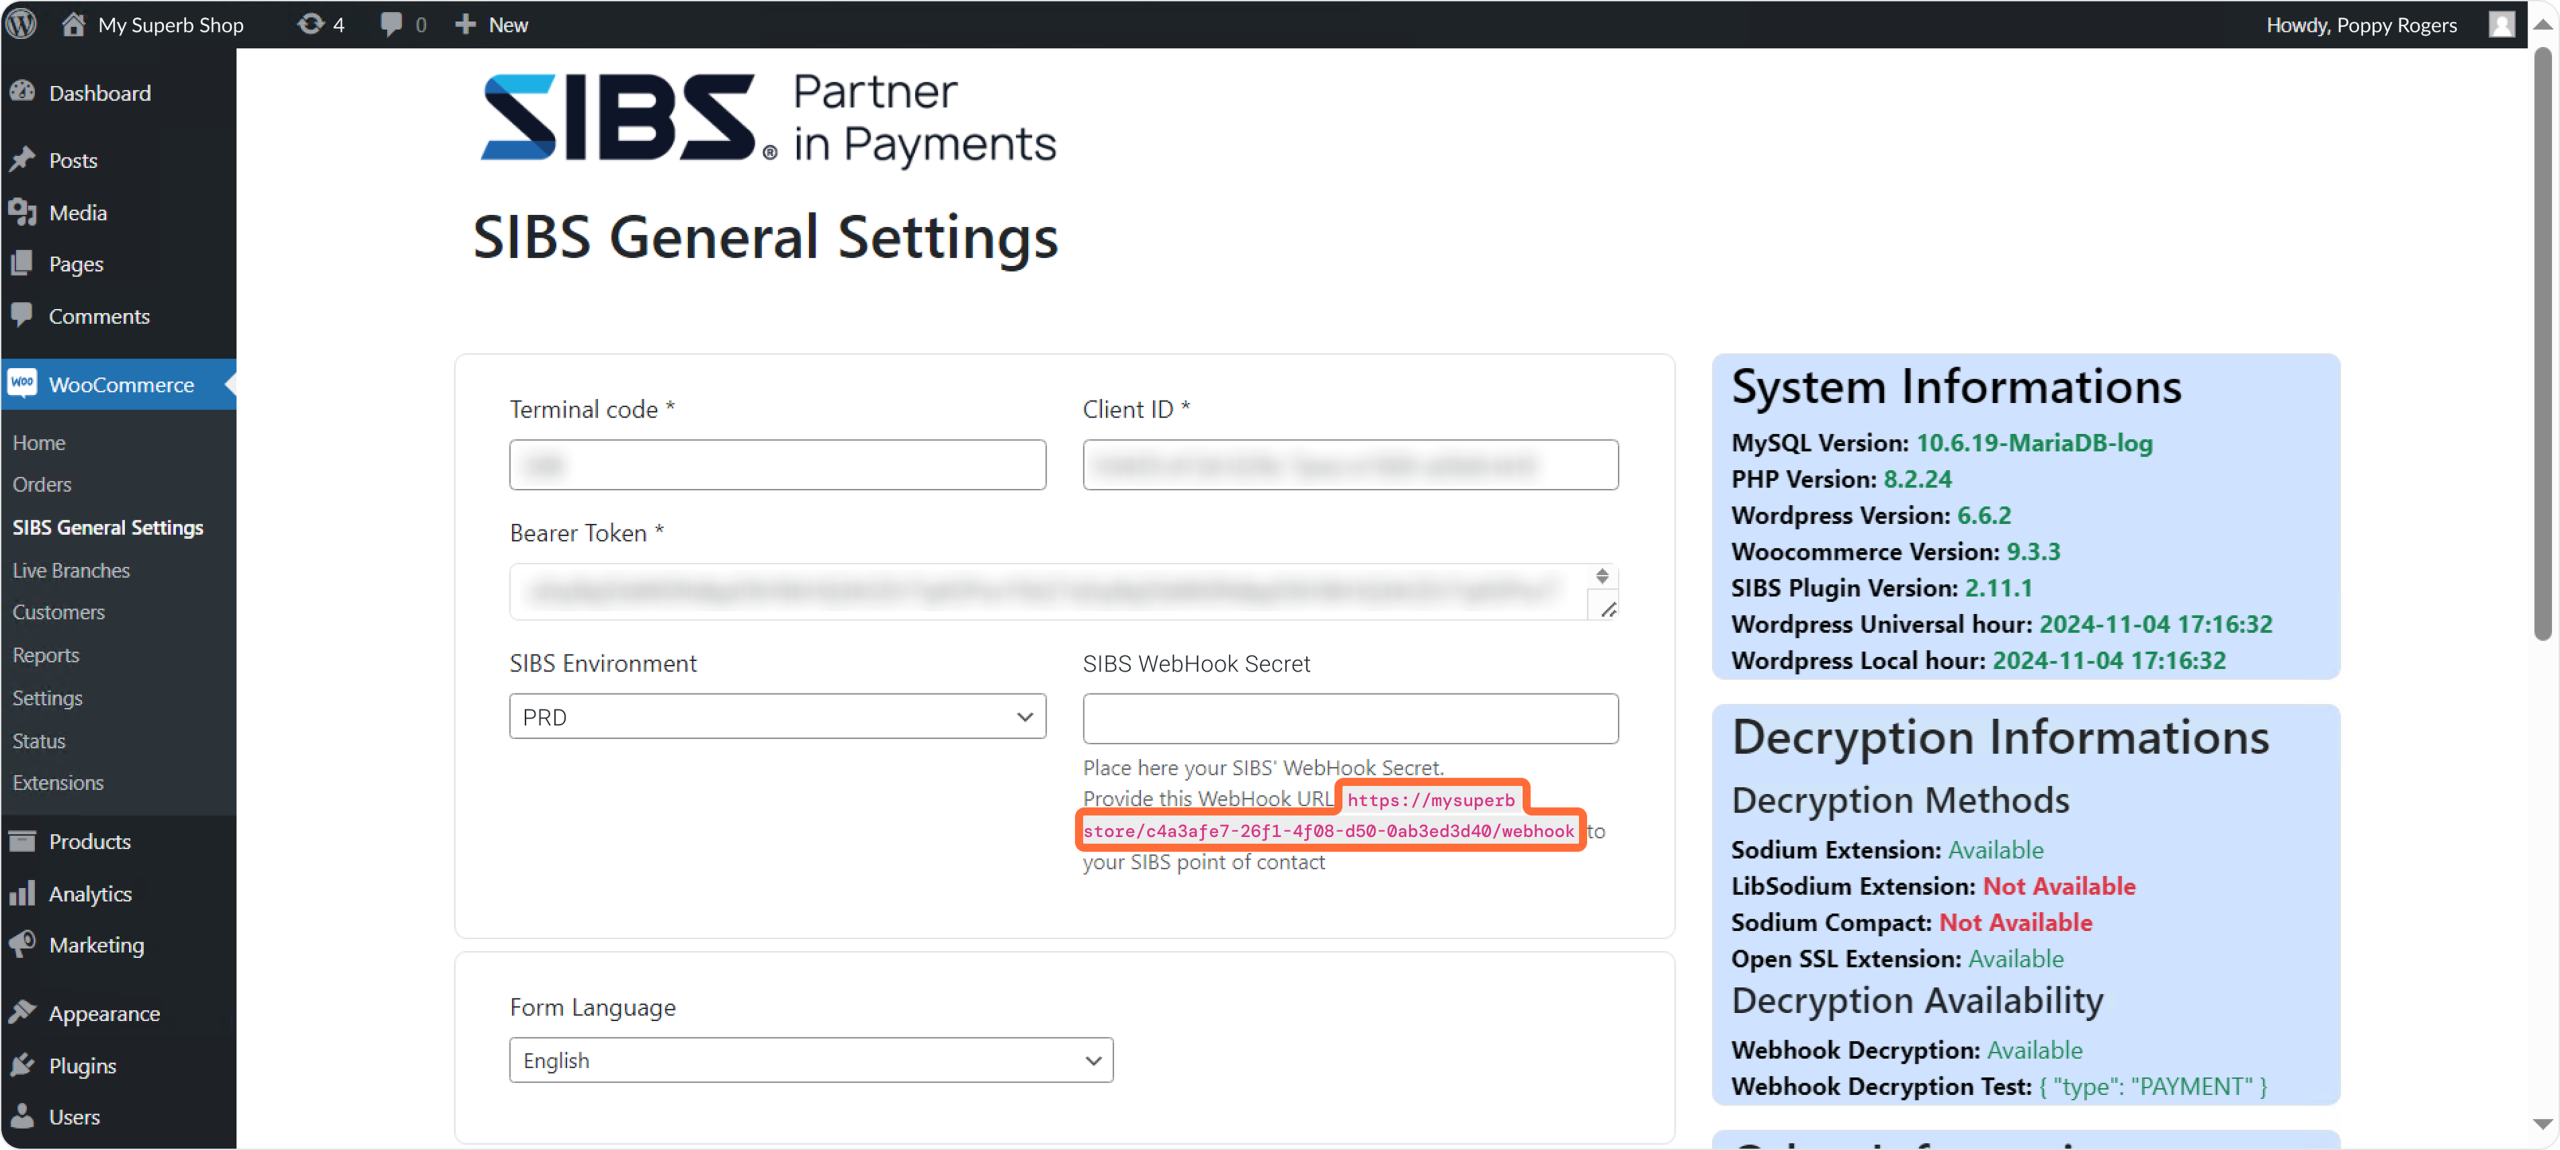
- Copy the WebHook URL and send it to your Account Manager:
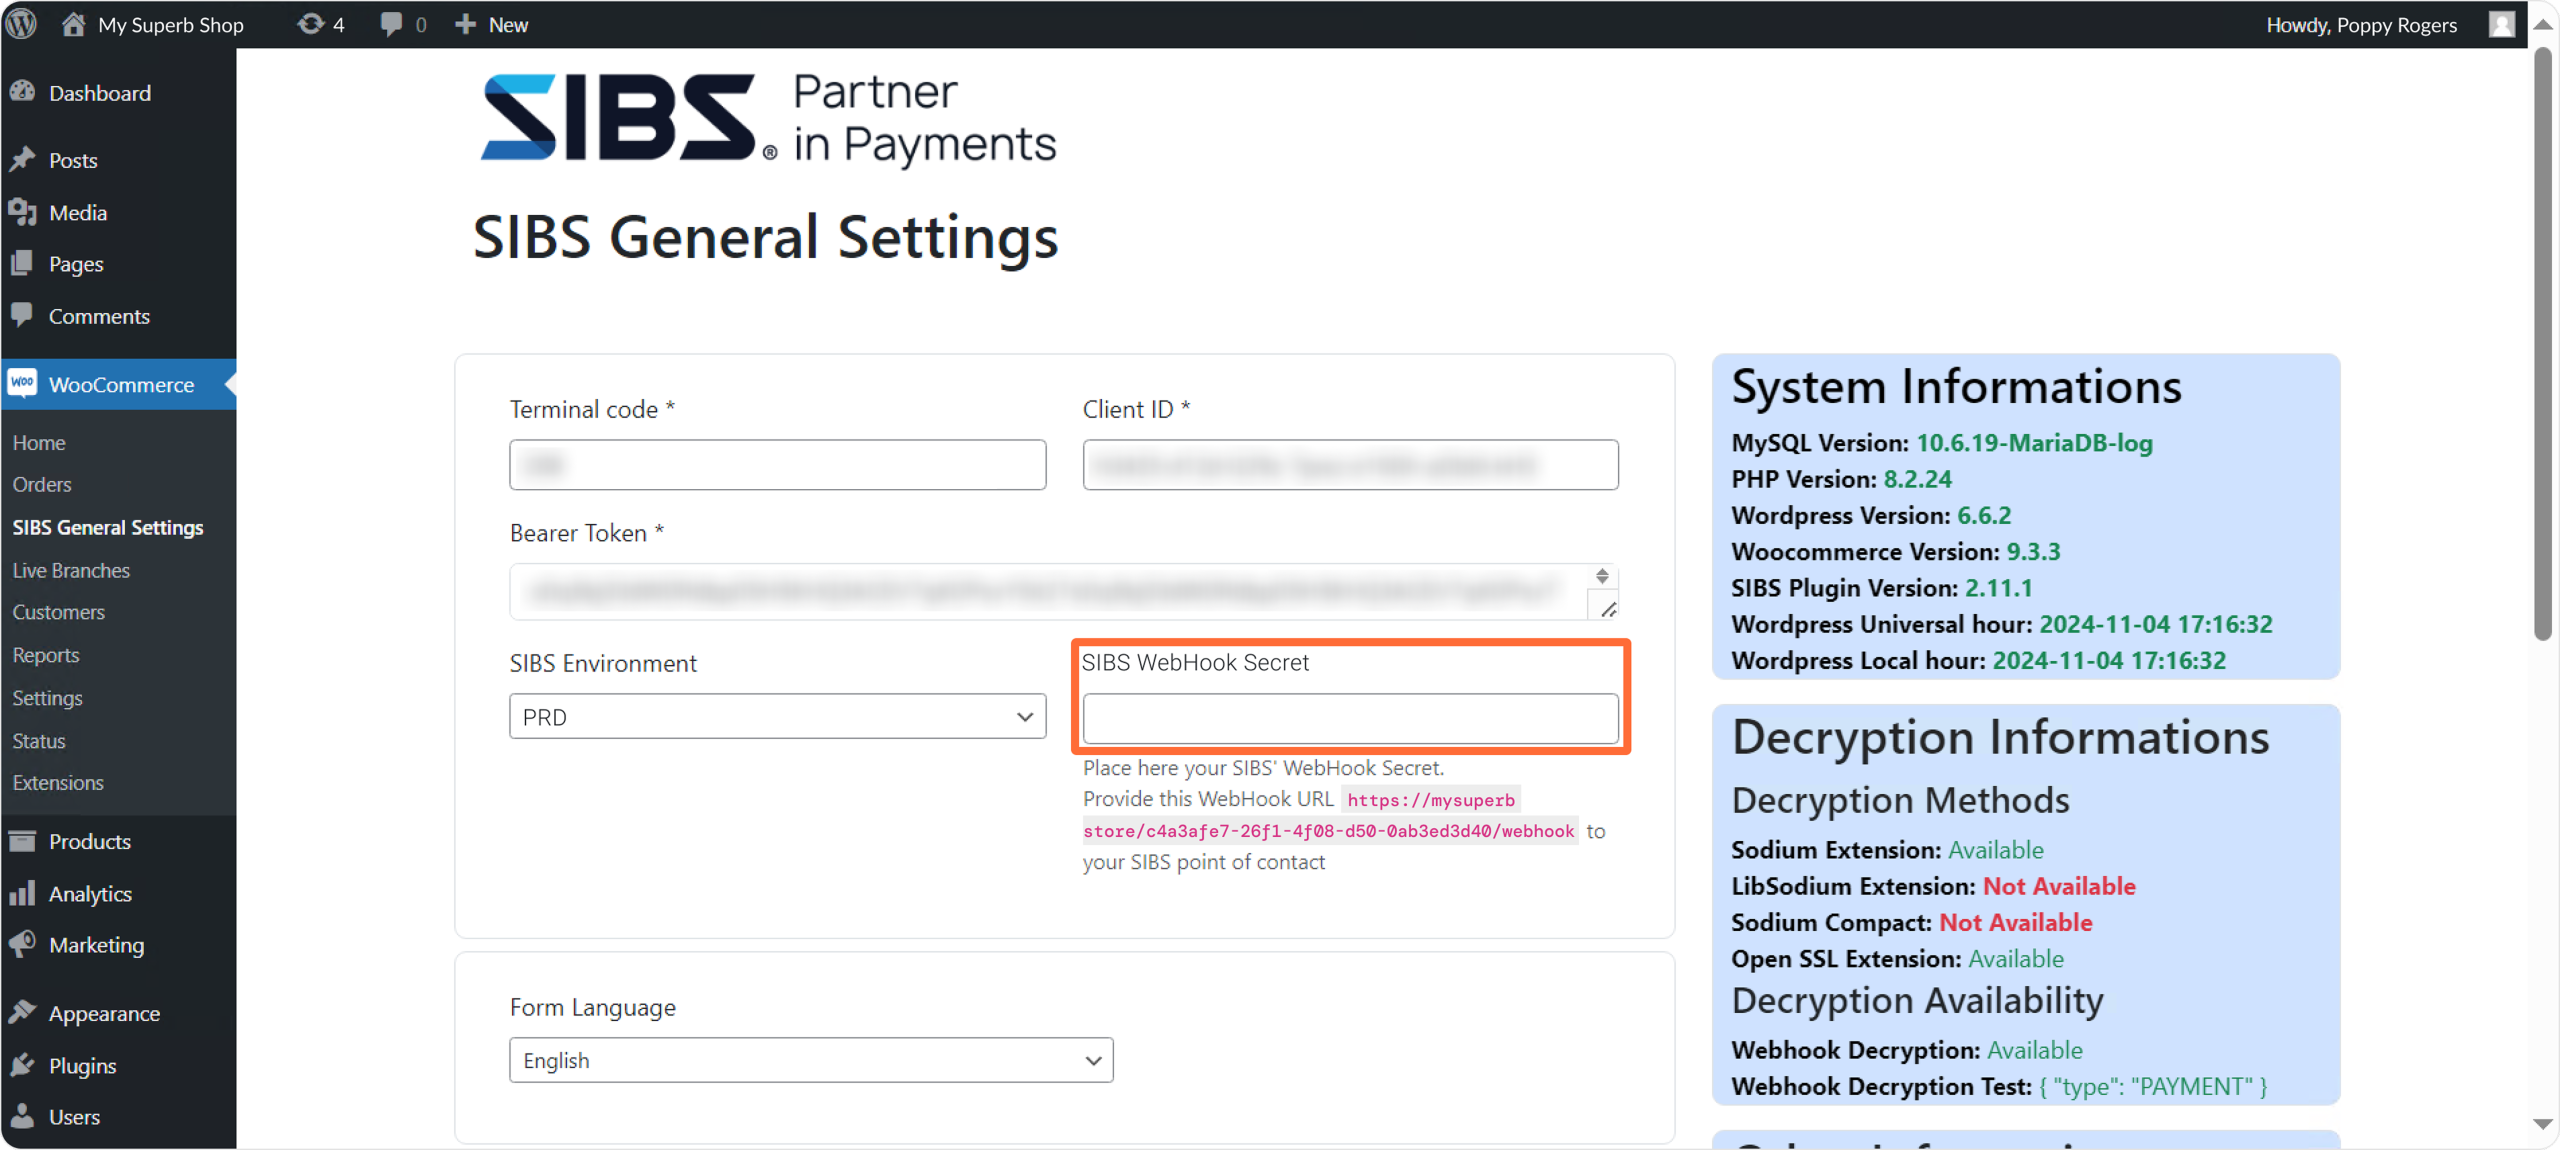
- Once you receive your WebHook Secret, enter it in the SIBS WebHook Secret field:
- From the Form Language drop-down list, select the language in which you want your payment form to appear:
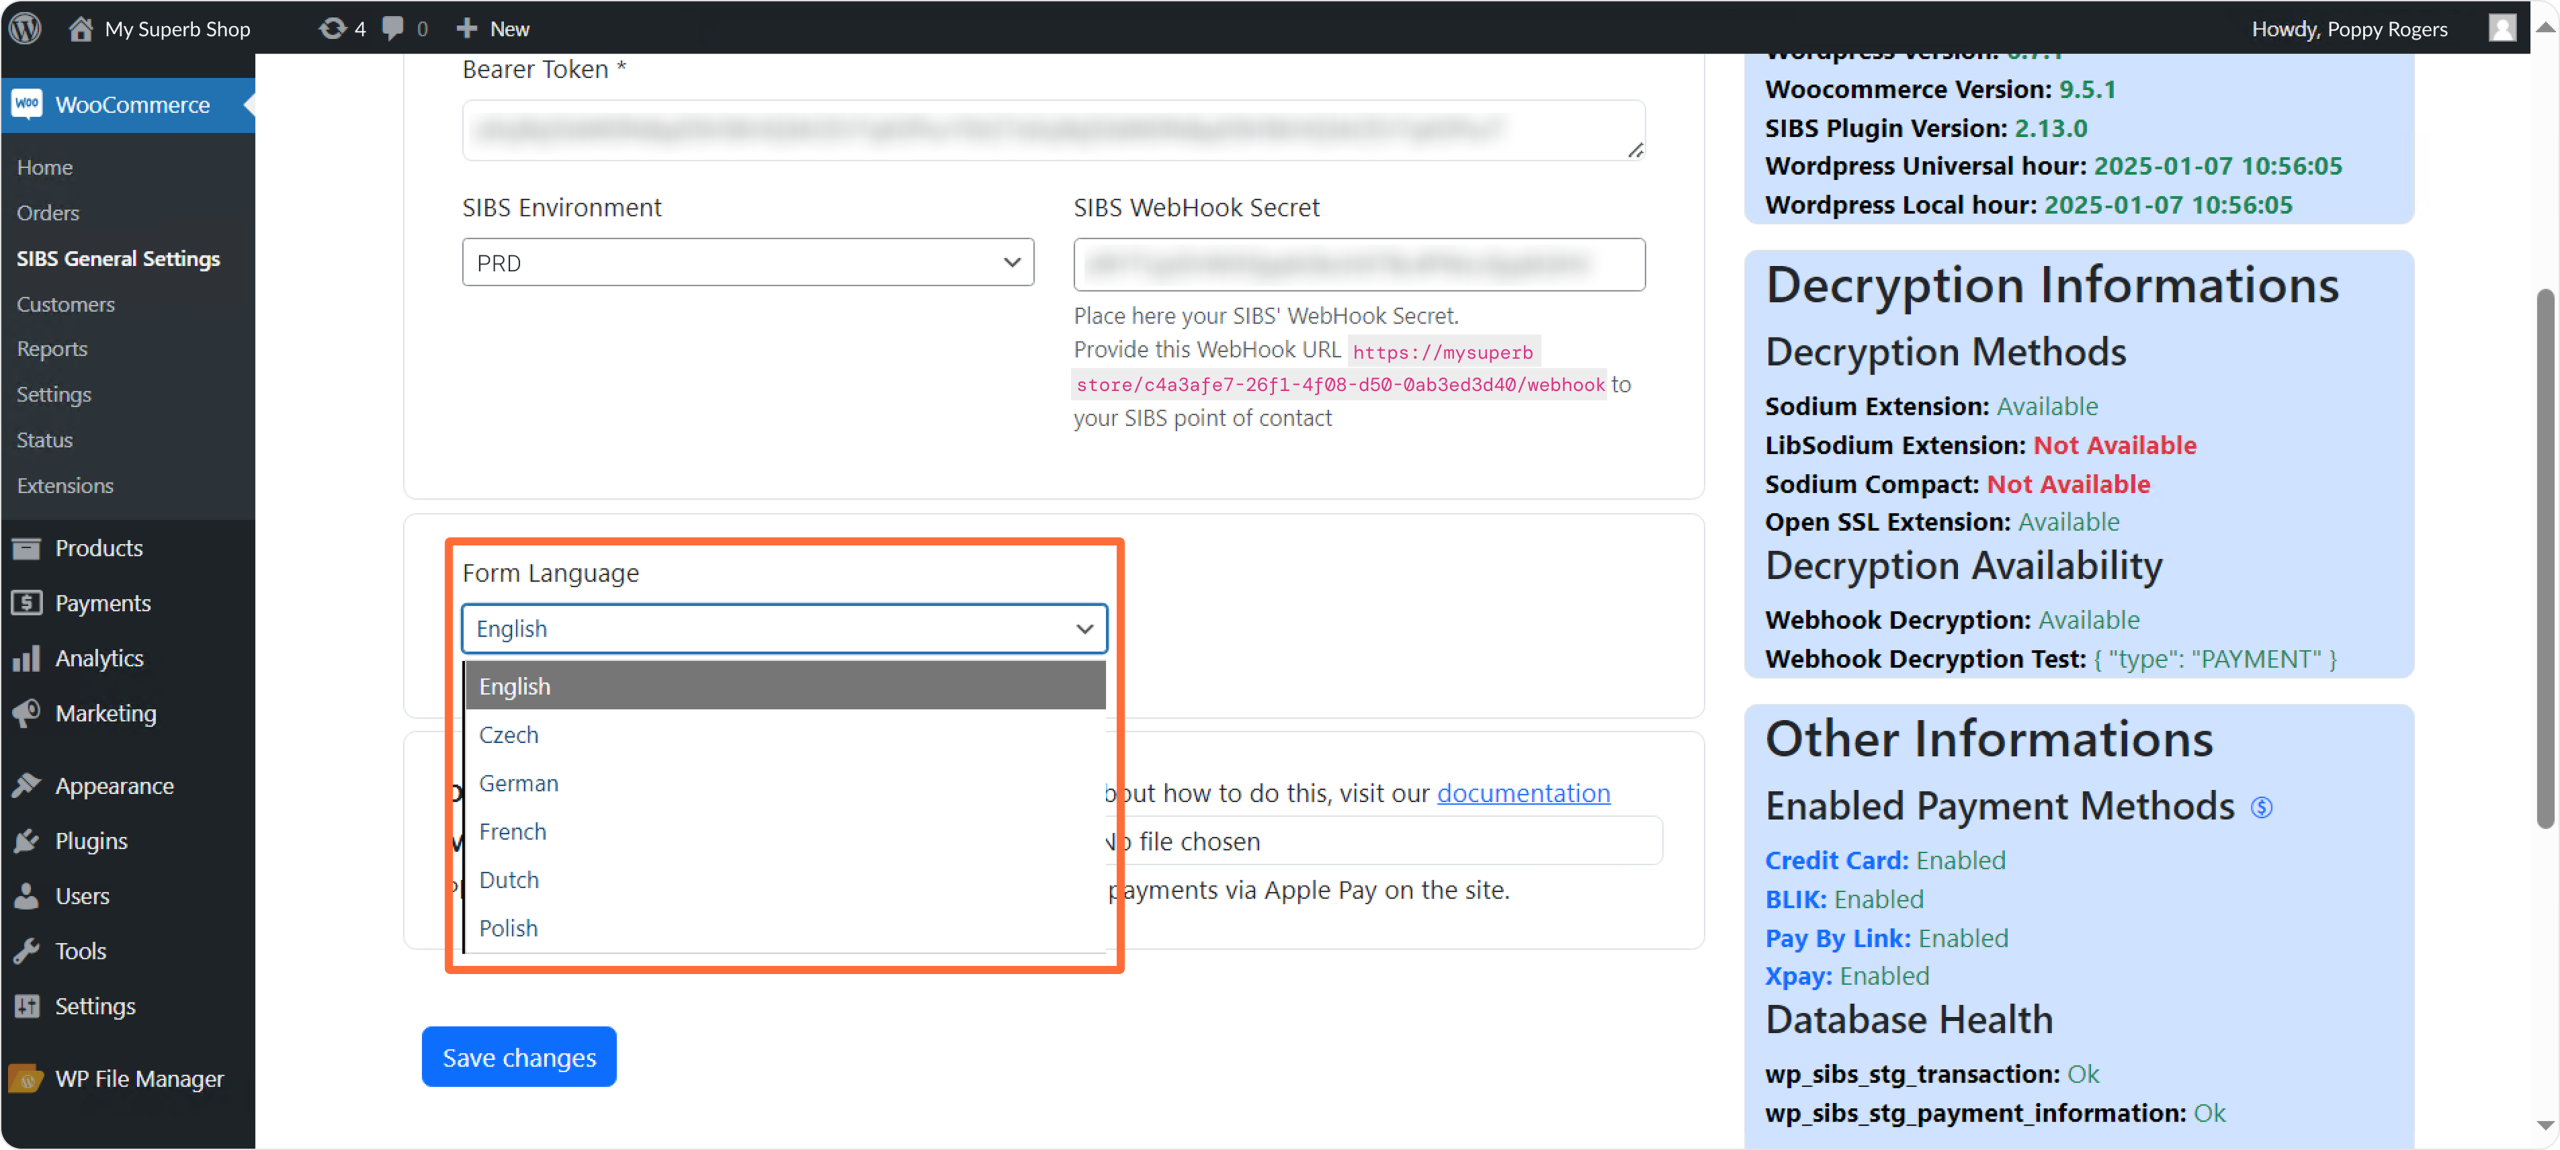
By default, this field uses the store’s language. If that language isn’t available, the payment form will default to English.
- If you plan to activate Apple Pay, upload the file provided by Apple by clicking Choose File:
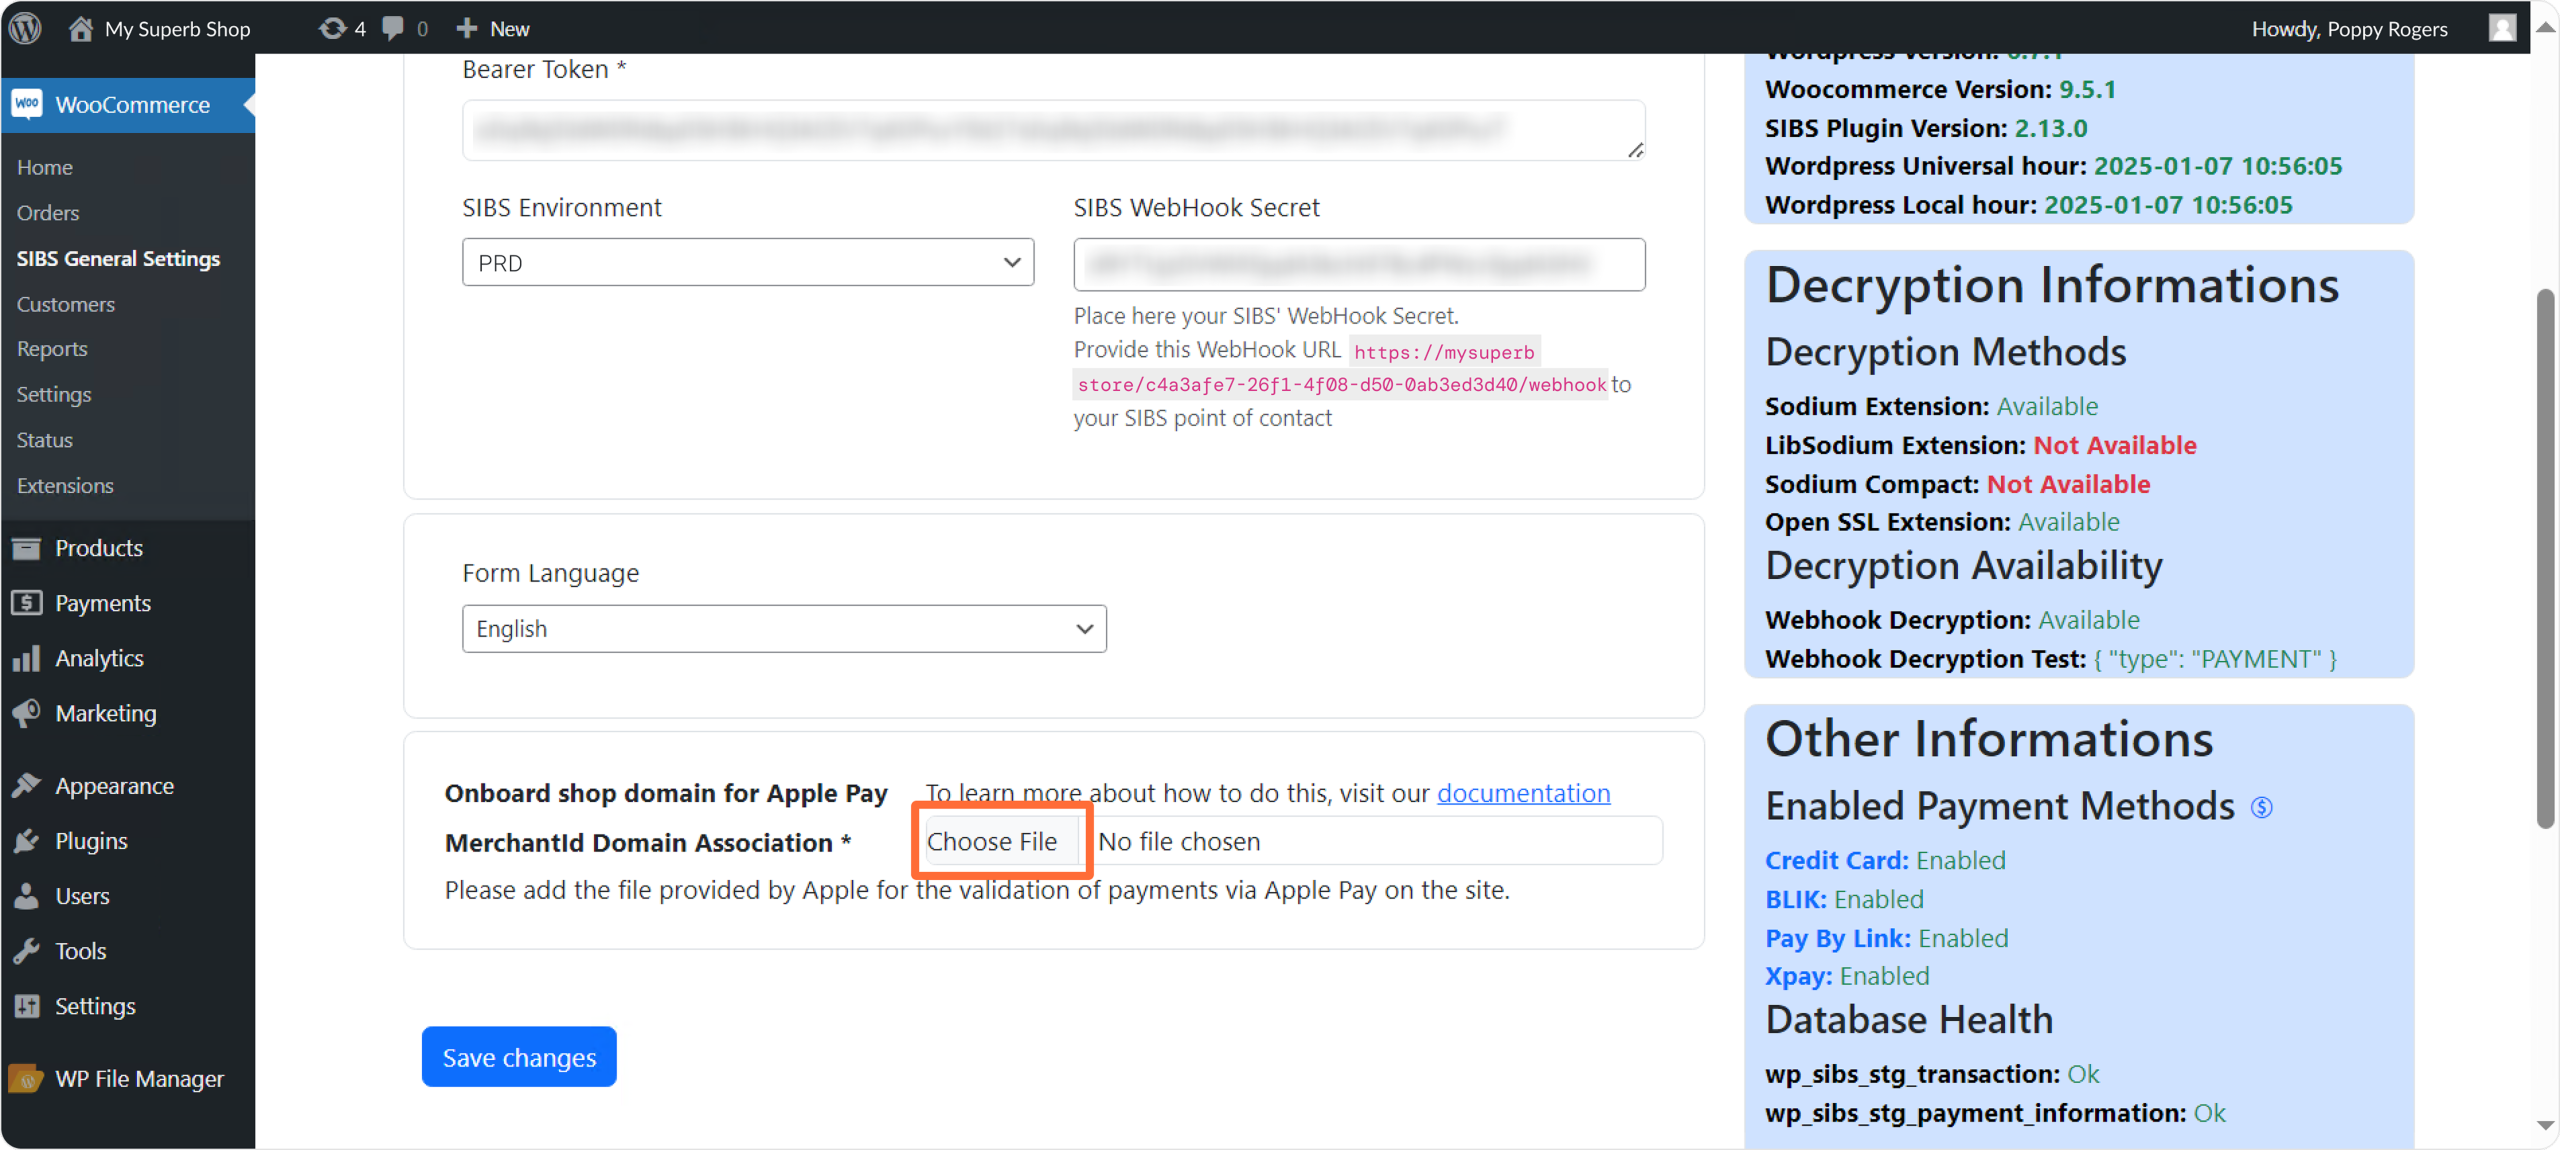
Check our Apple Pay page for more information on how to obtain it. If you choose not to activate Apple Pay, you can skip this step.
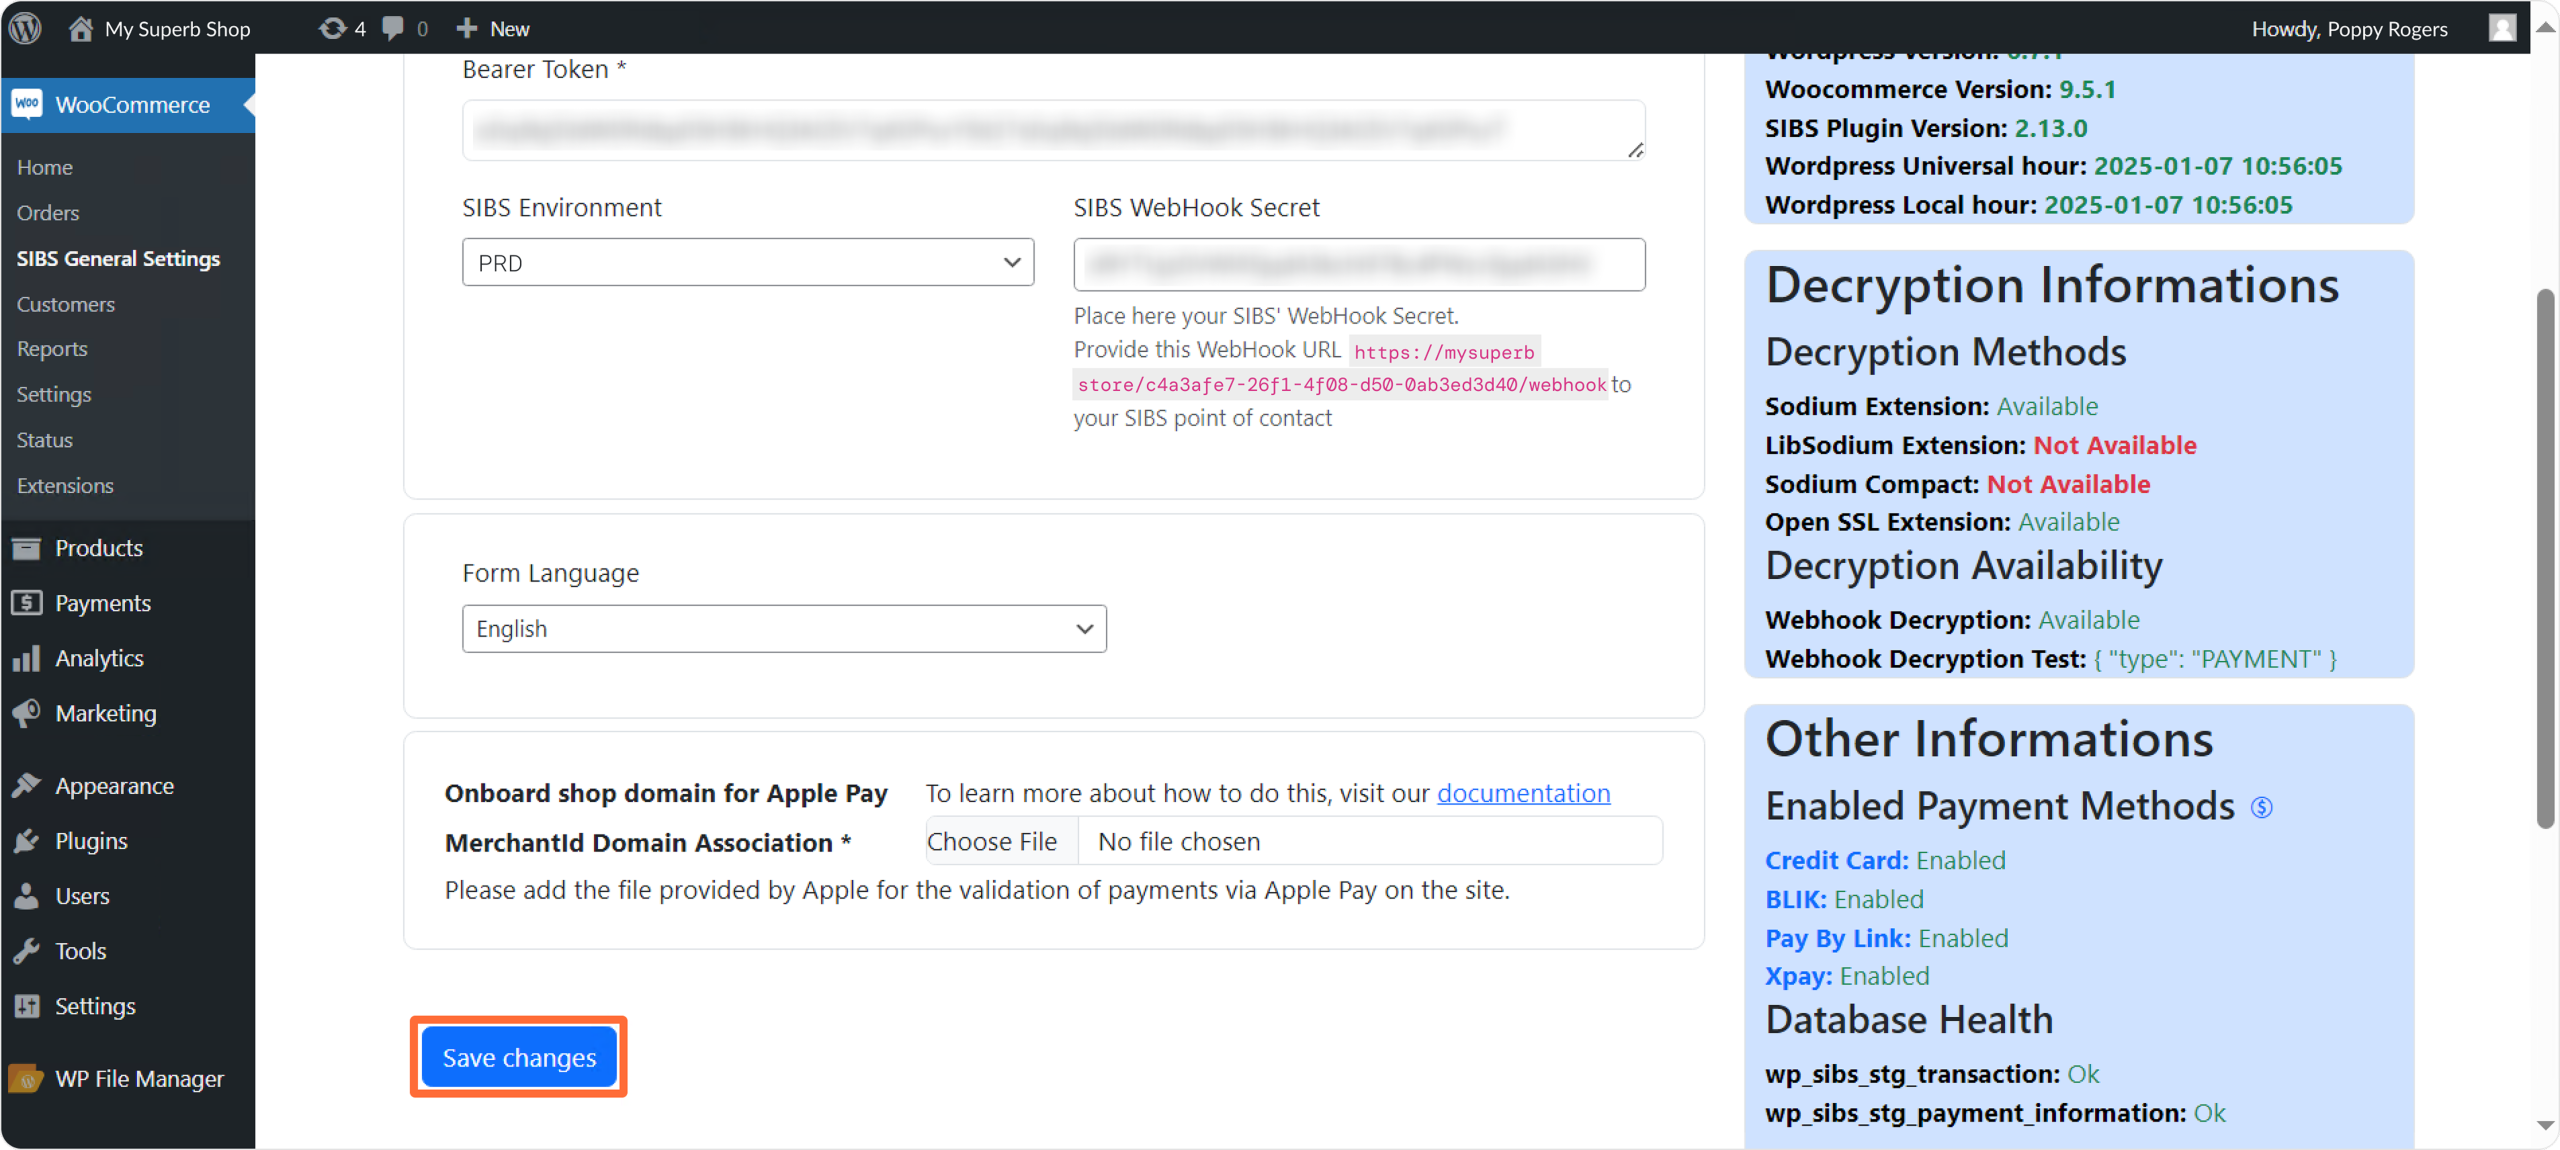
- In the end, remember to Save changes:
Step 3: Customize your payment methods
- Go to Plugins > Installed Plugins in the left-side menu. Find the plugin SIBS Payment Gateway for WooCommerce and click Payments:
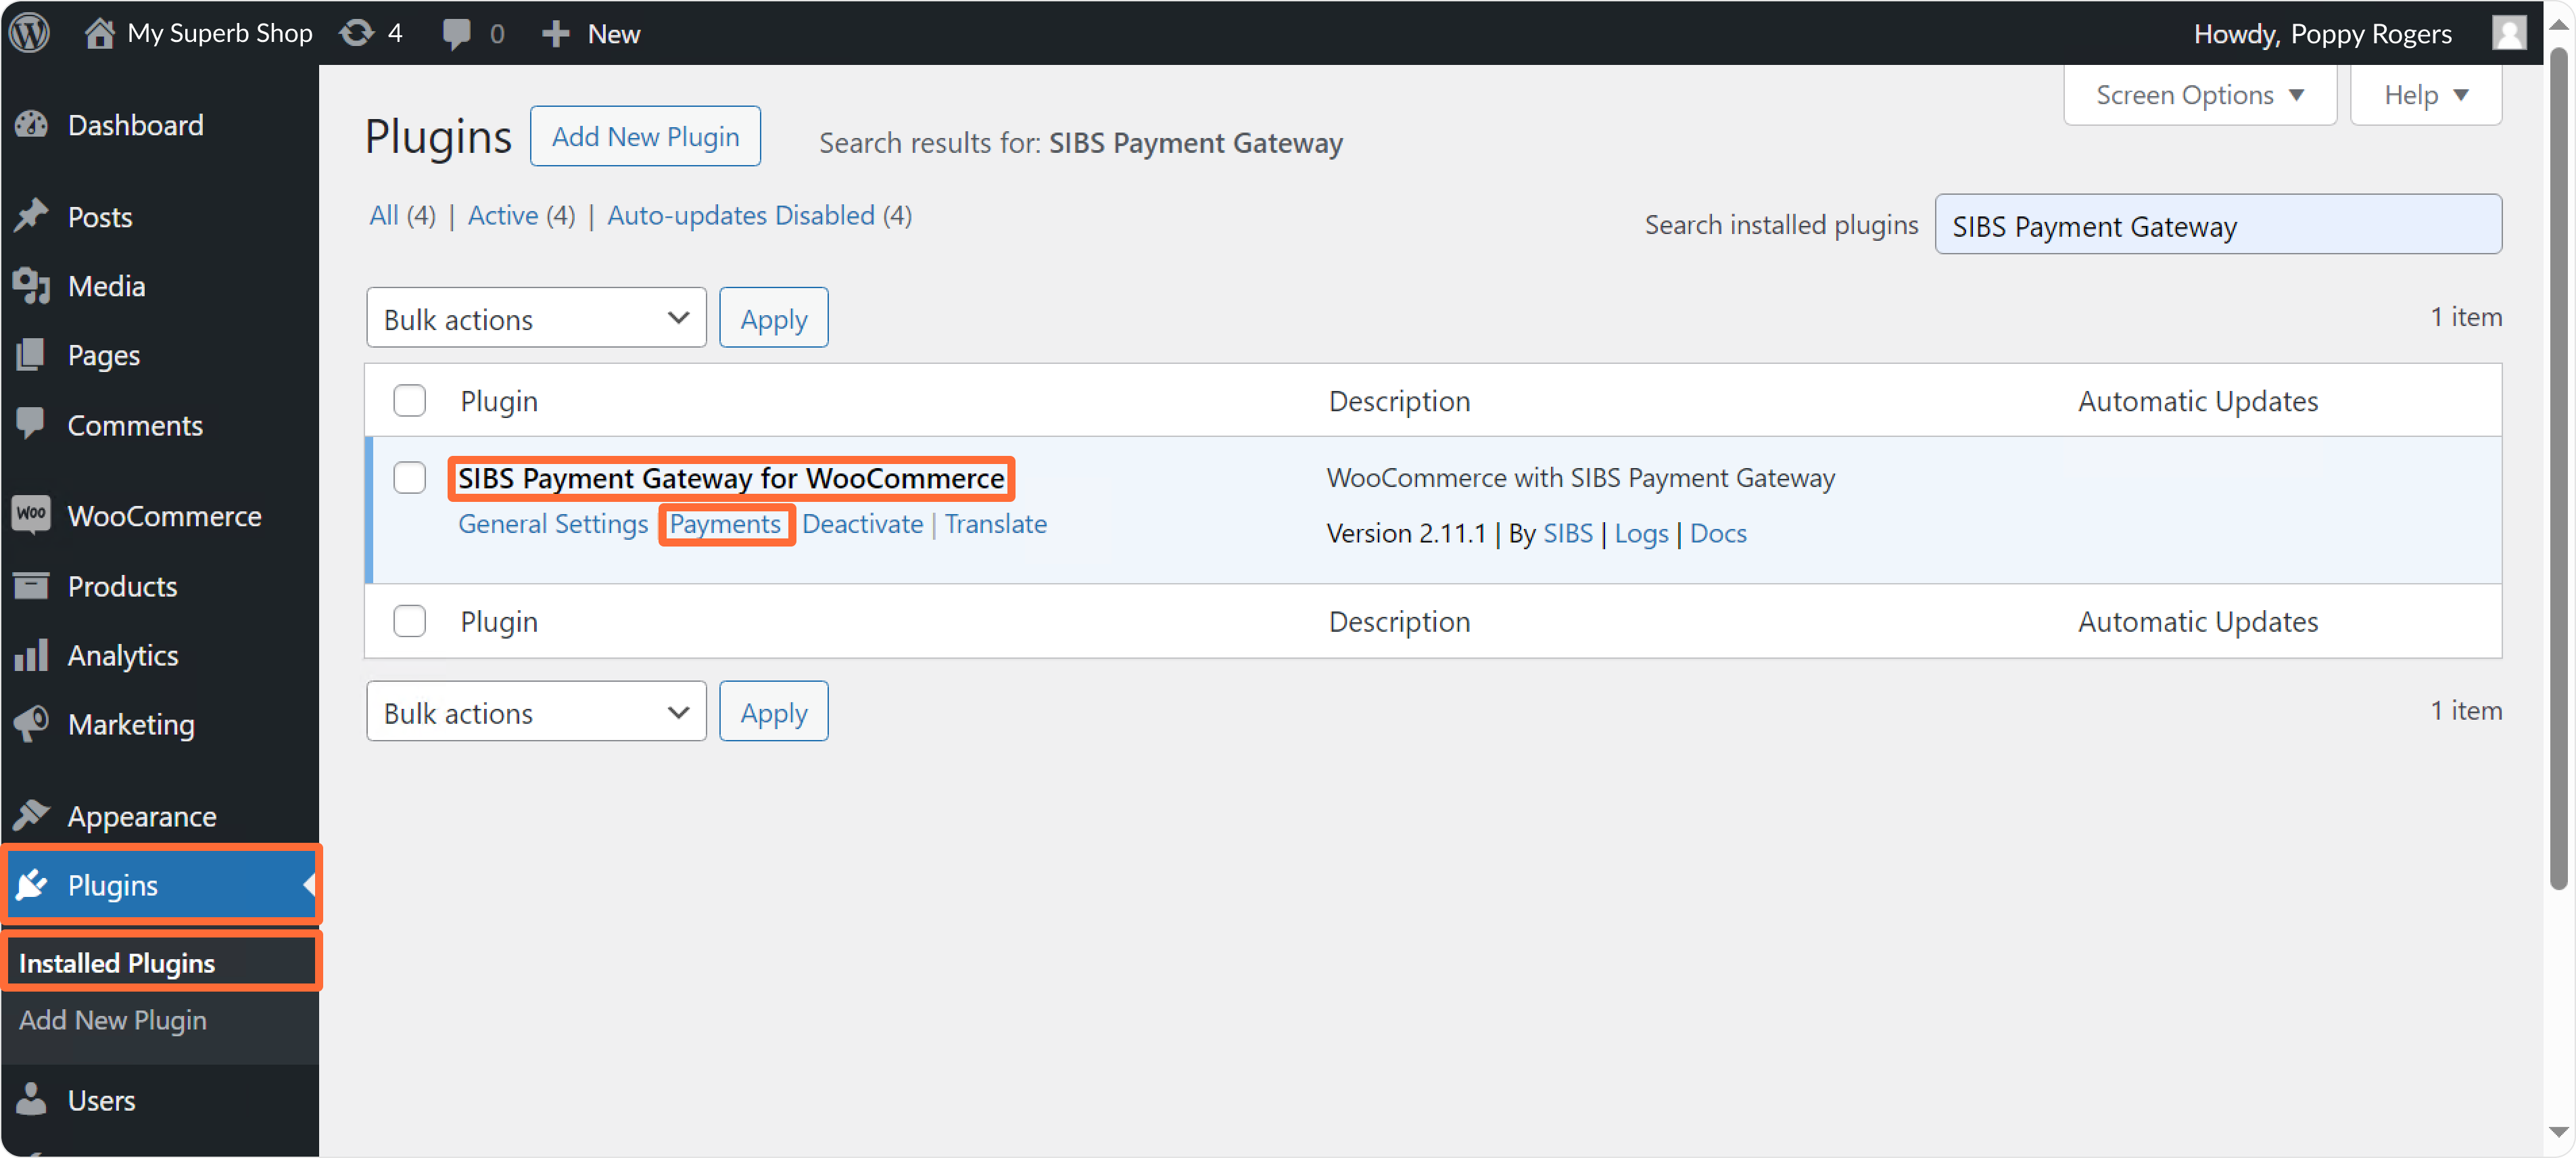
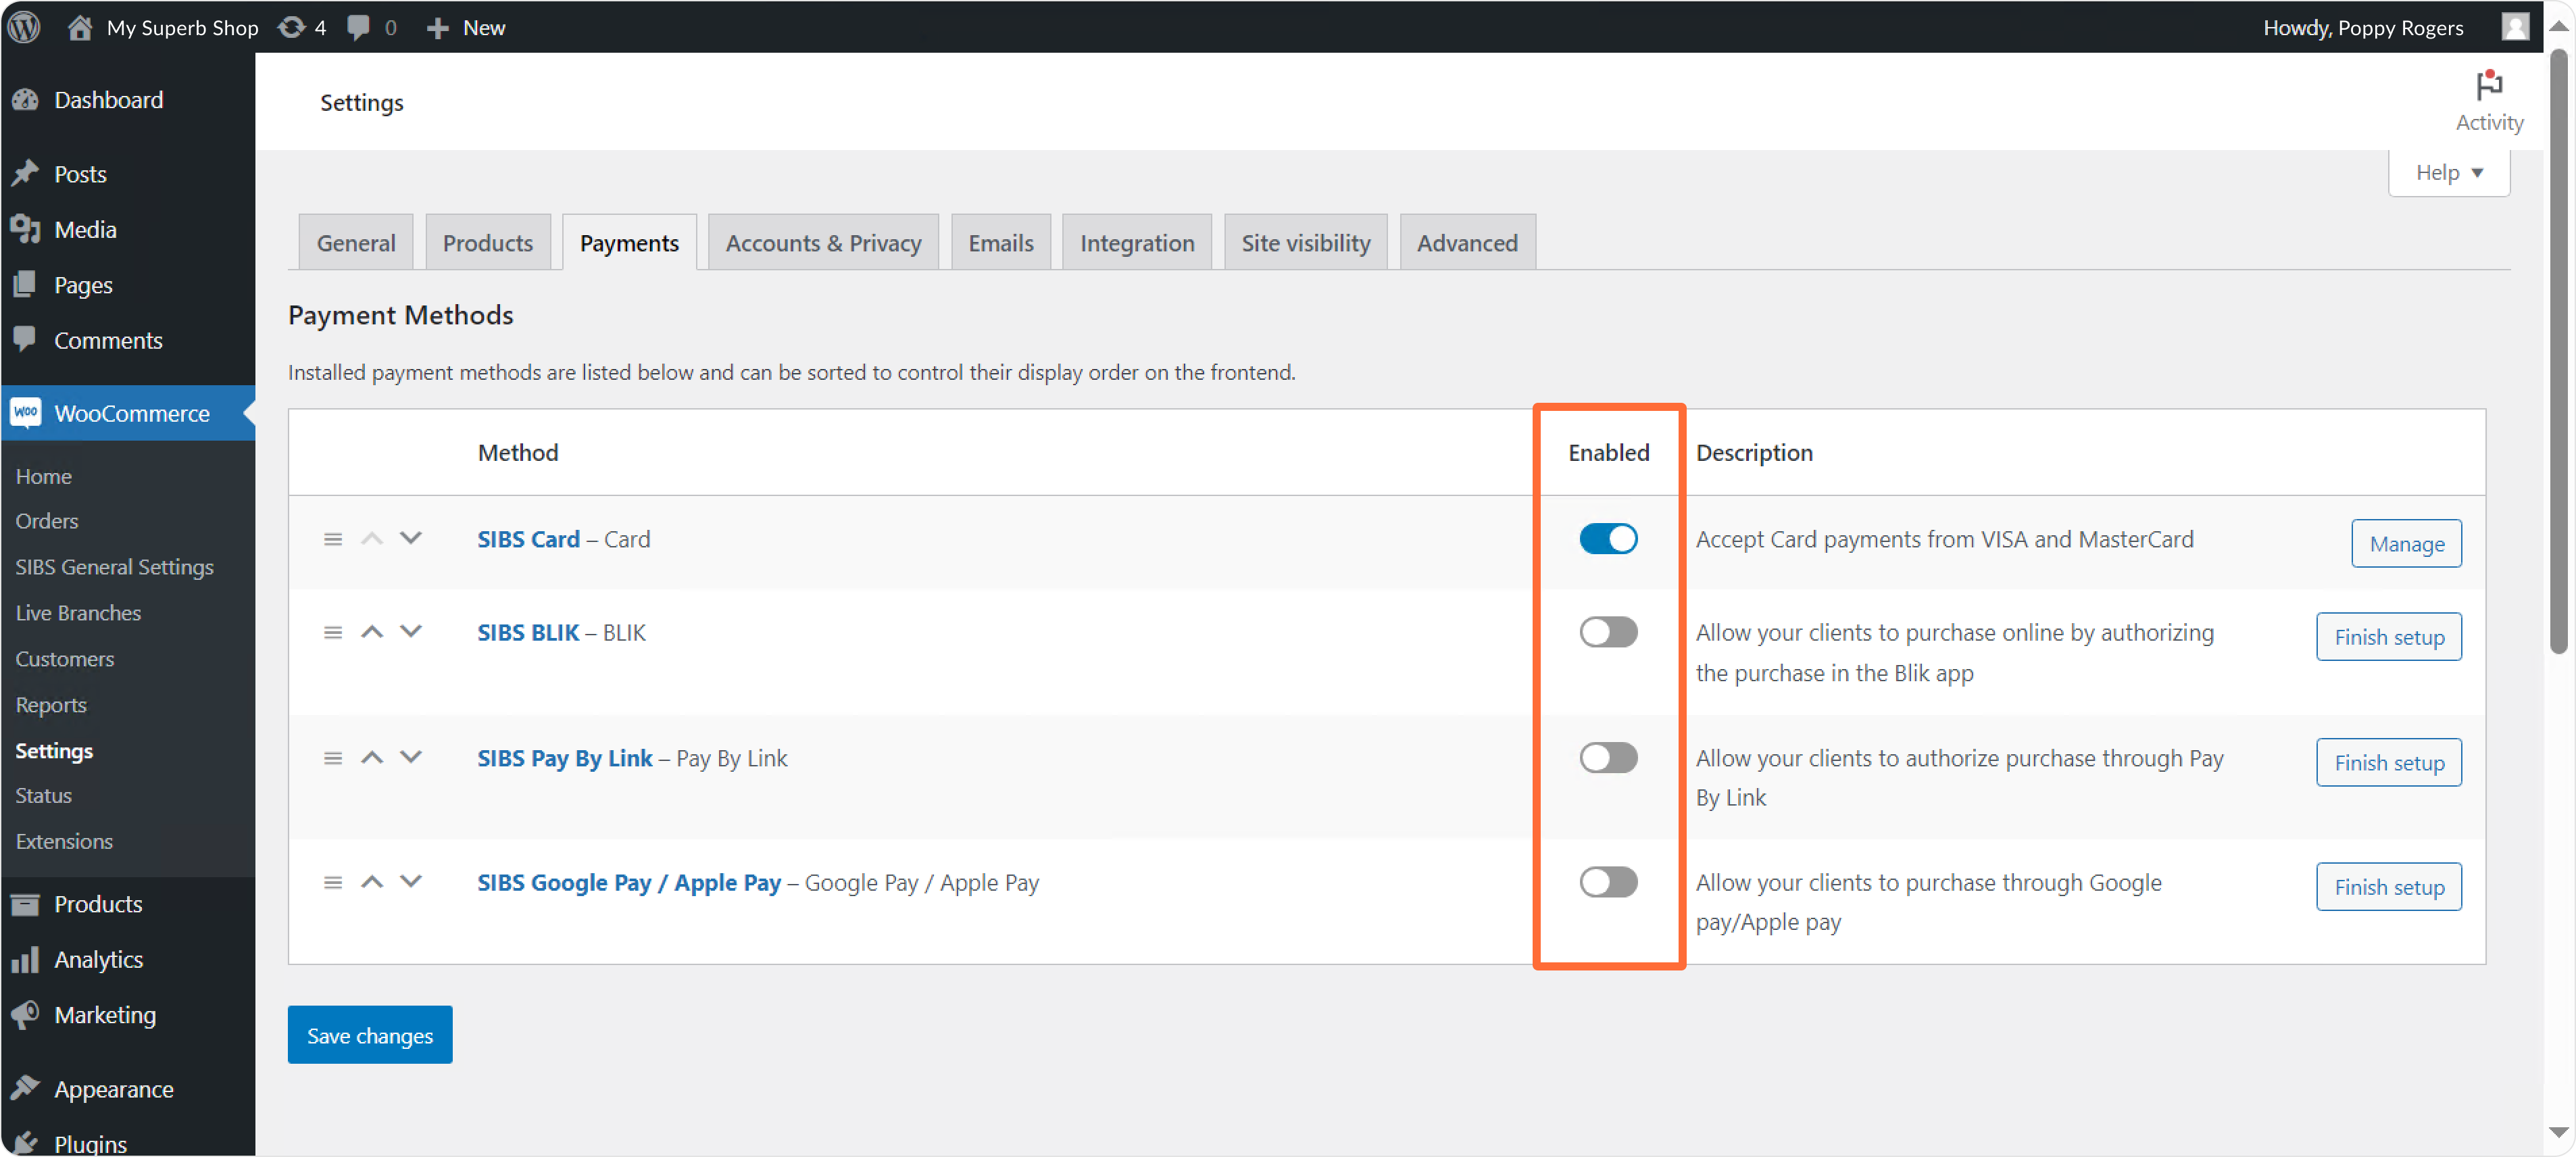
- In the Enabled column, use the toggle to enable (activate) or disable (deactivate) a payment method. You can choose from SIBS Cards (Visa and Mastercard), SIBS BLIK (available only in Poland), SIBS Pay By Link, and SIBS Google Pay / Apple Pay.
Check Payment methods to learn more.
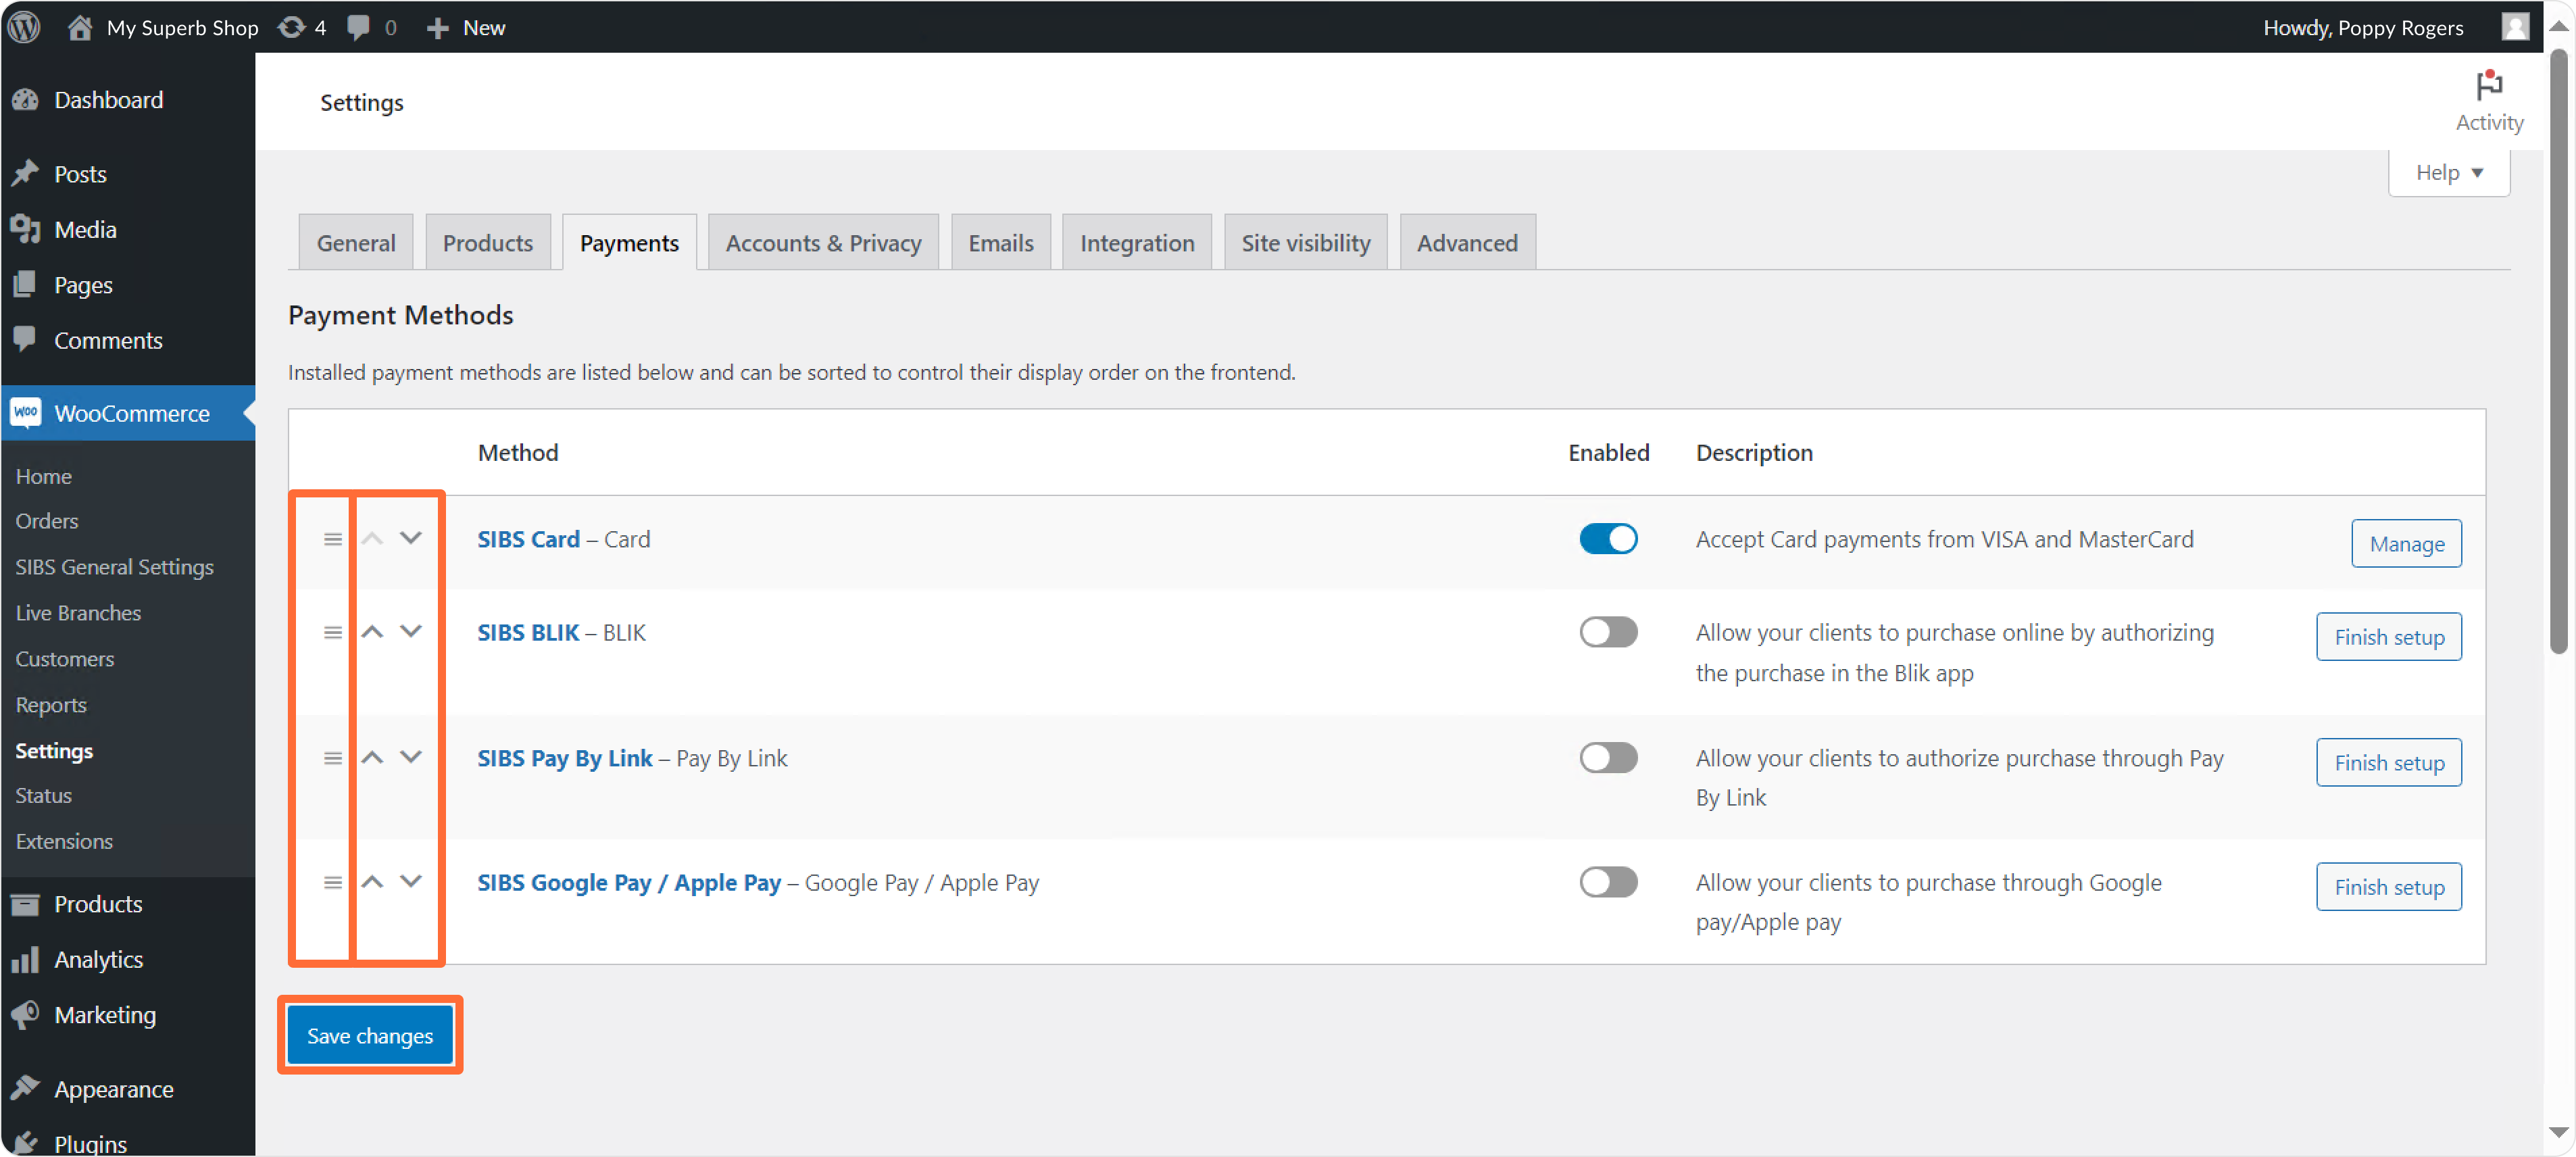
- Use the drag-and-drop functionality (drag using the ‘hamburger’ icon) or the up and down arrows to define the order in which your payment methods will be displayed to buyers in your store. Remember to Save changes in the end:
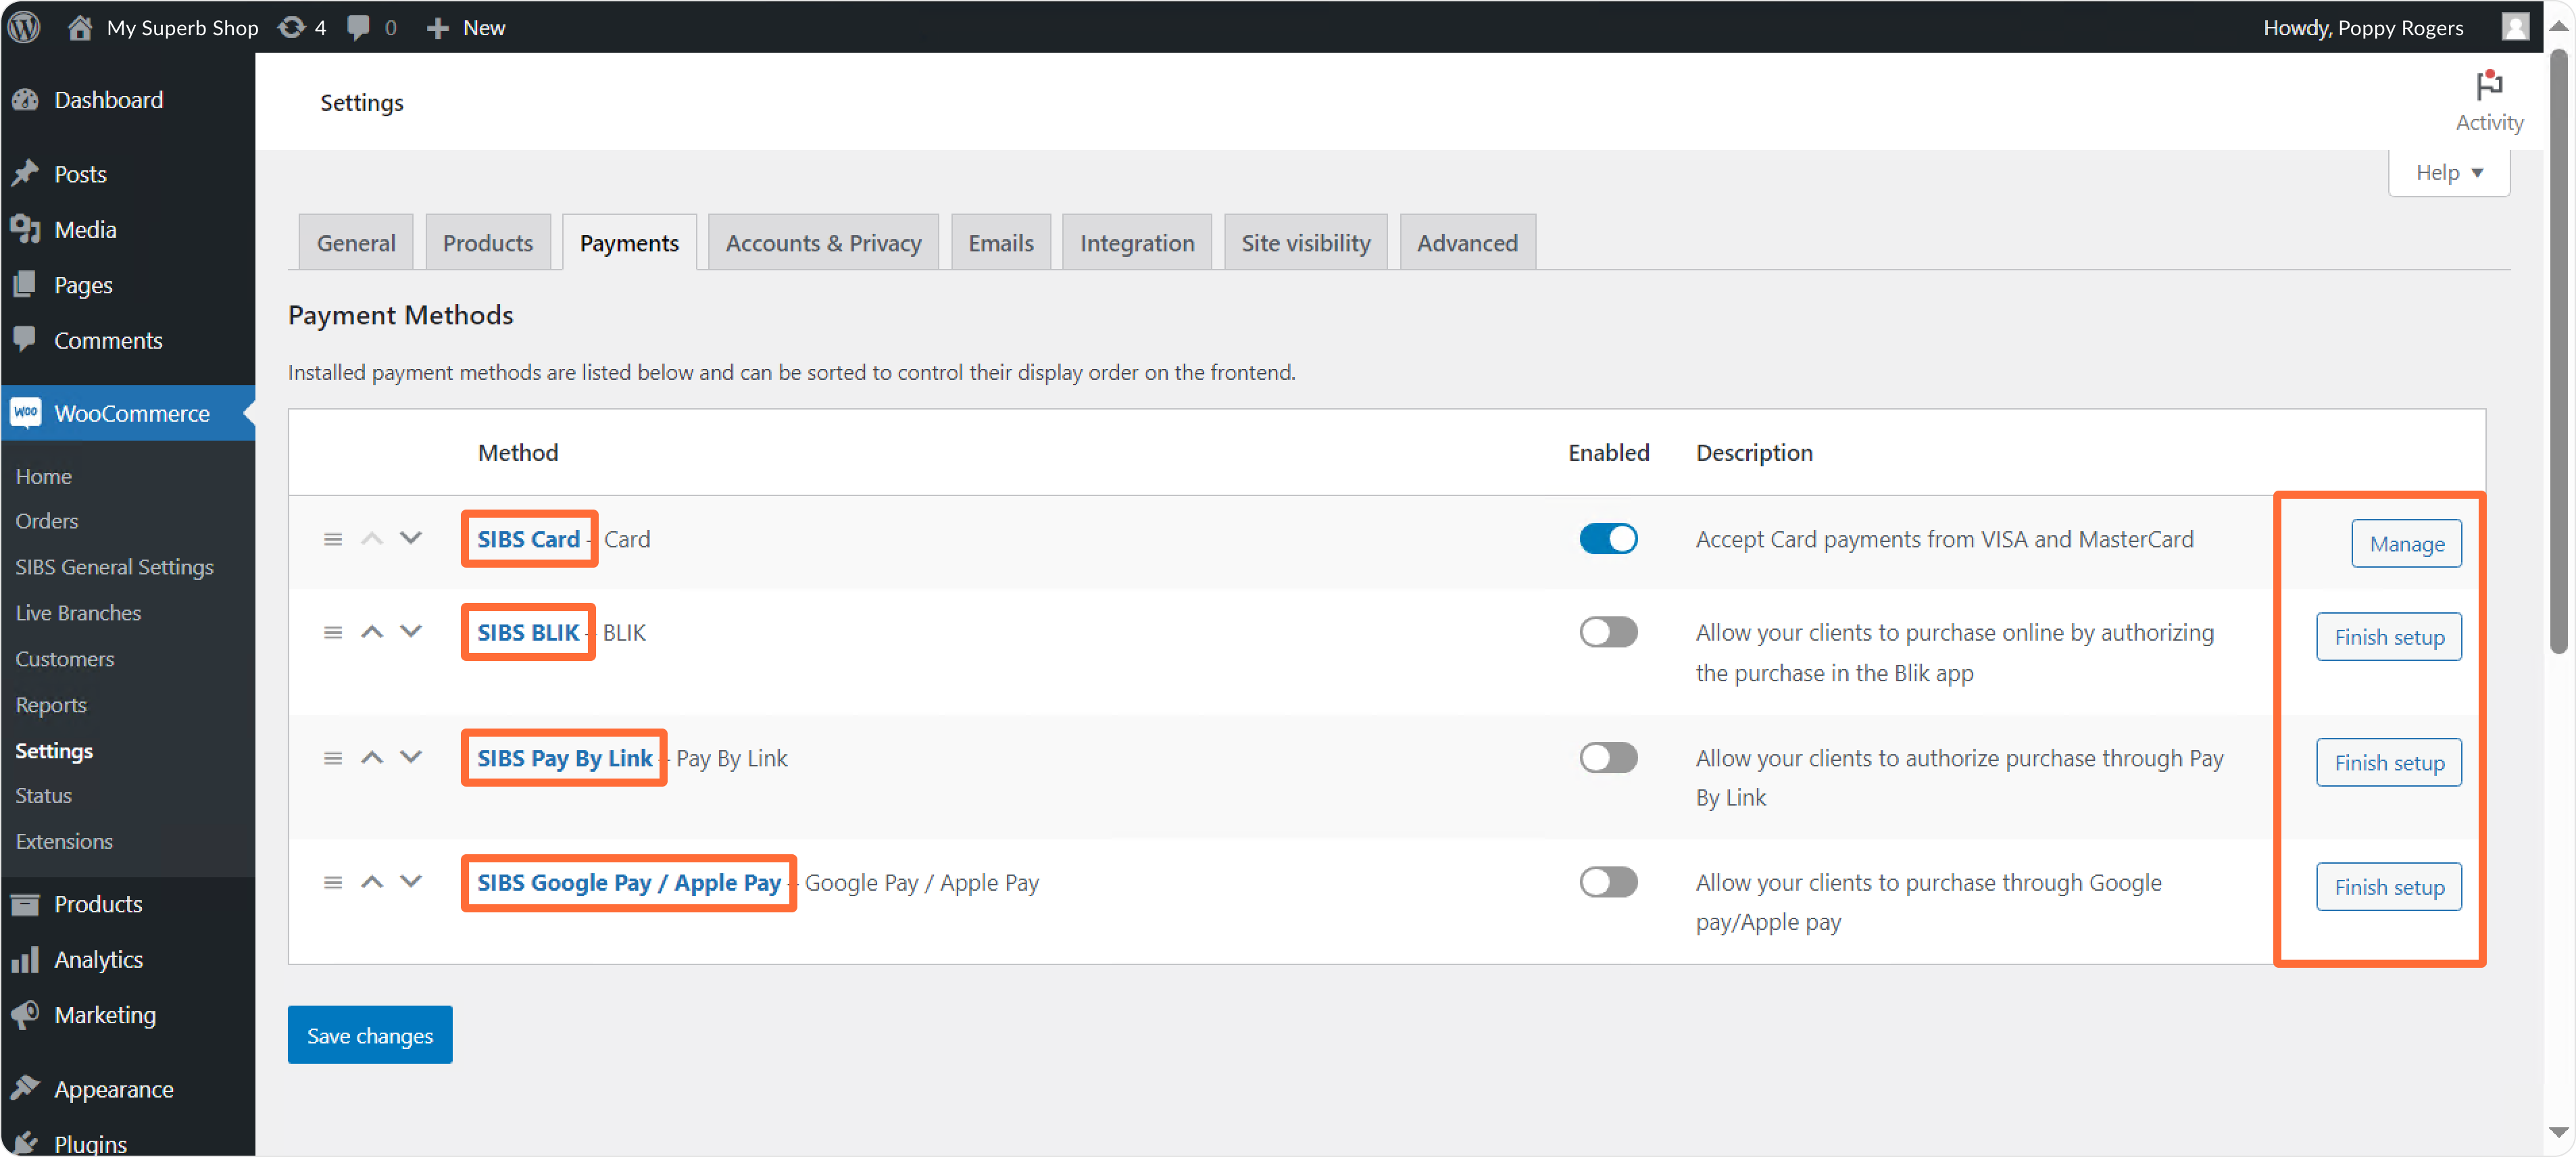
- Click the name of the selected payment method or the Manage/Finish set up button to access each payment method configuration page:
- Customize your payment method settings on the selected configuration page as you like.
Cards
BLIK
Pay By Link
Apple Pay / Google Pay
Cards
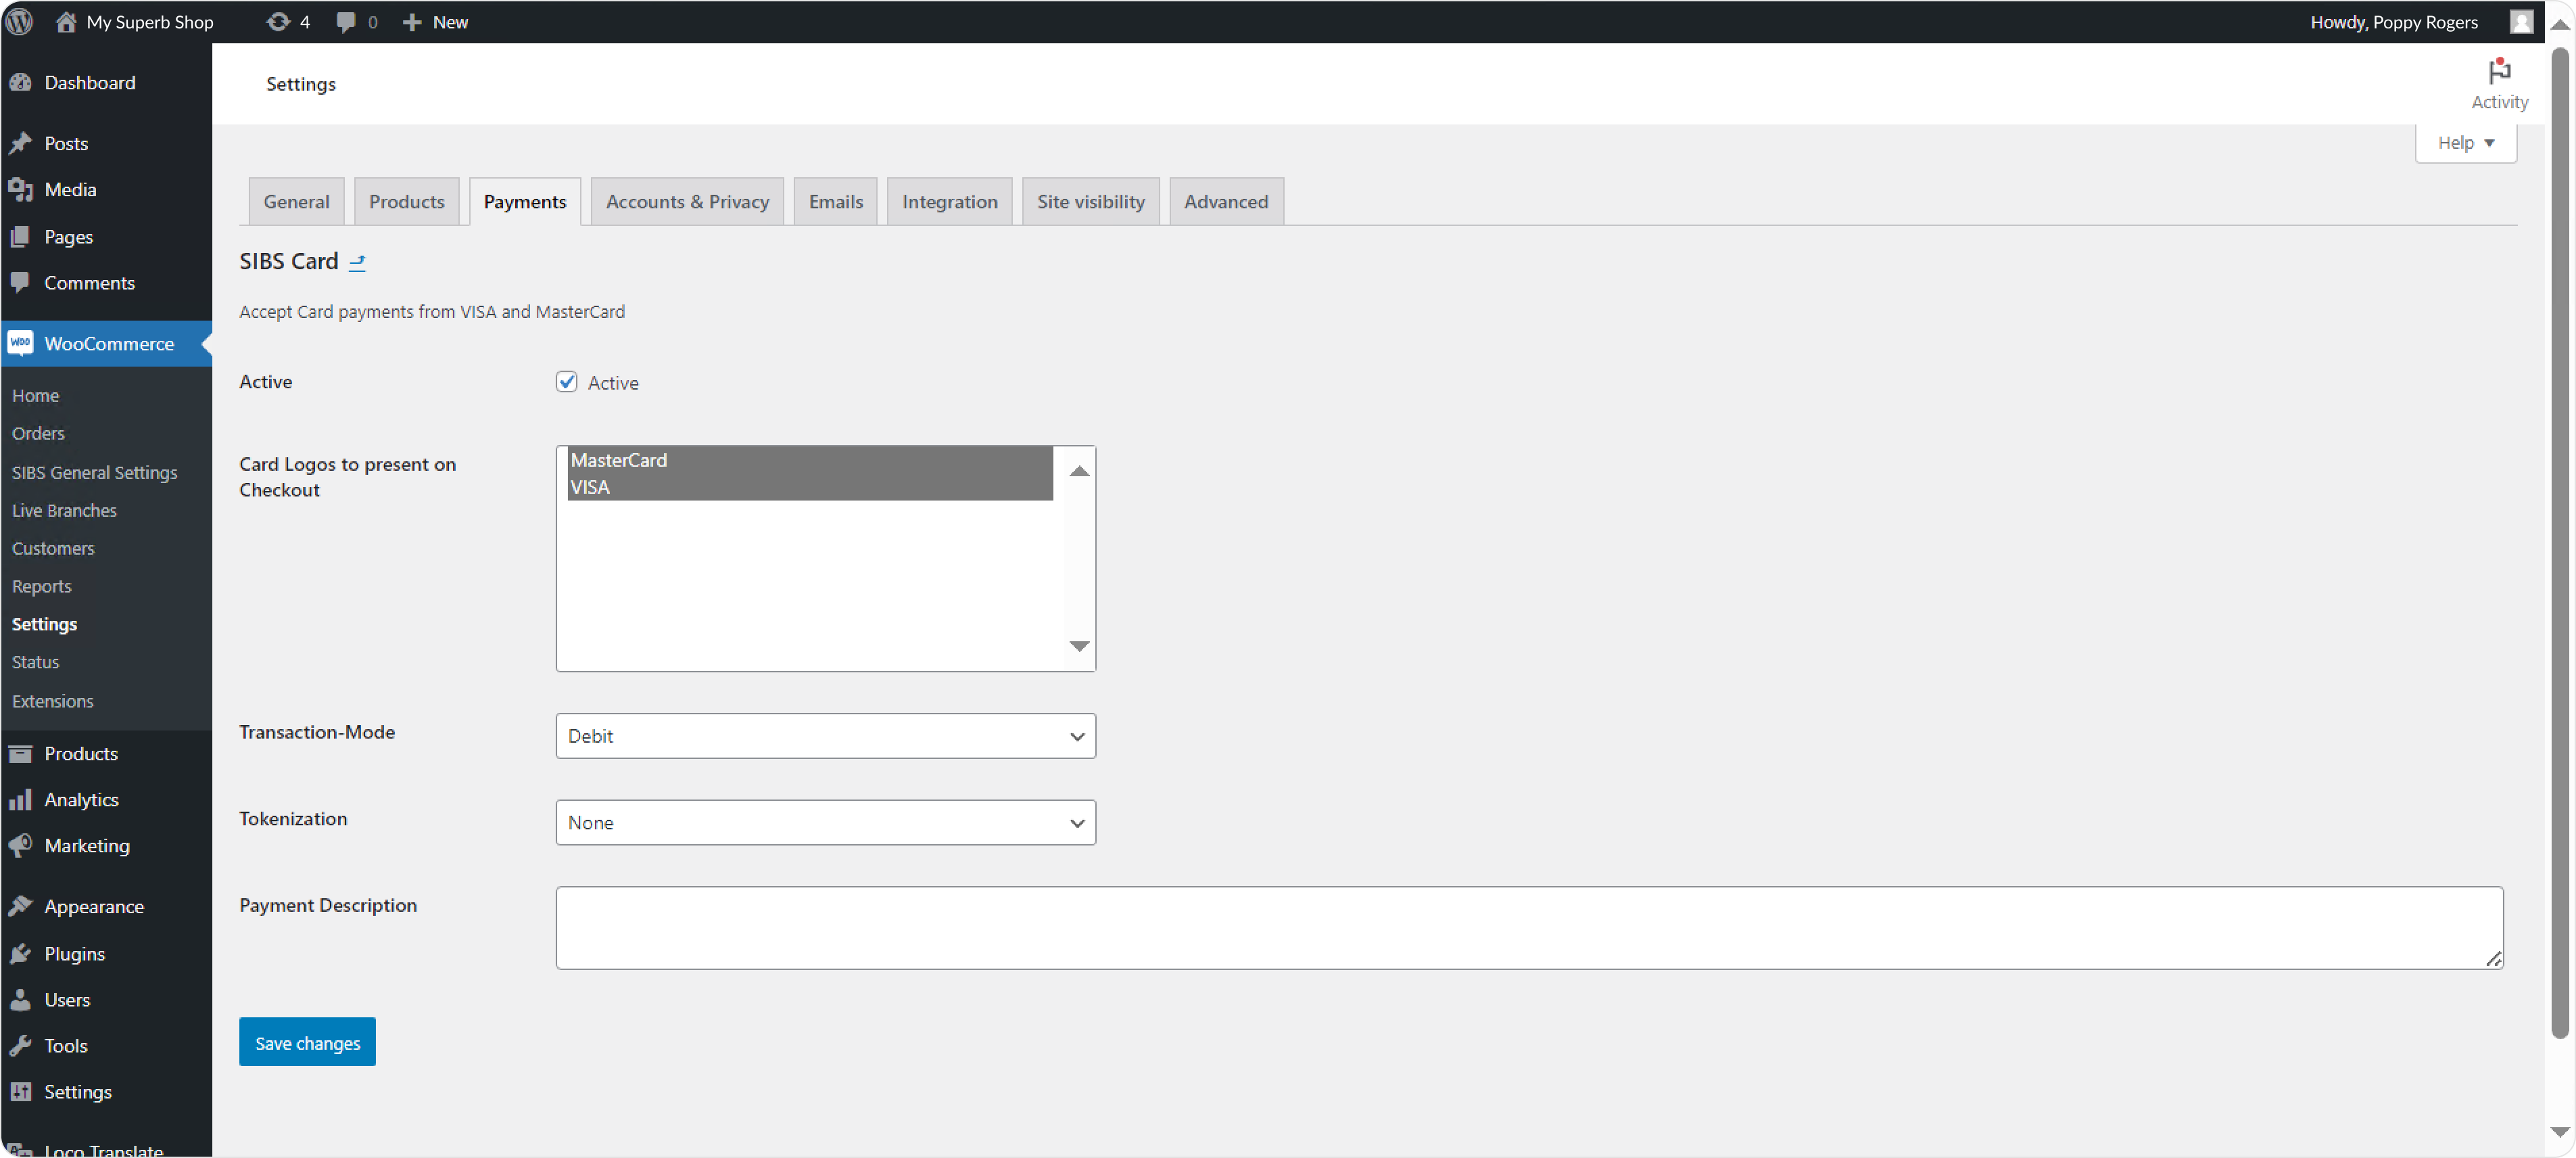
- Active – enable (activate) or disable (deactivate) a payment method using the ‘Active’ checkbox.
- Card Logos to present on Checkout – select which card types you accept and want to display on the checkout page.
- Transaction-Mode
– Debit – standard card payment.
– Pre-Authorization – the customer authorizes the payment, but the charge is only made after the merchant approves it. - Tokenization
– None – the card number is not saved for future purchases.
– Tokenize – the customer will be able to securely save (tokenize) their card number for future transactions. The security code (CVC/CVV) will not be saved.
– OneClick – the customer will be able to securely save (tokenize) their card number and the security code (CVC/CVV) for future transactions.
For both Tokenize and OneClick, on the next purchase, the customer will not need to re-enter saved information, resulting in a faster checkout. All data is securely stored and encrypted in compliance with industry standards. - Remember to Save changes.
Check Payment methods > Cards to learn more.
BLIK
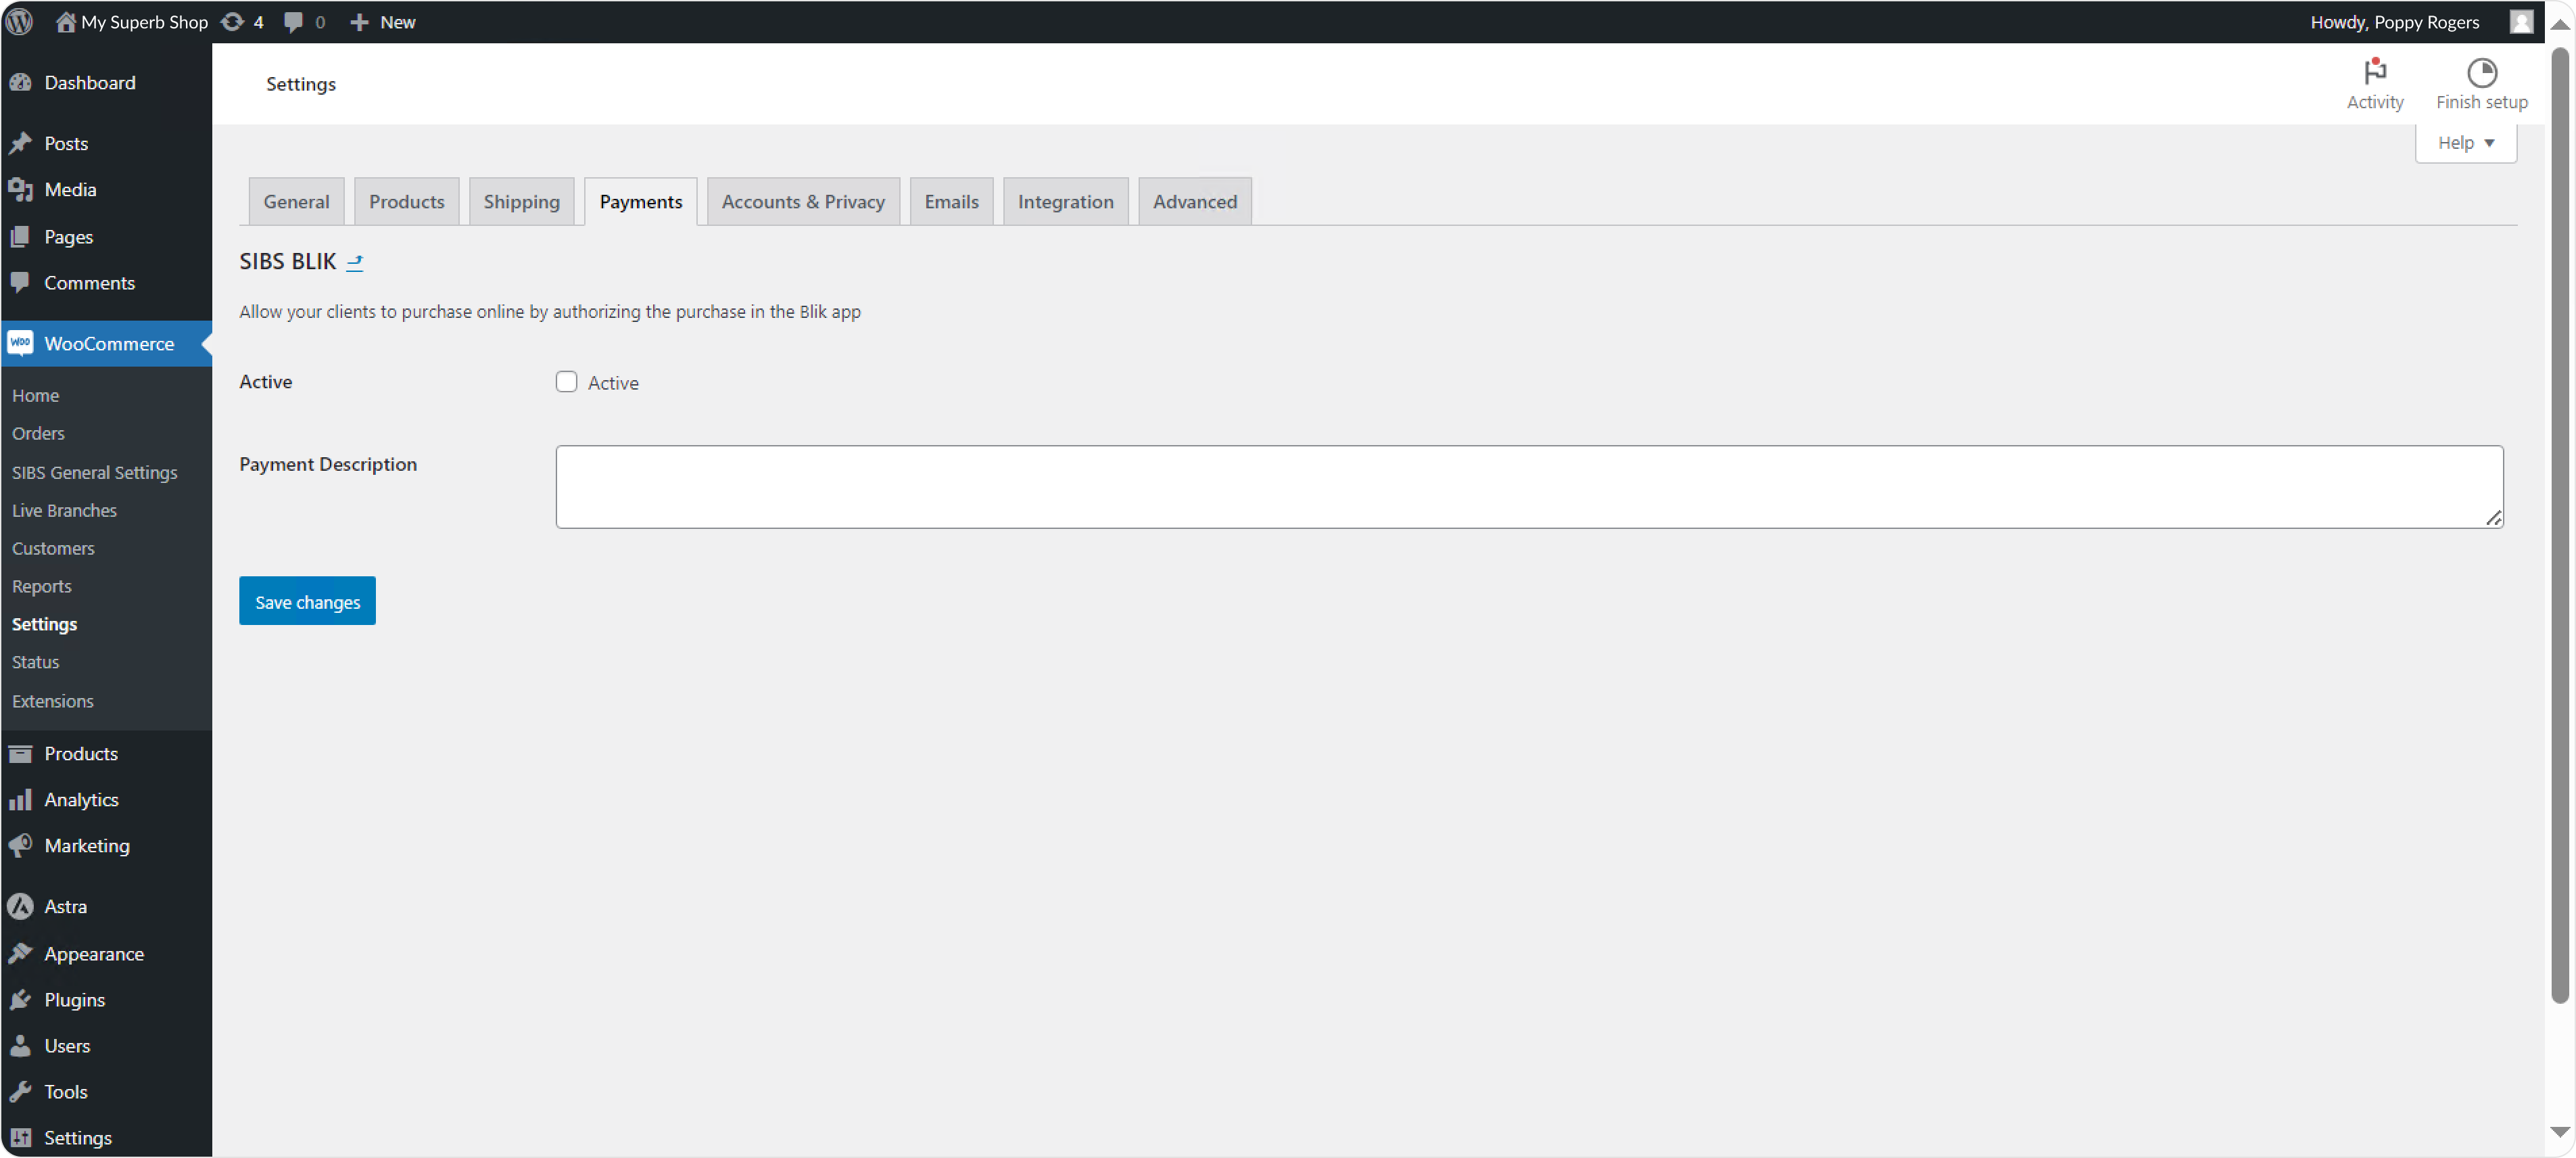
- Active – enable (activate) or disable (deactivate) a payment method using the ‘Active’ checkbox.
- Remember to Save changes.
Check Payment methods > BLIK to learn more.
Pay By Link
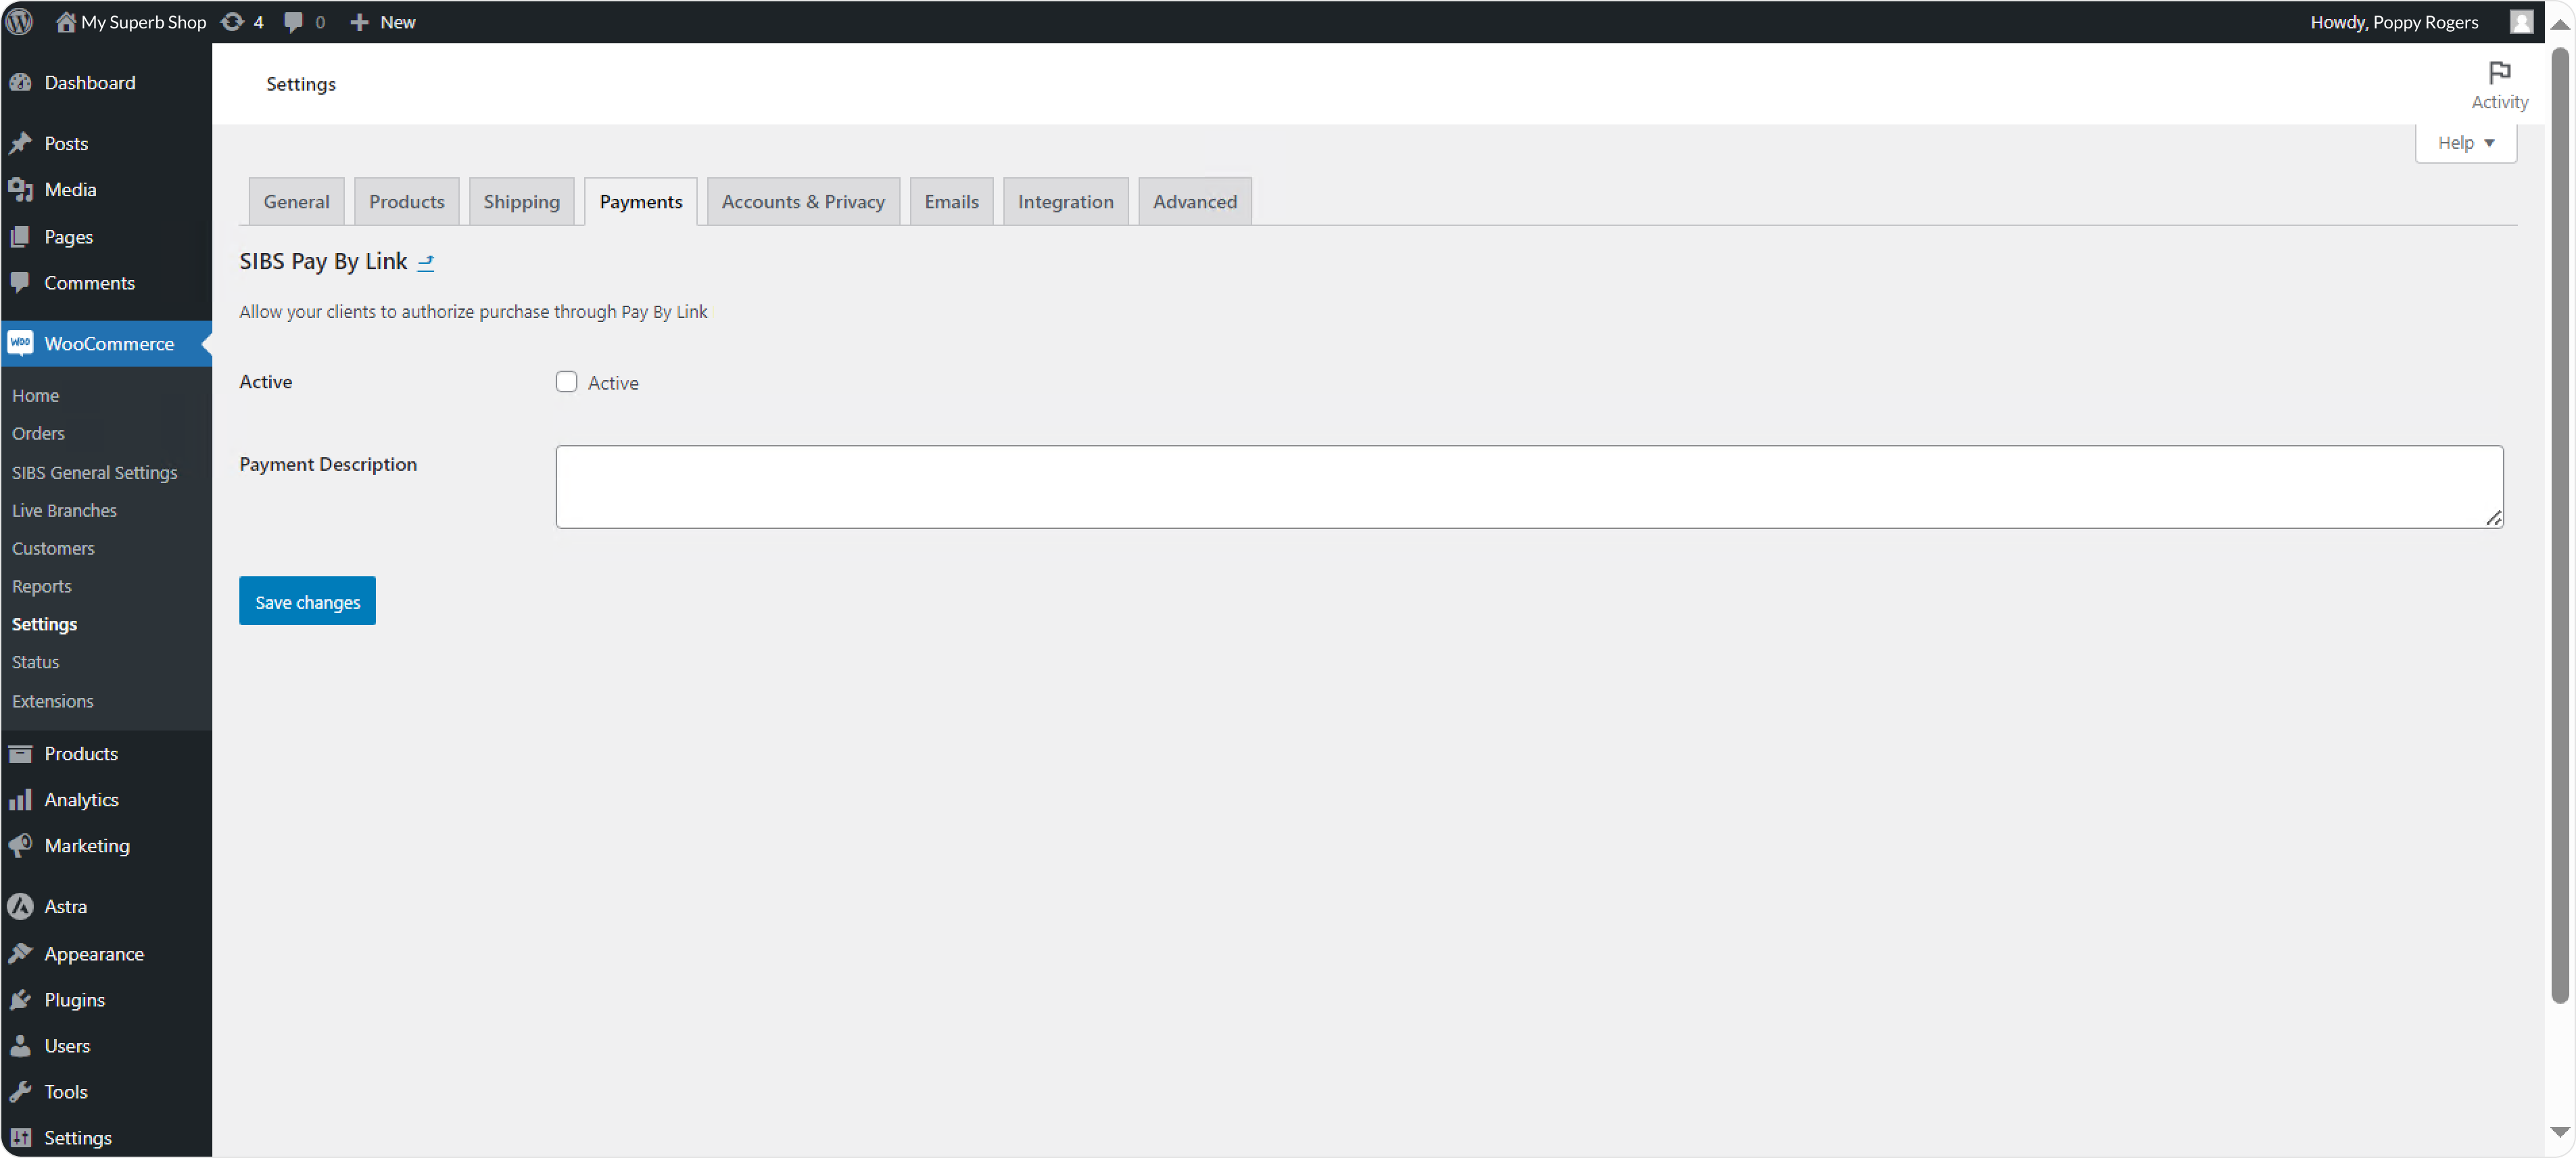
- Active – enable (activate) or disable (deactivate) a payment method using the ‘Active’ checkbox.
- Remember to Save changes.
Check Payment methods > PayByLink to learn more.
Apple Pay / Google Pay
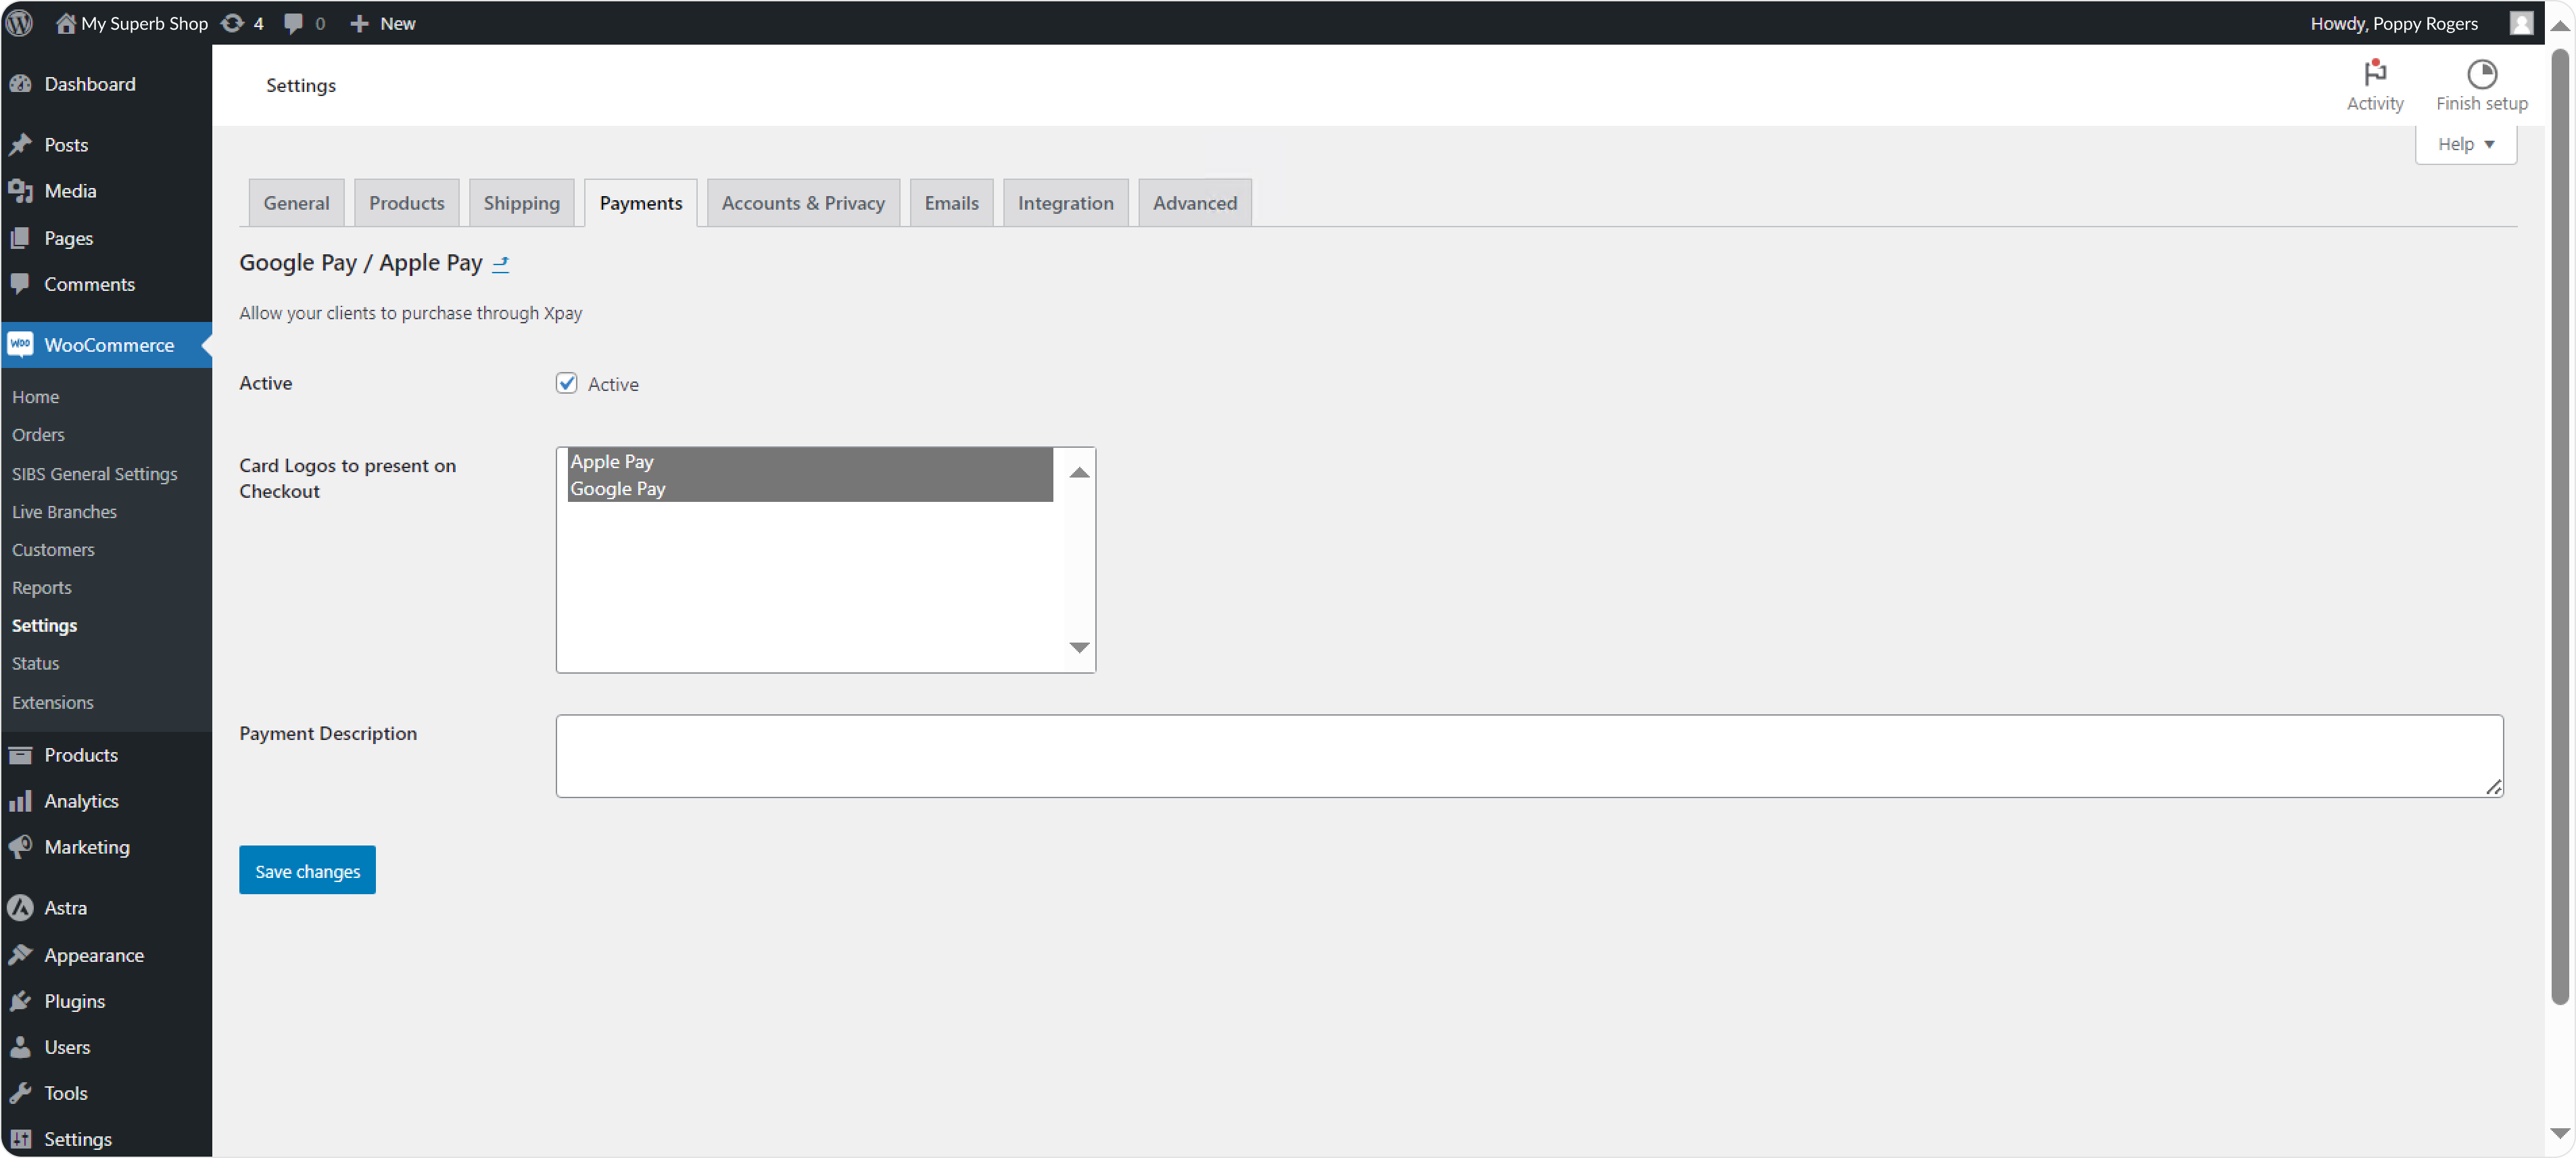
- Active – enable (activate) or disable (deactivate) a payment method using the ‘Active’ checkbox.
- Card Logos to present on Checkout – select which payment method you accept and want to display on the checkout page.
- Remember to Save changes.
Check Payment methods > Apple Pay and Google Pay to learn more.


