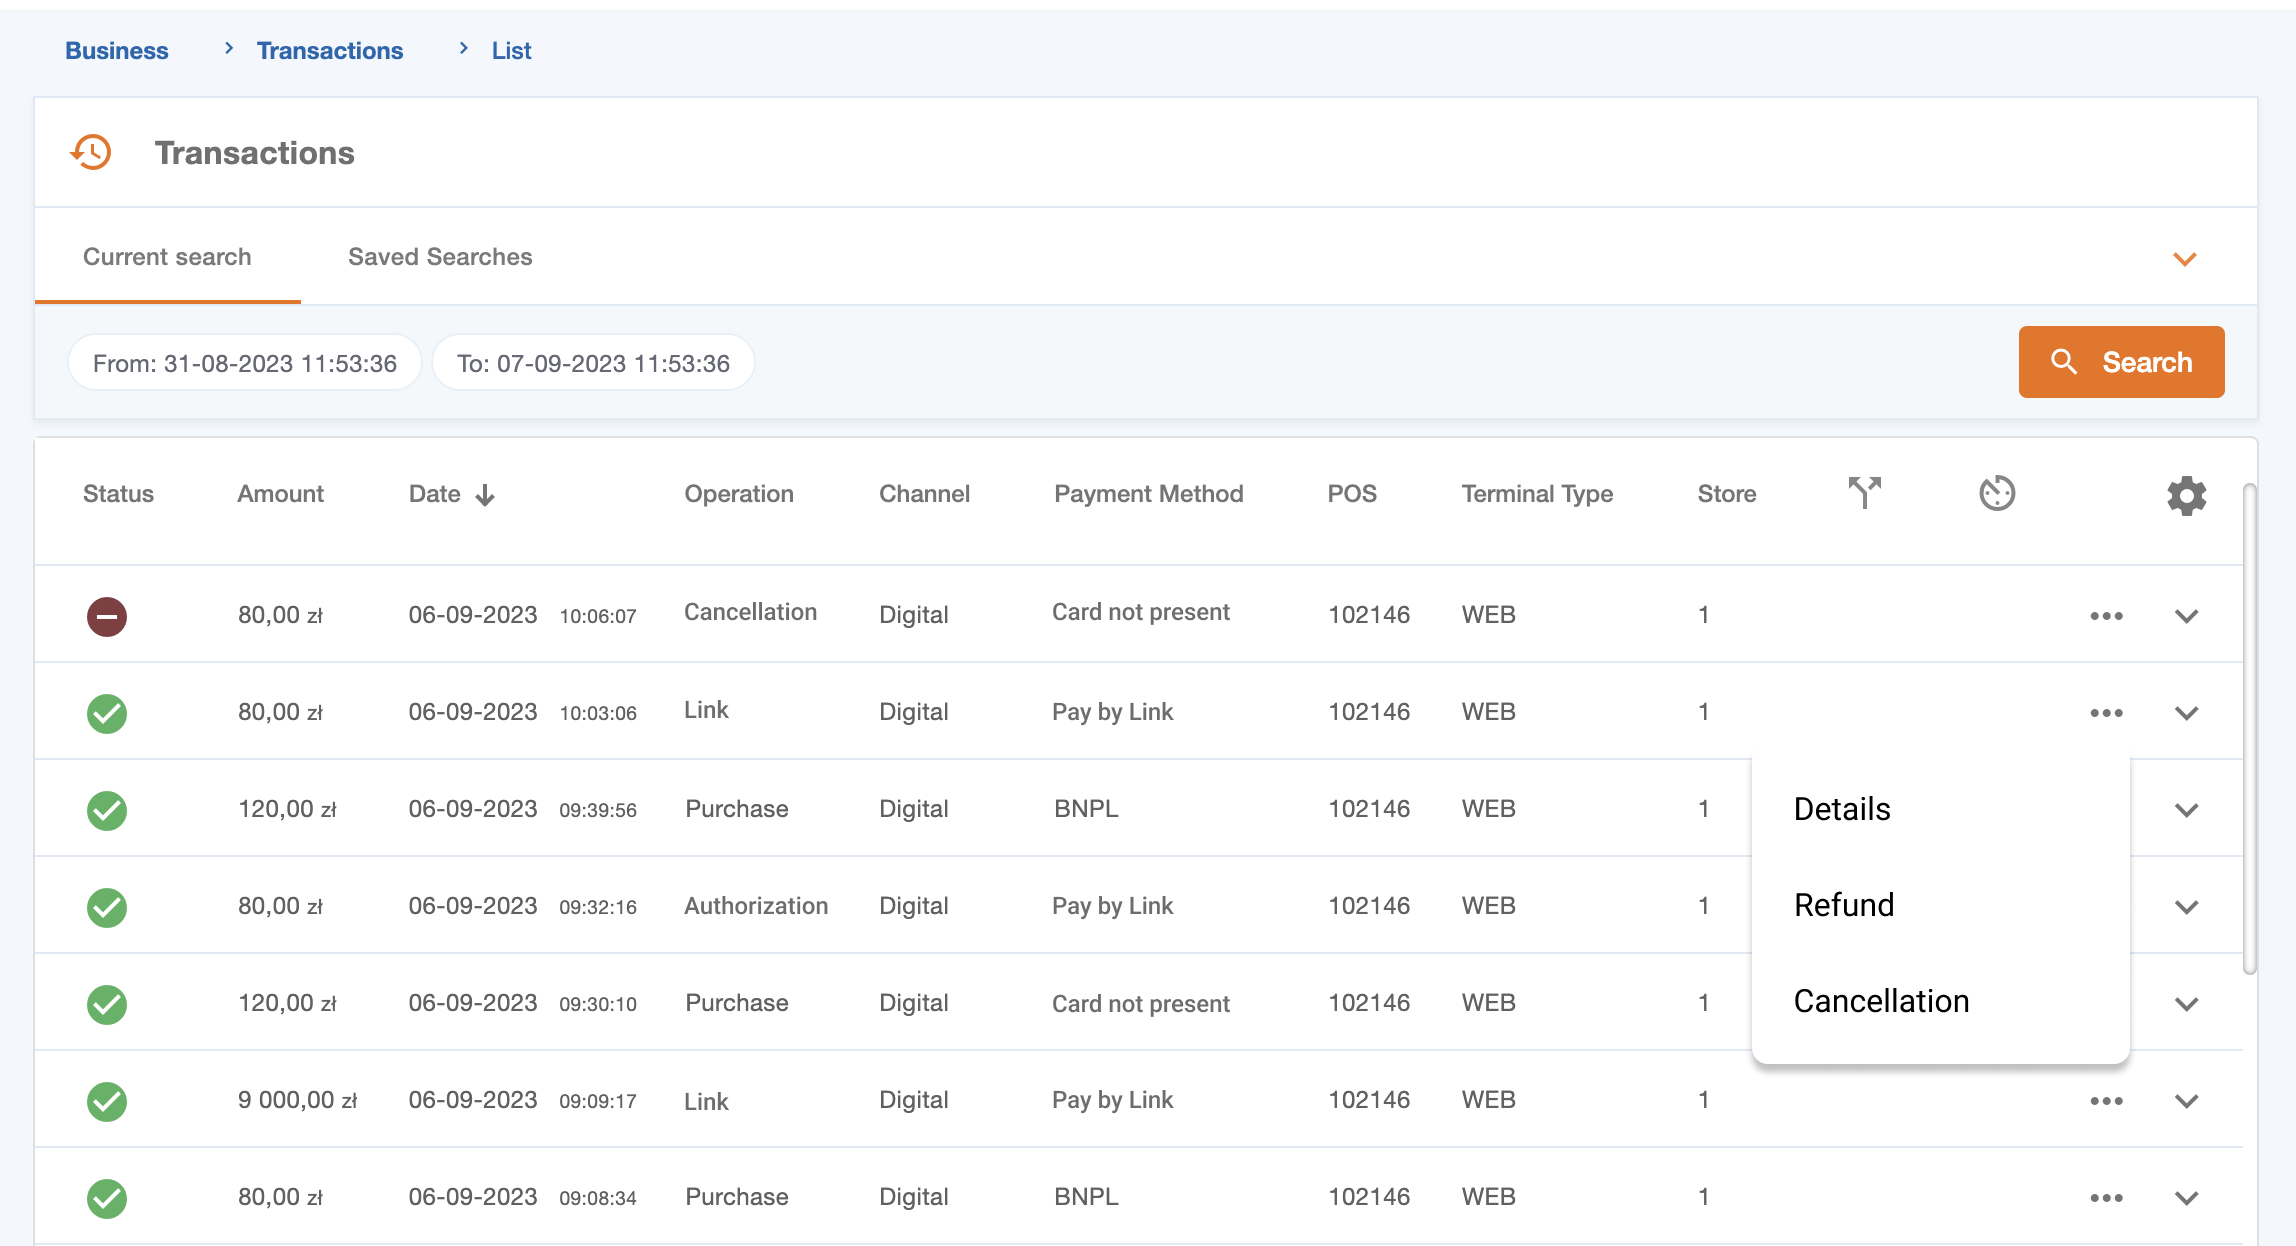
The Transactions Menu provides information about your business transactions. Here, you can also cancel an authorization, collect or refund a payment, or even generate a transaction receipt.
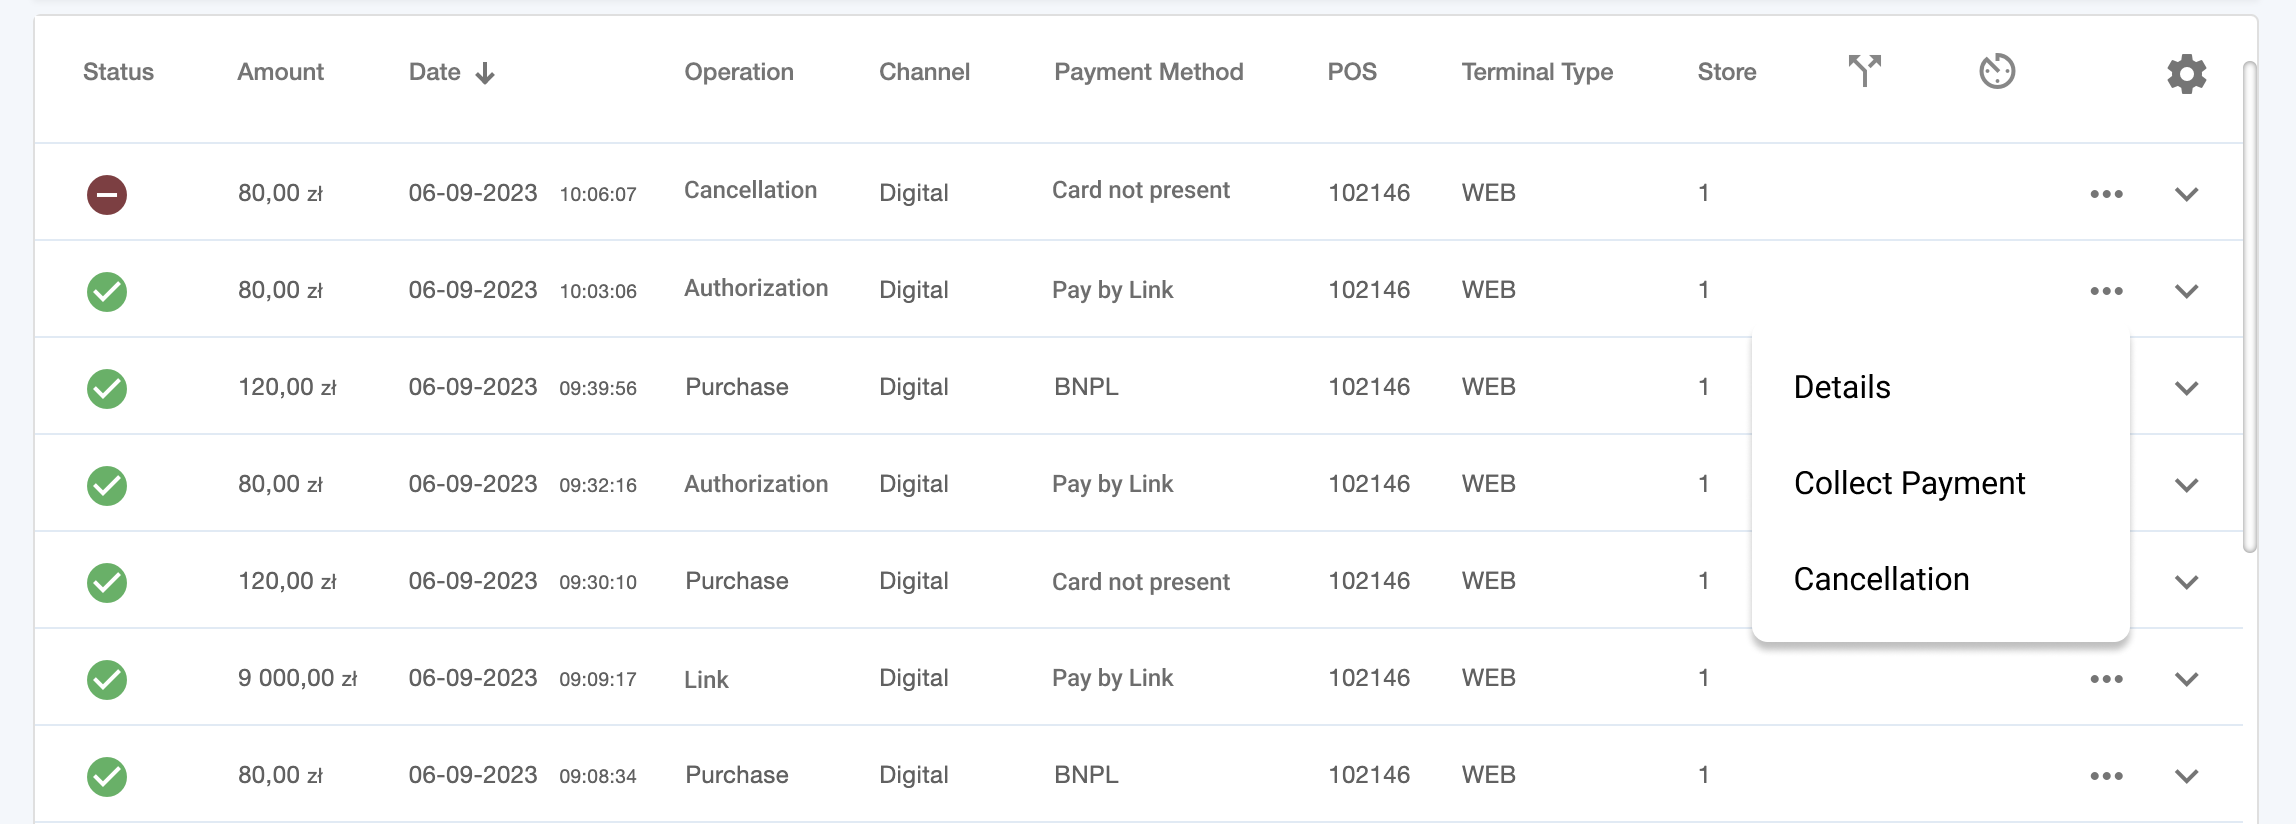
You can view all your recent payments and you can filter them. Information displayed for each payment includes transaction status, payment amount, date of the transaction, type of operation, the channel, payment method, the POS terminal and the store code.
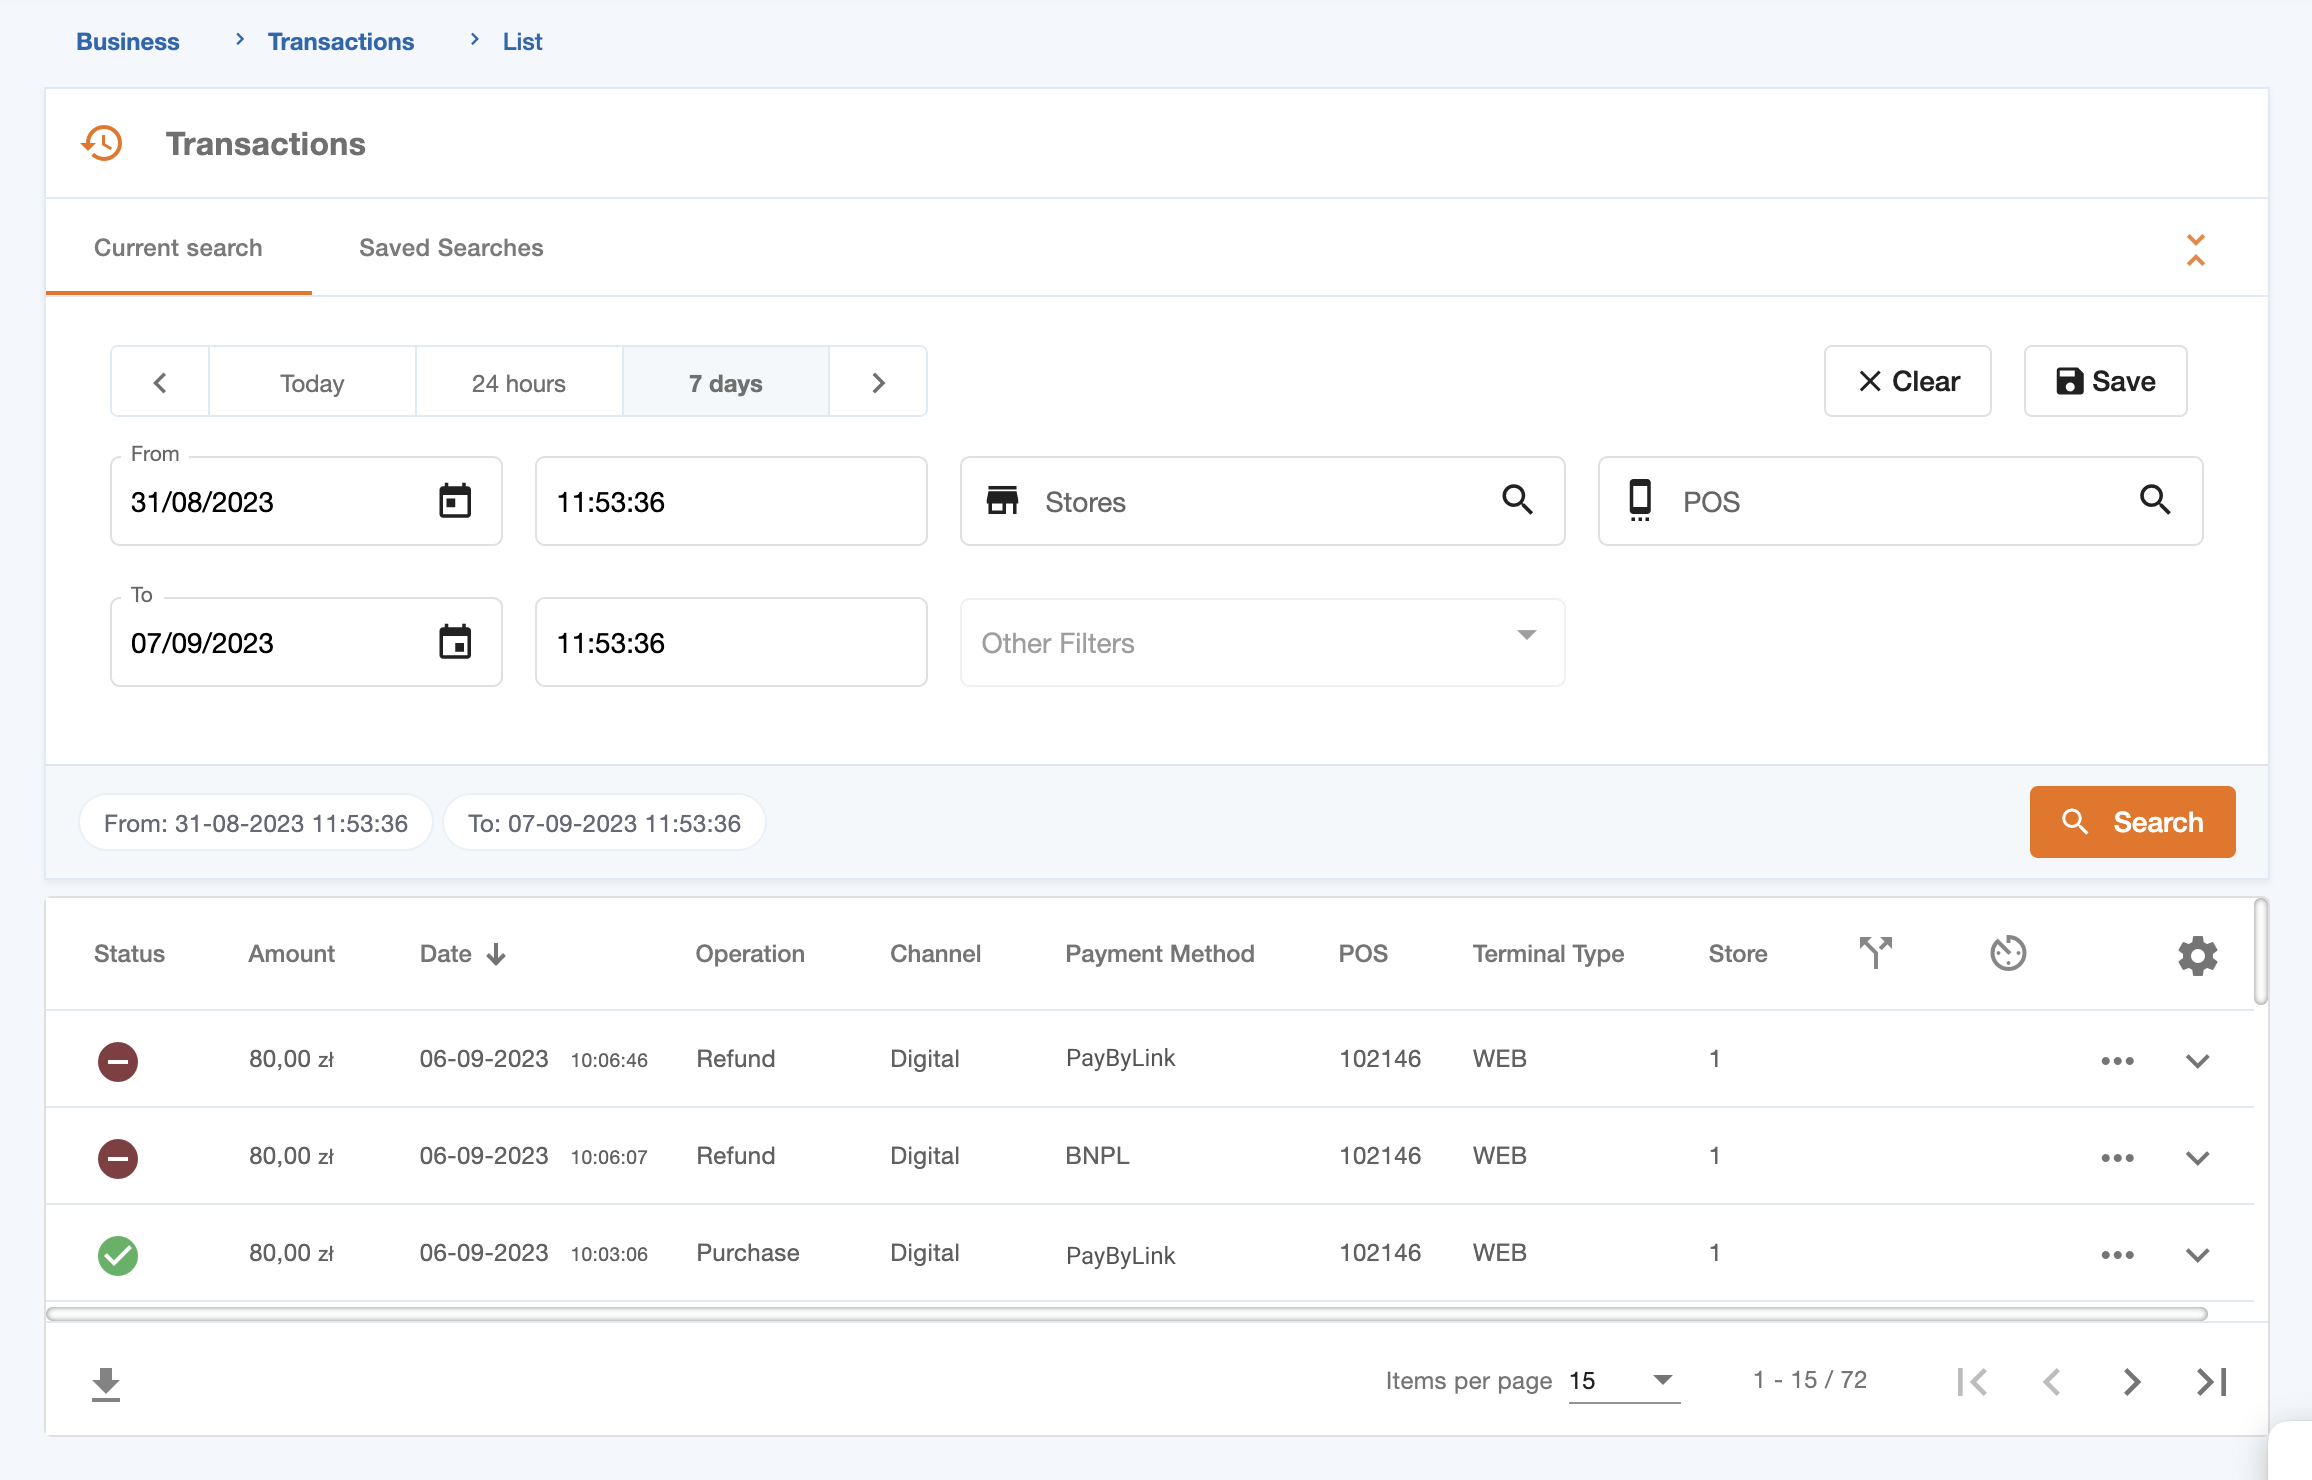
You can access more detailed information about each payment by pressing the “Details” button.
The table below details all the fields displayed. These fields can differ, depending on the type of transaction.
| Group | Field | Description |
|---|---|---|
| “Transaction” Group | Date | Timestamp of the operation/transaction. |
| Operation | Type of operation (Authorisation/Purchase/Refund/Reversal/Closure, etc.). | |
| Amount | Transaction amount. | |
| Currency Code | Transaction’s Currency code. Assumes the fixed value of ‘978 – Euro’. | |
| Status | Transaction status, which can be: “Completed”, “Declined” or “Cancelled”. | |
| Error Reason | Informs the error code. | |
| Error Description | Informs the error description. | |
| Authorisation ID / ARN | Identification of the authorisation at the payment system. | |
| Authorisation Key | Identification of the transaction at SIBS Backoffice. | |
| Original Authorisation Key | Secondary identification of the transaction at SIBS Backoffice. | |
| Original Authorisation Key (External) | Secondary identification of the transaction at SIBS Backoffice. | |
| Acquirer | Identification of the acquirer associated with the transaction. | |
| “Merchant” Group | Merchant | Merchant identification at SIBS Backoffice. |
| Store | Identification of the Merchant’s store, owner of the terminal where the transaction was carried out. | |
| “Terminal” Group | POS | Terminal ID. |
| POS brand code | Identifies the brand code of the terminal used for the transaction. | |
| Terminal Type | Identifies the type of terminal used for the transaction. | |
| “Acceptance” Group | Channel | Identifies the type of channel (Digital or Physical). |
| Acceptance network code | Identifies the code of acceptance in the network. | |
| Acceptance channel Type Code | Identifies the type of acceptance in the used channel. | |
| “Payment” Group | Payment Type | Identifies the type of the payment (Key enter, Others). |
| Scheme | Identifies the scheme of the payment. | |
| Payment Method | Identifies the method of the payment (Card, BLIK, PayByLink). | |
| “Card” Group | Card Data Entry Mode | Identifies the type of authentication (Chip, Contactless, etc.) of the operation, from the terminal perspective. |
| Presence | Identifies if it is card-present or card-not-present. | |
| Number | Identifies the number of the card (PAN). | |
| “Card Holder” Group | Authentication | Identifies if the transaction was made with or without Authentication. |
| Name | Identifies customer’s name. | |
| Customer e-mail | Identifies customer’s e-mail. | |
| “Split Payouts” Group | Split Payout ID | Settlement Point ID |
| Amount | Value defined to a specific Settlement Point ID |
Search and filter transactions
The filtering feature allows you to limit data according to predefined time intervals such as “Today,” “24 hours,” and “7 days.” The time interval filter updates as you progress through the transaction pages.
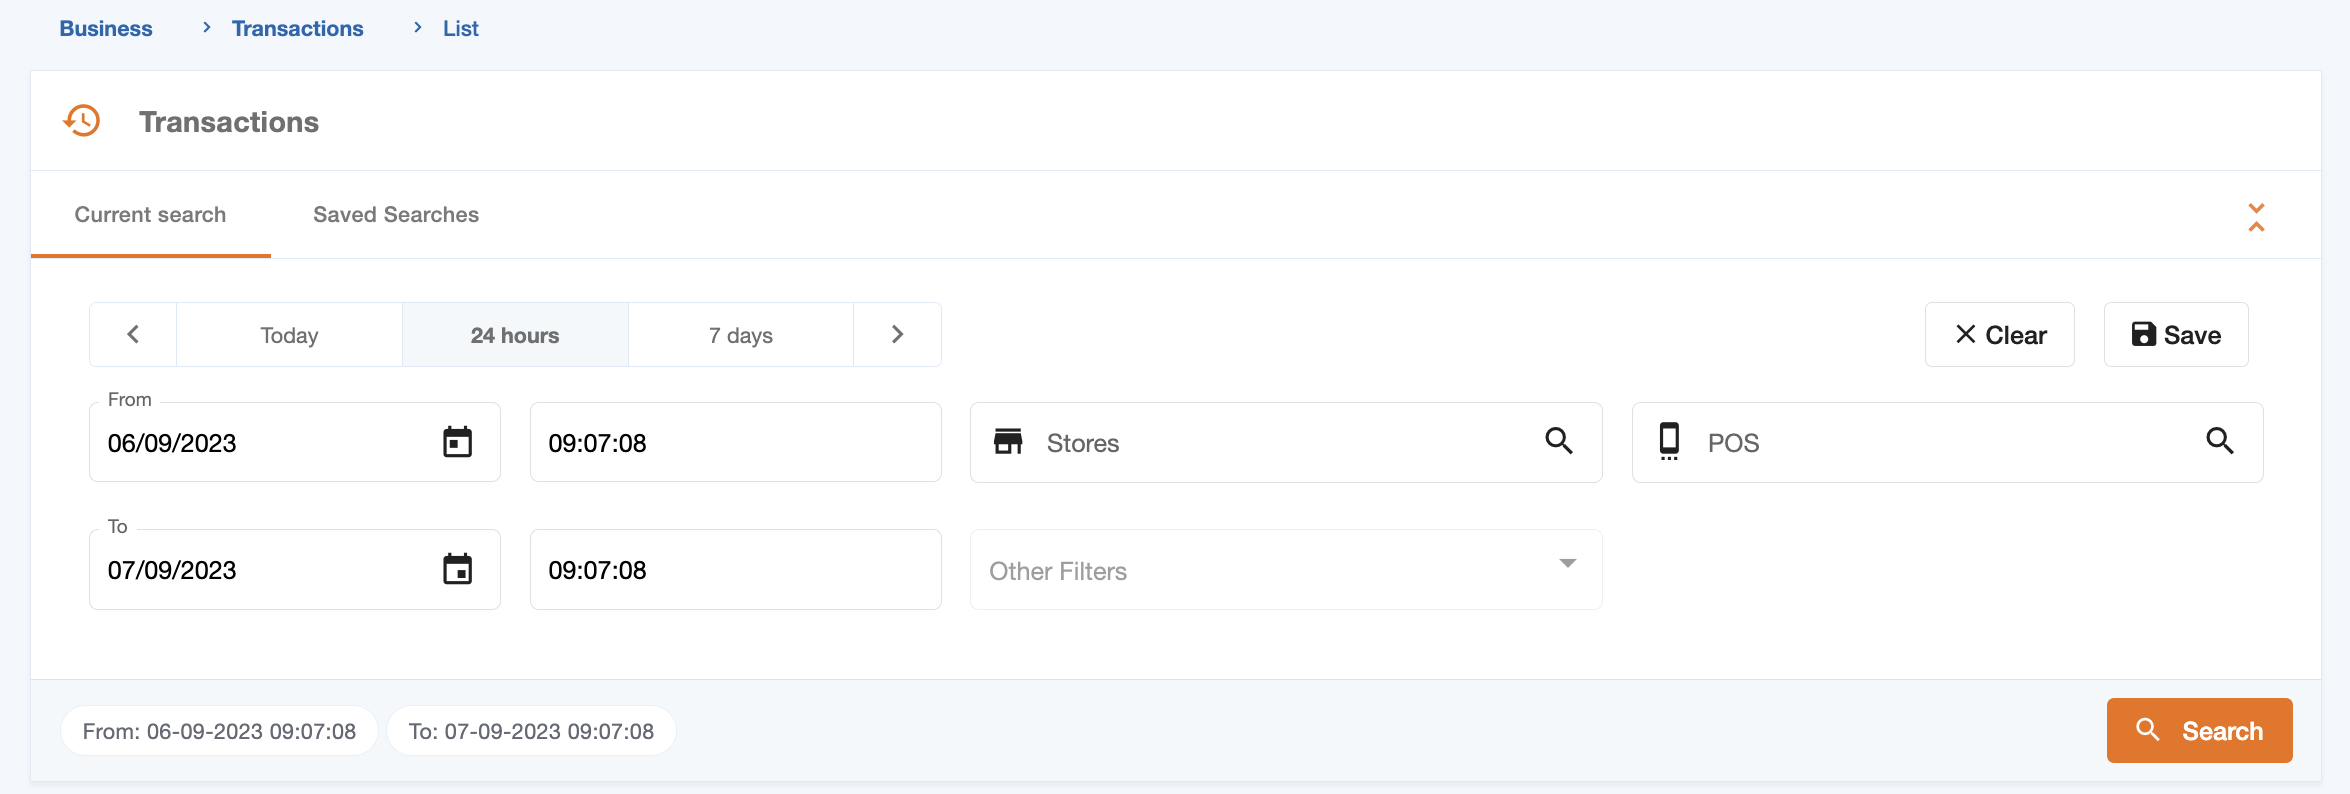
In the “Transactions” menu, you can filter transactions based on several criteria, as shown below:
“Store” filter
To use this filter, select a store so that the other search filters become available. If you want to clear a store from the filter, click the “x” on the right side of the parameter.
“POS” filter
The “POS” filter allows you to filter up to ten different POS terminals. To clear a POS from the filter, click the “x” on the right side of the parameter.
“Date” filter
The “Date” filter allows you to filter transactions by period of time. Click the date button to open the calendar and select the start and end dates or one of the default periods of time such as “Today,” “24 hours,” or “7 days.” For a “time” search, define the start and end times and click the “Search” button. Note that the slider window is limited to 7 days. The search returns all transactions and loads 100 items per page.
Add a filter to the search
You can choose one or more filters from the following options. When you select a filter, simply press the “+” button to add it to the search line, as shown in the table below.
| Field | Value |
|---|---|
| Acquirer | Choose an option |
| Authentication method | Choose an option |
| Authorisation ID/ARN | Editable |
| Card | Editable |
| Card Data Entry Mode | Choose an option |
| Channel | Choose an option |
| Channel Transaction ID | Editable |
| Customer E-mail | Editable |
| e-Commerce Authentication | Choose an option |
| Maximum amount | Editable |
| Merchant Operation ID | Editable |
| Minimum amount | Editable |
| Operation | Choose an option |
| Payment method | Choose an option |
| Payment type | Choose an option |
| Recurring | Choose an option |
| Scheme | Choose an option |
| Split Payouts | Choose an option |
| Split Shipment | Choose an option |
| Status | Choose an option |
| System | Choose an option |
| Terminal Period | Editable |
| Terminal type | Choose an option |
After selecting the desired search filters, click on the “Search” button to retrieve the corresponding data from the system. To remove or clear all applied filters, simply click on the “Clear” button. You can give a name to your search parameters for easy reference later.
Once saved, your search will appear under the “Saved Searches” tab and can be reused as needed.
Cancel a payment authorization
To cancel an authorization, click on the relevant transaction, open the menu, and select the “Cancellation” option. Then, on the screen that appears, press the “Perform cancellation” button to confirm the cancellation. If the operation is successful, a “Cancellation” operation will be generated.
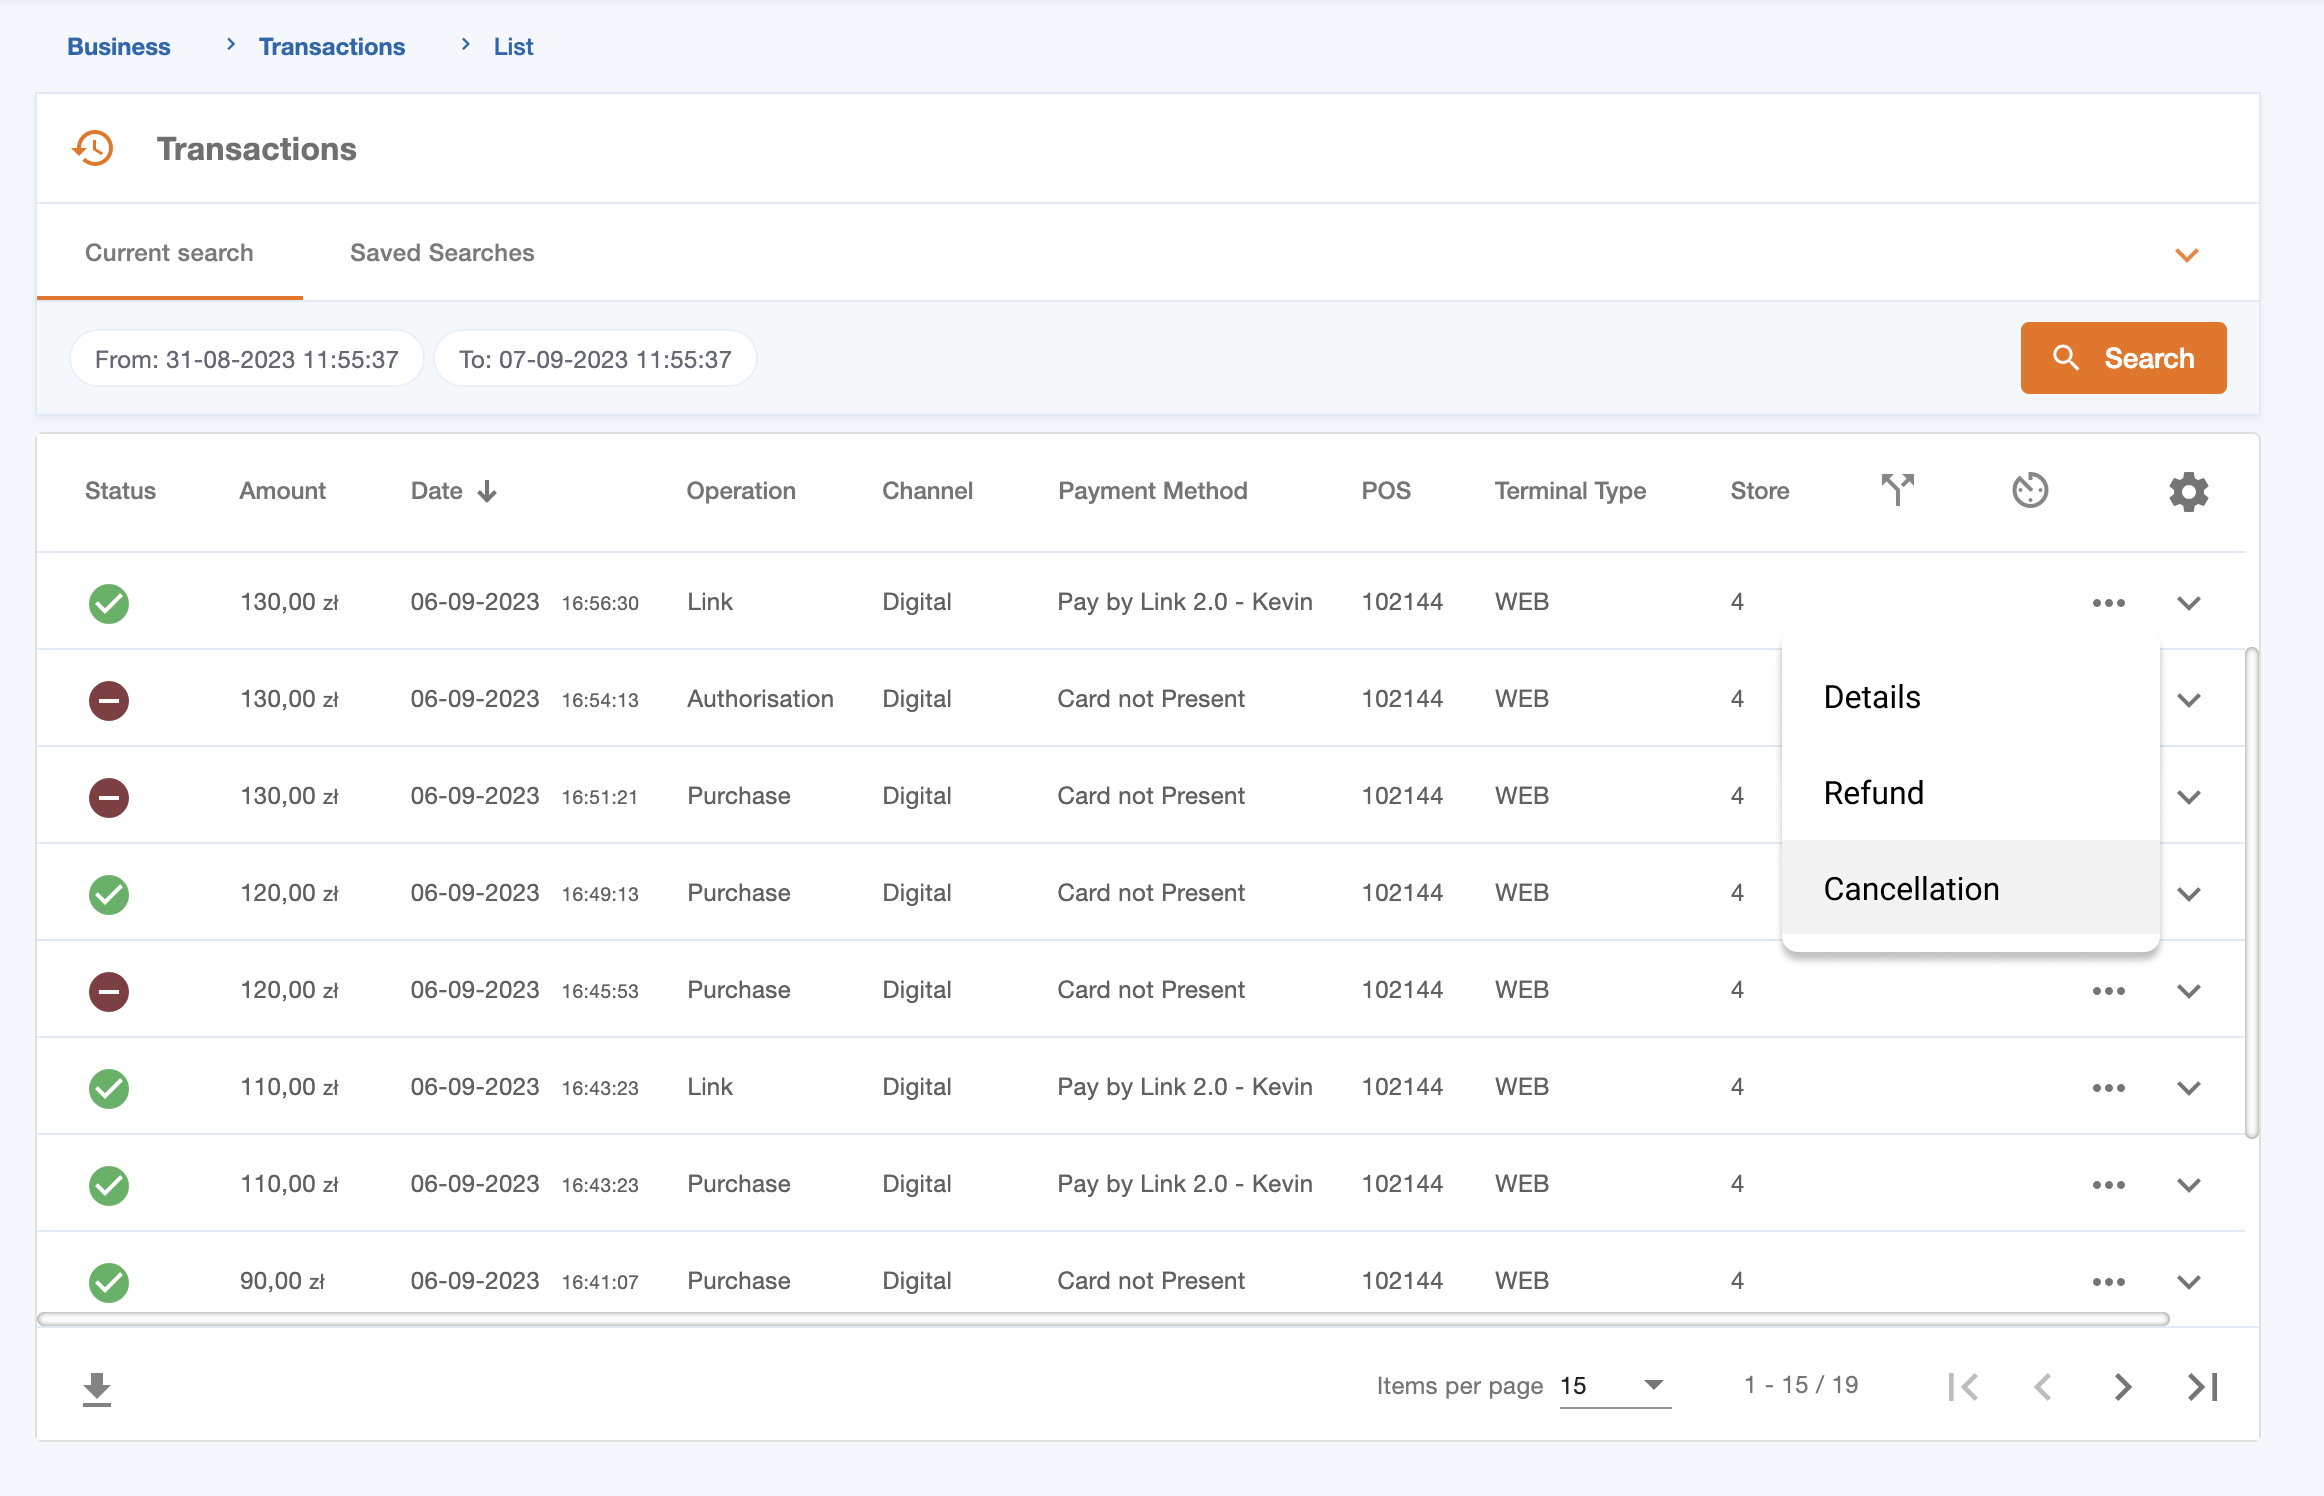
Keep in mind that only an authorization that has not been paid can be cancelled. You must inquire about the associated transactions to verify if the authorization has been paid.
Collect the payment
To confirm a Purchase Authorization and collect the payment, you must click on the transaction, open the menu, and select the “Collect Payment” option. Keep in mind that only authorizations that have not been cancelled can be paid, so you should check the associated transactions to verify if the authorization has been reversed.
You can pay either the full or partial amount, but if you choose to pay a partial amount, the remaining balance will be automatically cancelled.
Refund the payment
With this option, you can issue a refund of the purchase amount to the client. Before doing so, you should check the associated transactions to confirm that the amount to be refunded hasn’t already been refunded.
To initiate a refund, click on the relevant transaction and select the “Return” option from the menu. Enter the amount to be refunded, either the total or a partial amount, and then click the “Refund” button to complete the process.
